Creating a project
After downloading the installer and installing VSoft archITekt Launcher, you can create a new project.
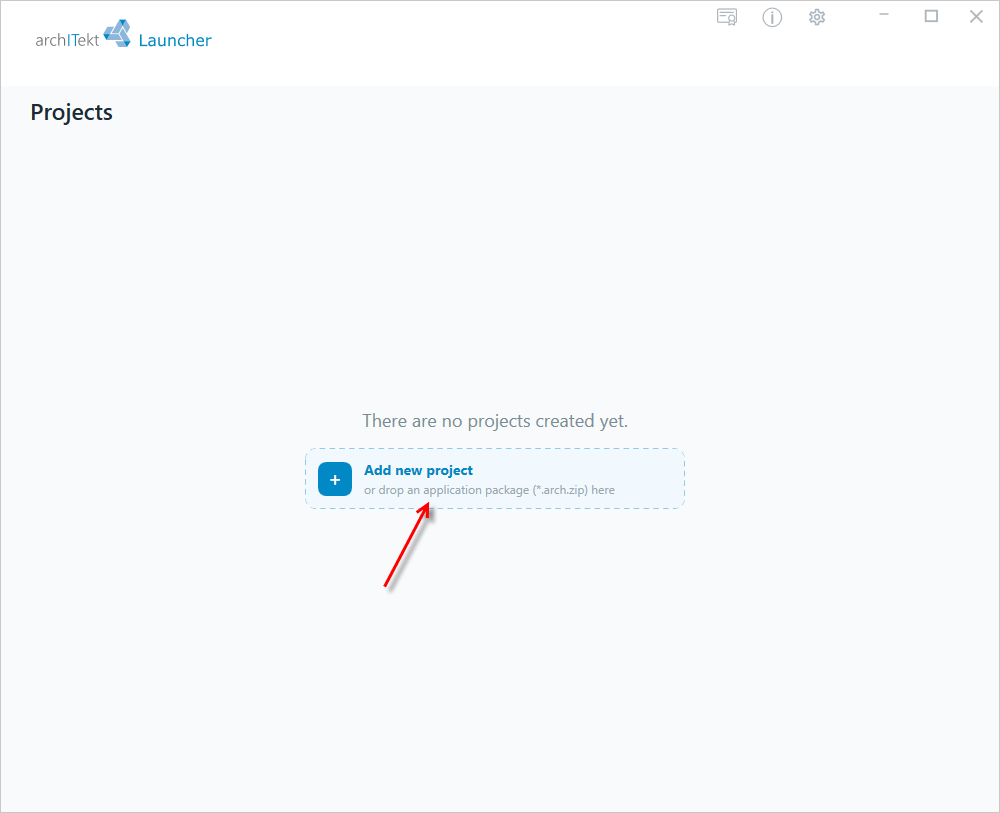
- If you do not have any projects yet, then select the Add new project option.
- In the next window, select Empty project.
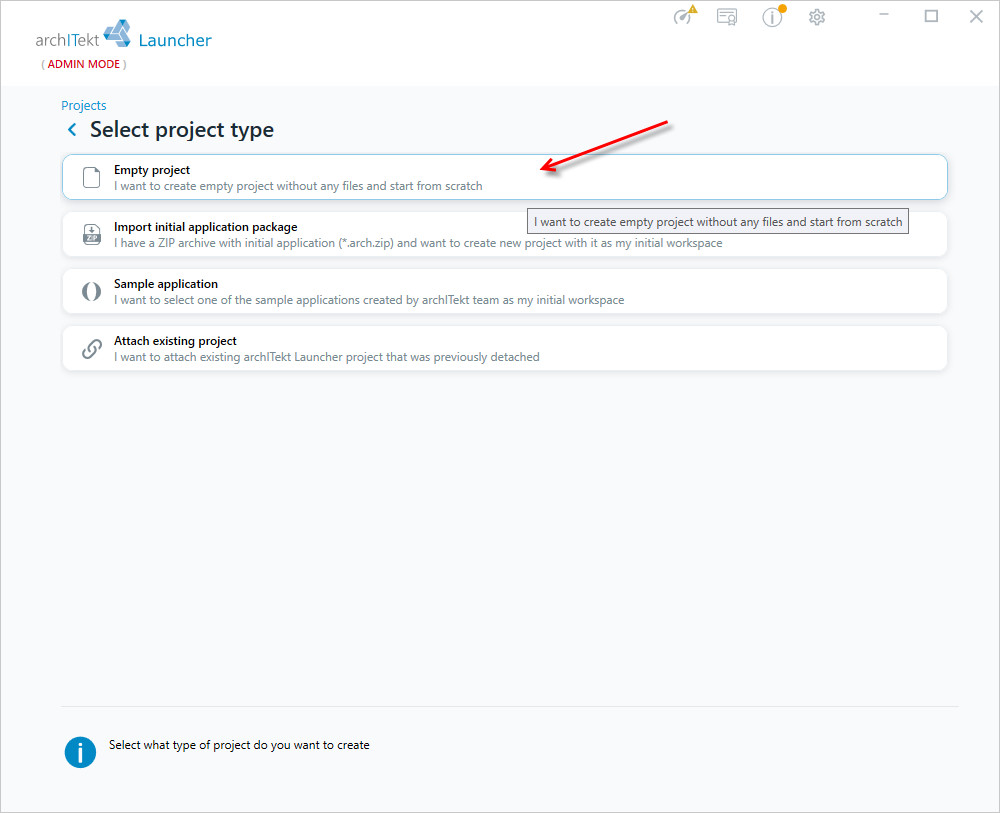
In this window, you can also:
- create a project based on the initial package,
- attach a project that was previously detached from VSoft archITekt Launcher,
- create a project using one of the available sample applications as a starter package.
Defining project parameters
When creating a new project, specify its most important parameters, which are grouped into the following sections:
Project details
- Name - the name of the project that will be displayed in archITekt Studio and in the web application.
- Technical name - the unique technical name of the project. This name will be displayed in the project list in VSoft archITekt Launcher. All technical elements of the created project (database names, service names, etc.) will be prefixed with this name. It is suggested automatically based on the project name and is automatically converted so that it contains no characters other than Latin letters, digits and underscores. If you want to change the technical name, select the edit option.
- Project folder - the path to the folder where the project files will be placed. Unless you indicate a different location on disk, the project files will be saved in the default location
C:\Users\[first.last]\VSoft archITekt\Projects
If you point to a folder that already contains another project, the following message will be displayed below the field: "Selected folder already contains another project. Mark 'Overwrite existing project' to overwrite it". This message means that the selected location is not empty and contains files belonging to another project. To continue, select the Overwrite existing project option in the Advanced section, which will overwrite the existing project, or choose a different folder.
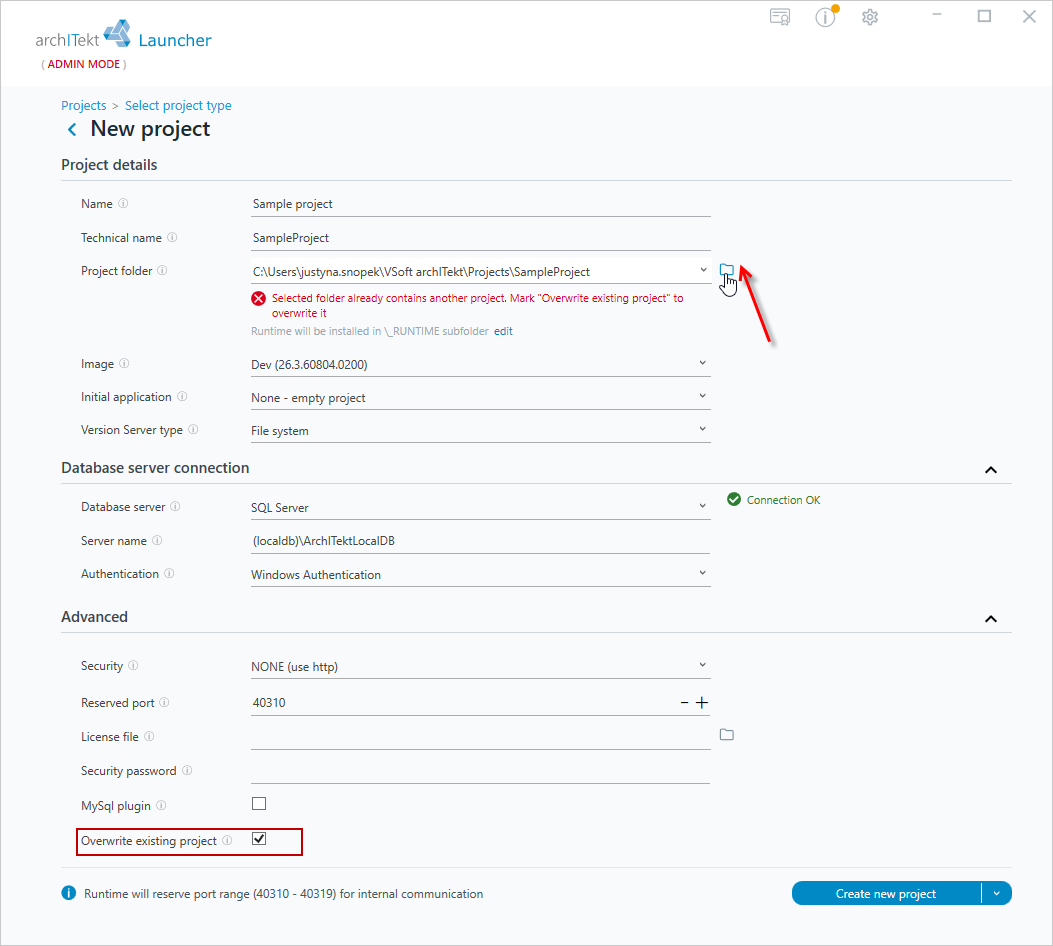
- Runtime folder - available after selecting the edit link next to the default location. It lets you specify the folder in which the project's runtime environment files will be created. If edit is not selected, the field for specifying a new location will not be available, and the files will be created in the default location.
- Image - if several VSoft archITekt images corresponding to different platform versions are installed, select one of them.
- Initial application - here, choose whether you want to create an empty project (None - empty project), a project based on an initial package (Import initial application from local *.arch.zip package), or a project based on one of the sample applications (Select one of sample applications). To import the package correctly, make sure it contains not only the project but also the other installation files needed to set up a new environment. For more information about export types and how to export a package, see: Exporting a package. For more information about creating a project based on an initial package, see: Creating a project based on an initial package. For information about creating a project based on sample applications, see: Sample applications.
- Version server type - select the type of version server. If you select FileSystem, a project with a file-based version server will be created; if you select System.DataSqlClient, the version server will be database-based. For more information about the file and database version server, see: File and database version server.
Database server connection
- Database server - selection of the engine on which the application should set up its databases.
- Server name - the name of the computer and the SQL server instance. For a PostgreSQL database, enter the computer name and port number in the format:
{computer_name}:Port={port_number} - Authentication - select the user authentication method.
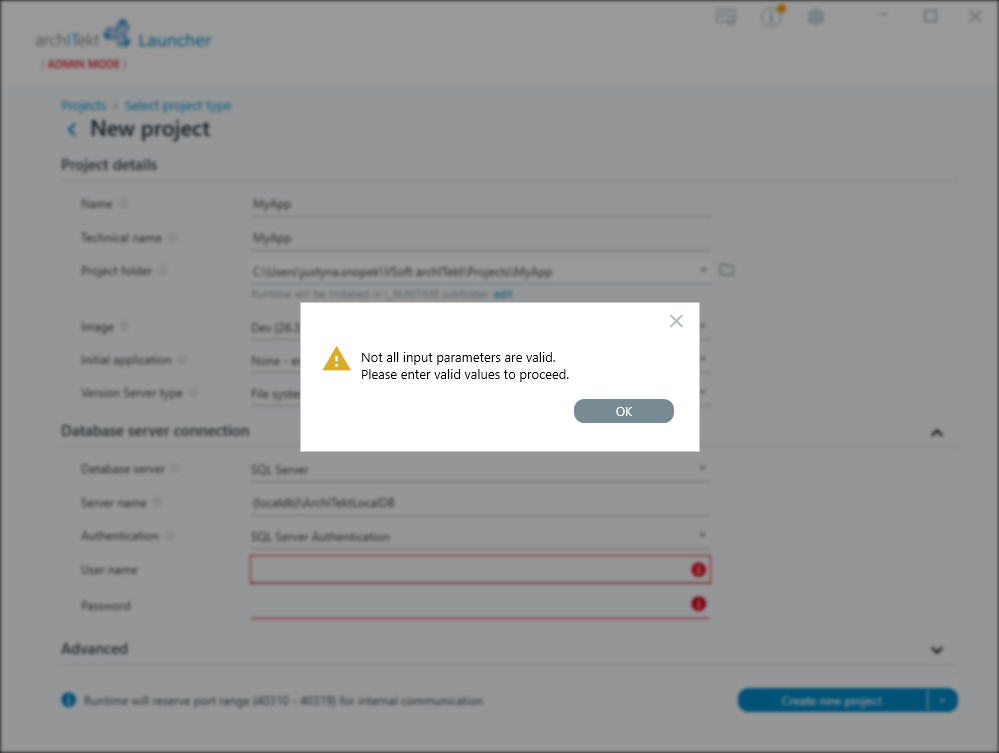
- User name and Password - you can specify these if SQL Server Authentication has been selected as the authentication method.
Advanced
- Security - choose the option without HTTP protocol protection, or the option with SSL encryption, which results in the HTTPS protocol.
- Reserved port - specifies the first port in the range of ports used by the runtime environment. The runtime uses a total of 9 consecutive ports, starting from the specified number.
- License file - lets you specify a
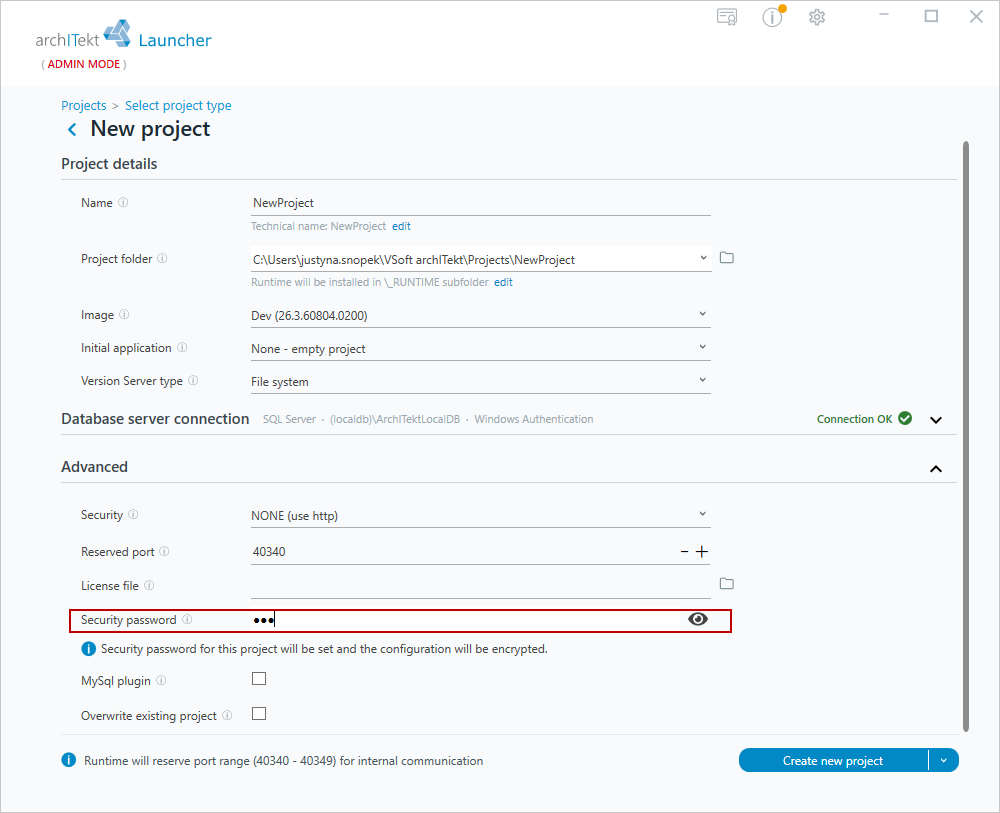
*.xmllicense file. This option is useful when you want to use a license other than the one assigned to the Launcher application by default. - Security password - a password used to encrypt sensitive configuration entries stored in the project files. Once the environment is encrypted, the password will be required to make changes to the project configuration. Leaving the field empty means the configuration will not be encrypted. If the configuration has already been encrypted, removing the password from this field will remove the current password and decrypt the configuration. To change an existing password, enter a new password in this field.
Losing the password may make it impossible to modify the encrypted configuration, so it is recommended to store it securely. For more information, see: Configuration encryption.
- MySql Plugin - select this option if you want to enable a connection to a MySql database.
- Override existing project - select this option if you want to replace an existing project when there are SQL tables or project files with the same name.
After defining the project data, select Create new project.
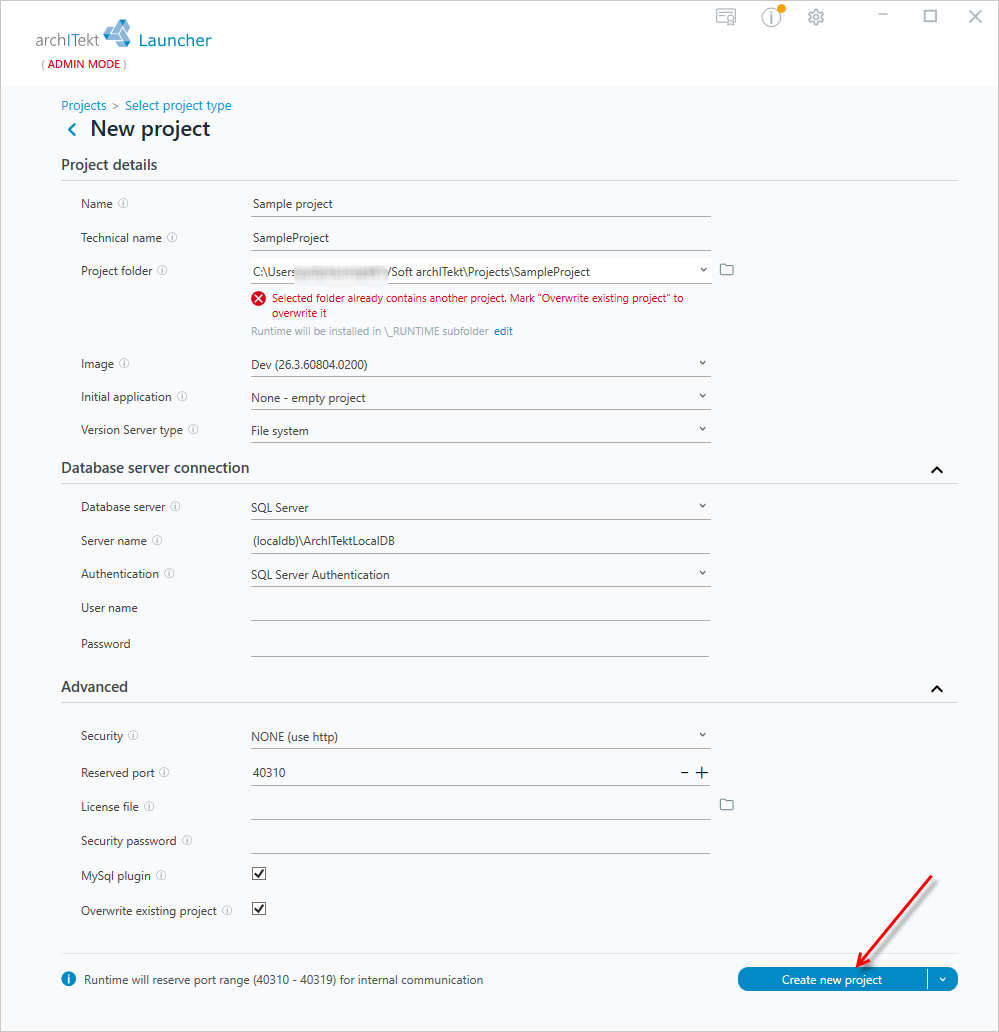
The Verify input parameters option lets you check that the entered parameters - the SQL server name, login and password - are correct. This functionality does not create a new project.
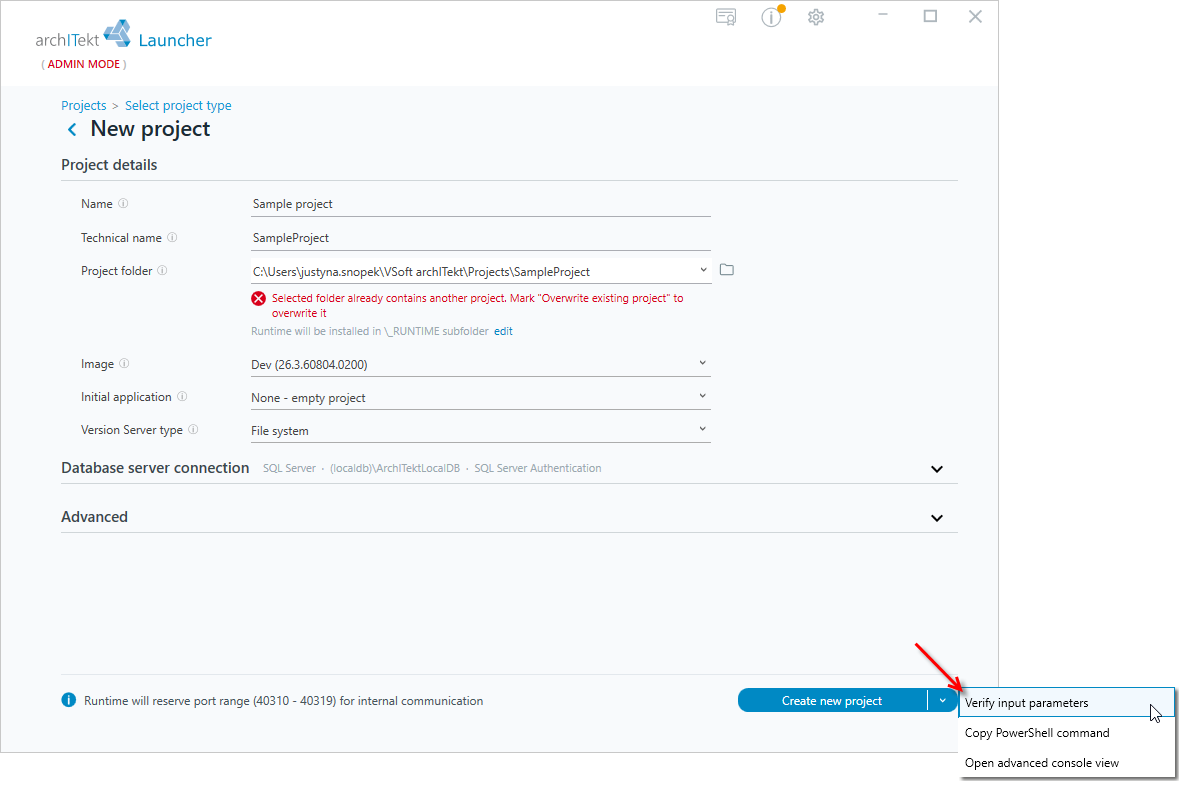
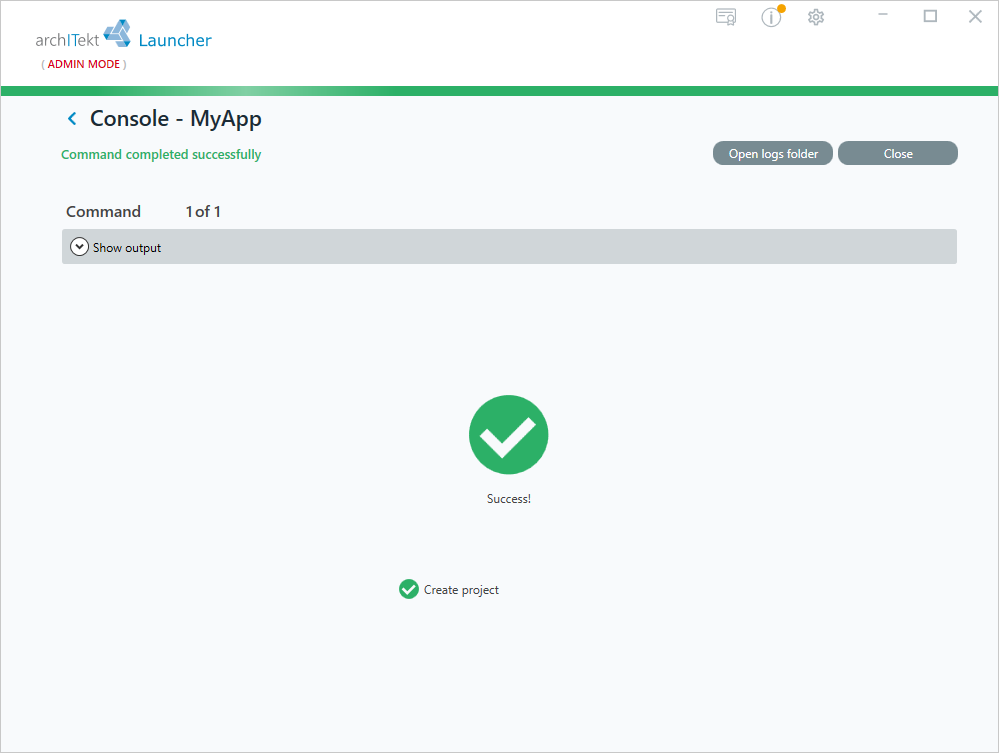
The verification is only performed once all the required data has been filled in correctly. If any required information is missing, the verification process will not run.
Composing a project by VSoft archITekt Launcher
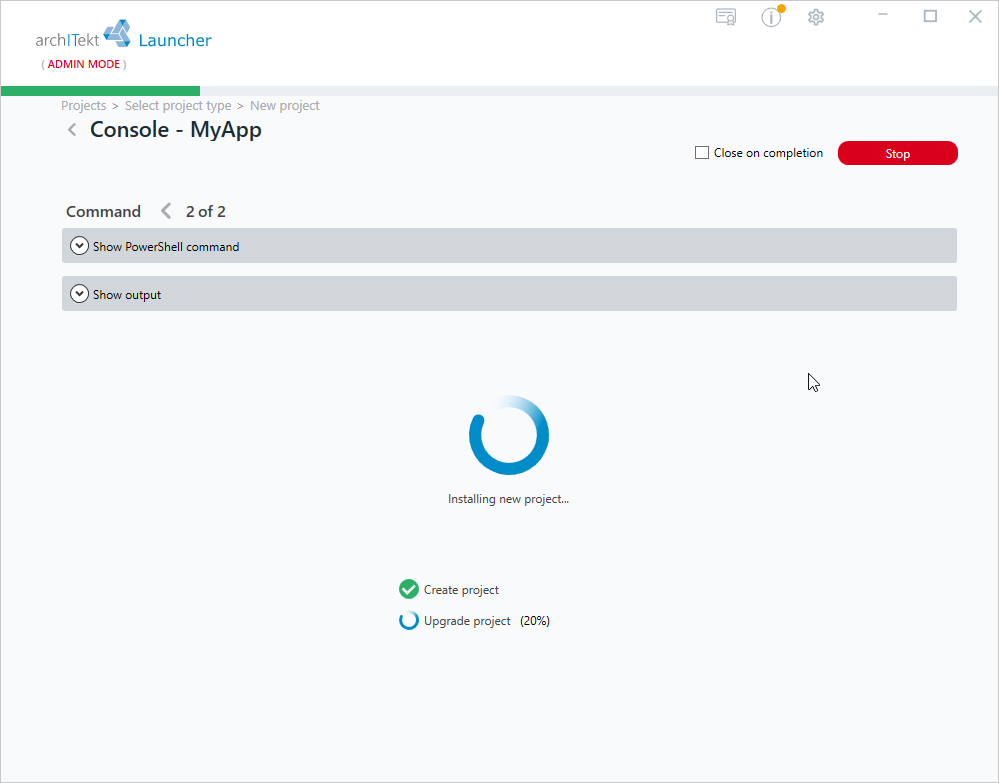
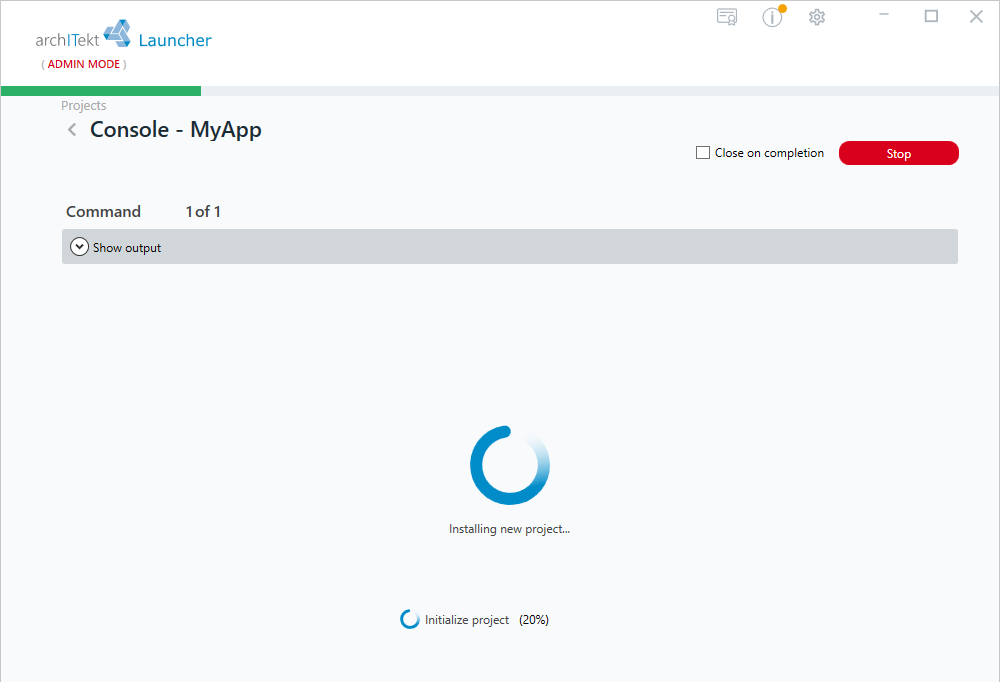
Once the user has defined the project parameters, in the next step VSoft archITekt Launcher creates the project according to the specified data.
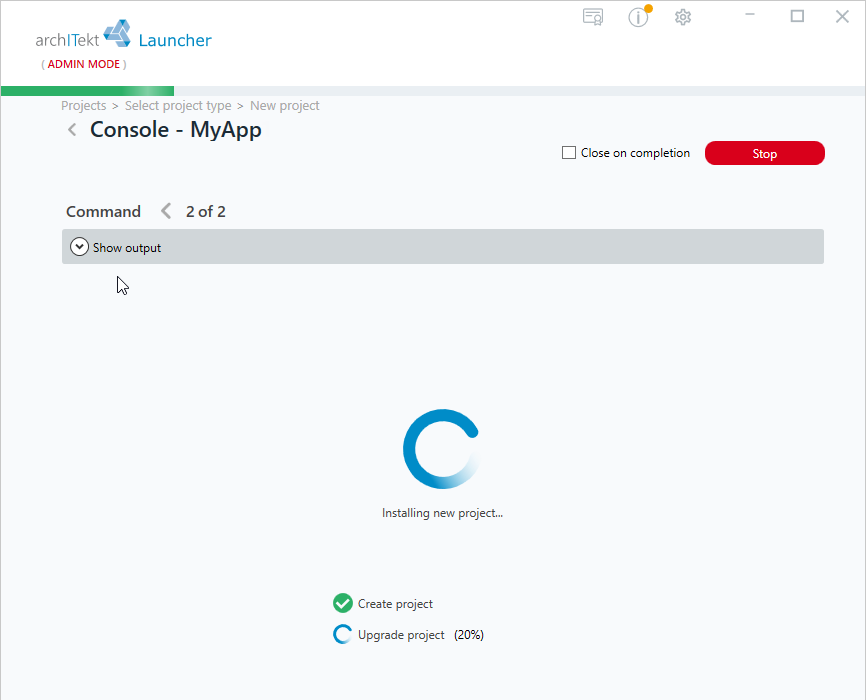
- A console window is available, which you can collapse or expand, containing detailed information about the operations being performed. If several operations are being performed, the process is split up and you can view the details of each individual operation.
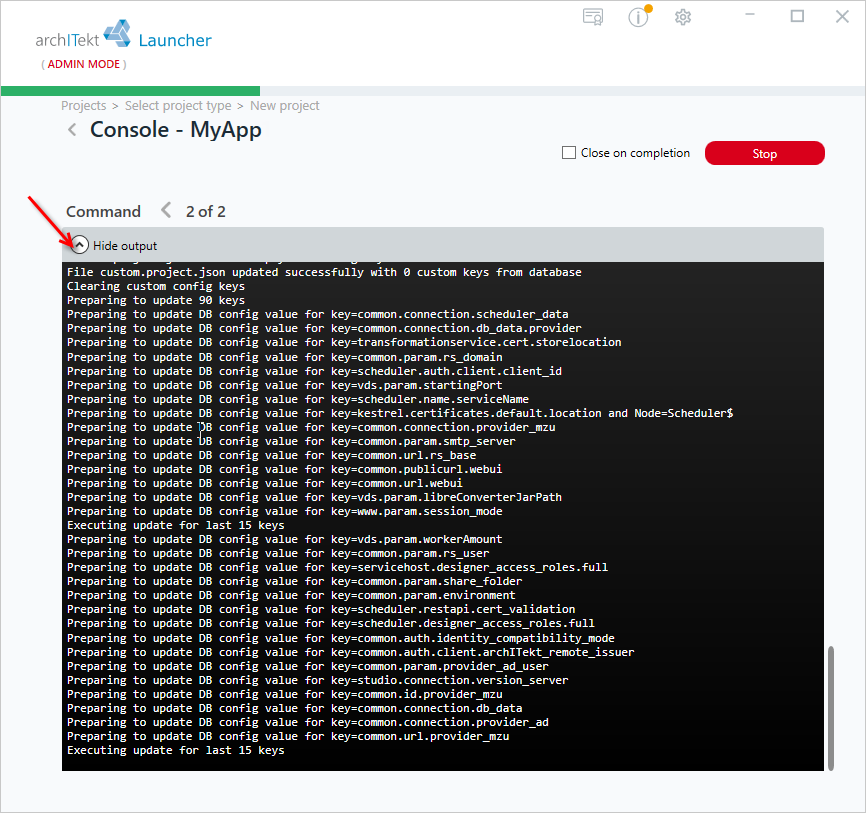
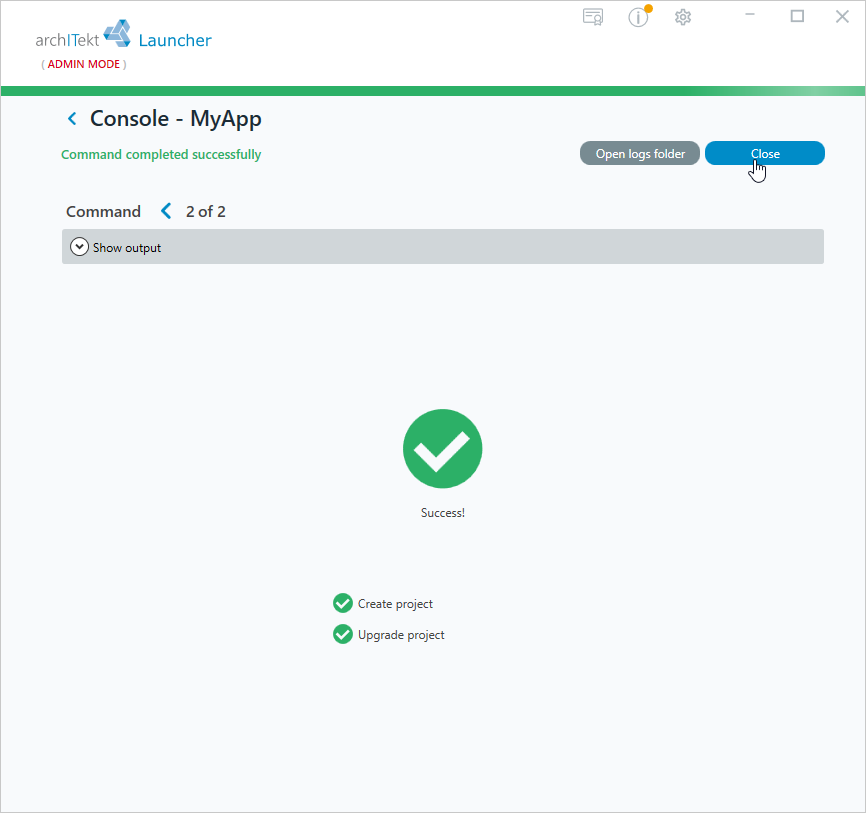
- If the project initialization completes successfully, a message will be displayed and you can close the window (Close).
All deployment operations related to creating/modifying a project built on the VSoft archITekt platform are performed using PowerShell scripts, whose syntax is similar regardless of whether it is a development or production environment. The console provides a more convenient way to run these scripts.
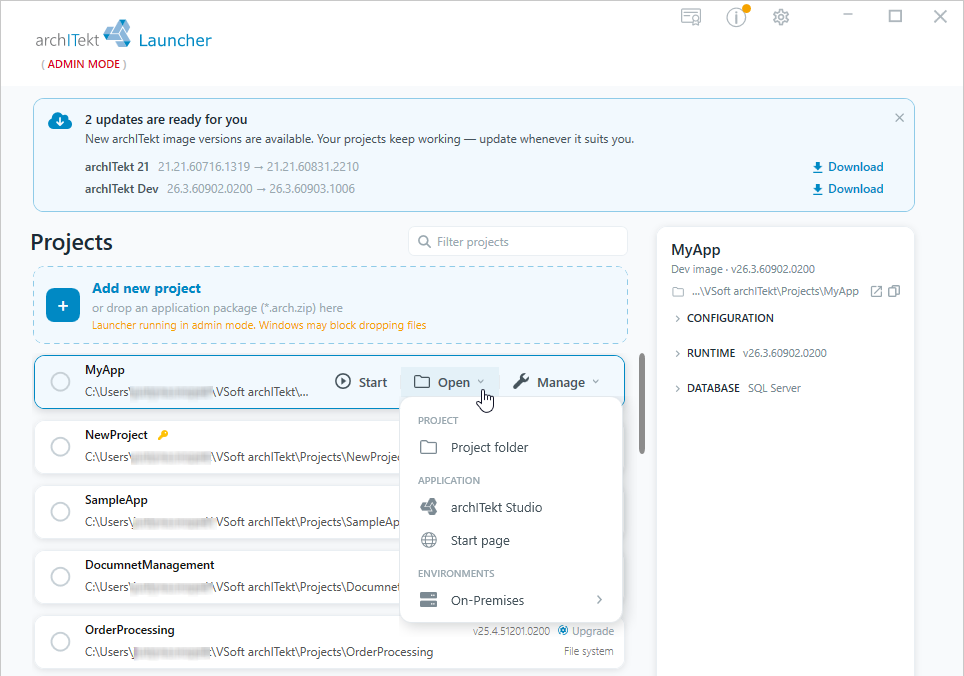
- Now you can go to component management, start all services, or open archITekt Studio and the project's start page. These options are available by hovering over the selected project in the list and then choosing the appropriate action.
Advanced view of the console
In many places in VSoft archITekt Launcher, such as when creating a new project, reconfiguring, or updating an image, you can expand an option and select the advanced view for the action being performed: Open advanced view.
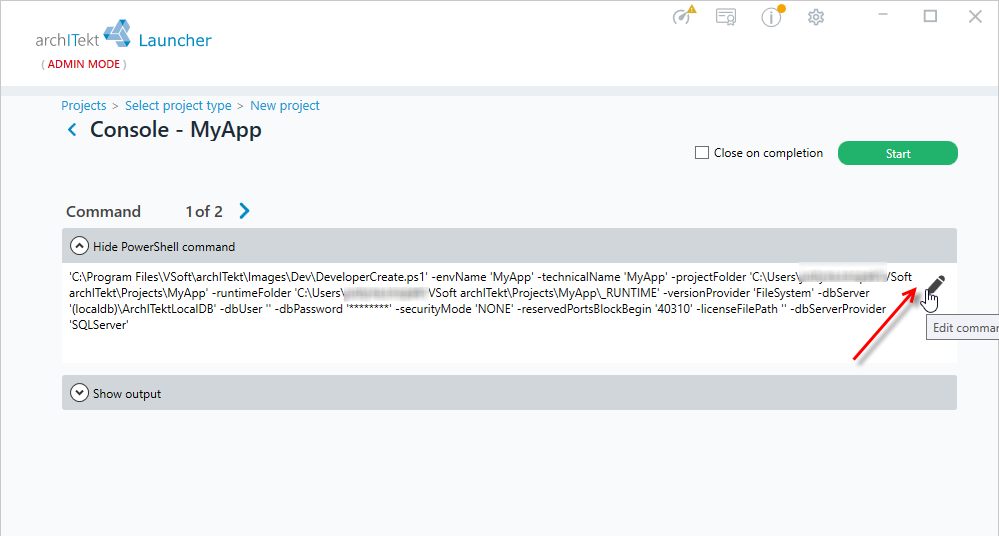
This functionality shows the command that is about to be run, with the option to edit it.
- In the example below, after expanding the Create new project action, you can select the Open advanced view option.
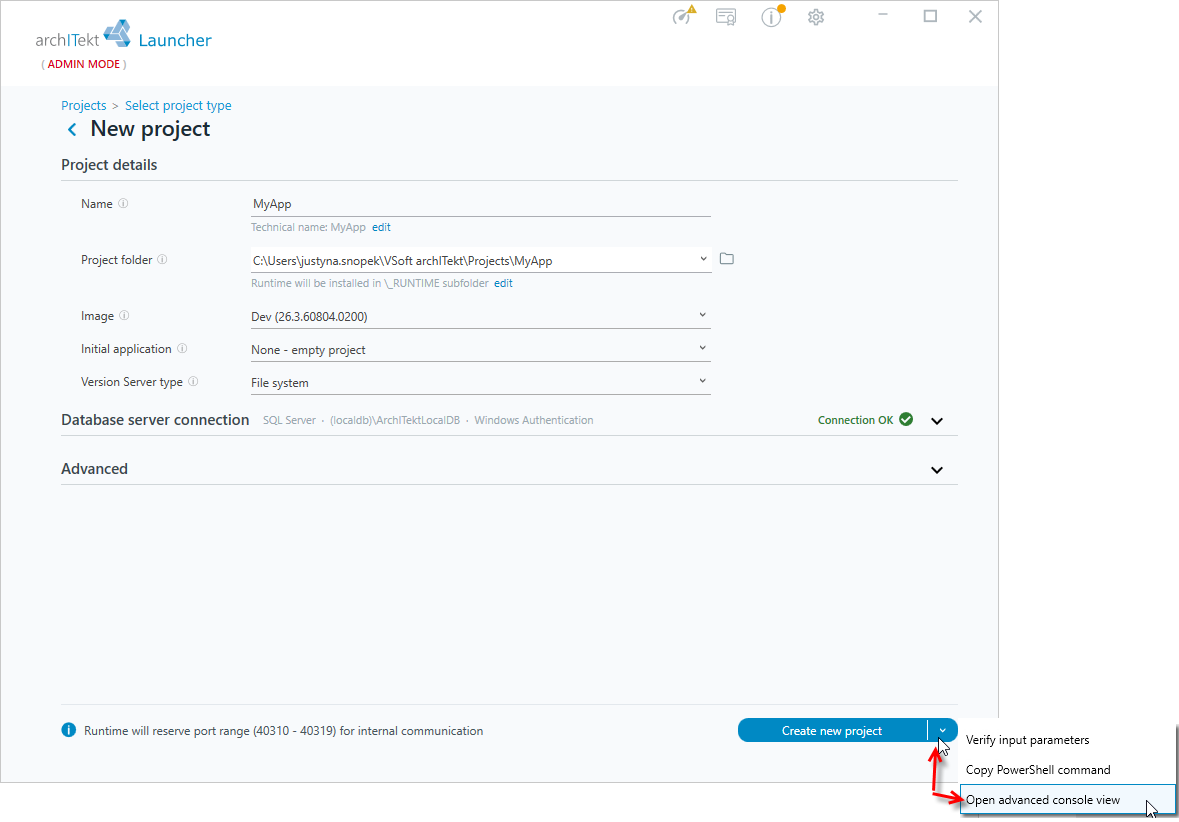
- Selecting this action does not immediately start the project creation process. The next window will display the commands that will be executed while the project is being created.
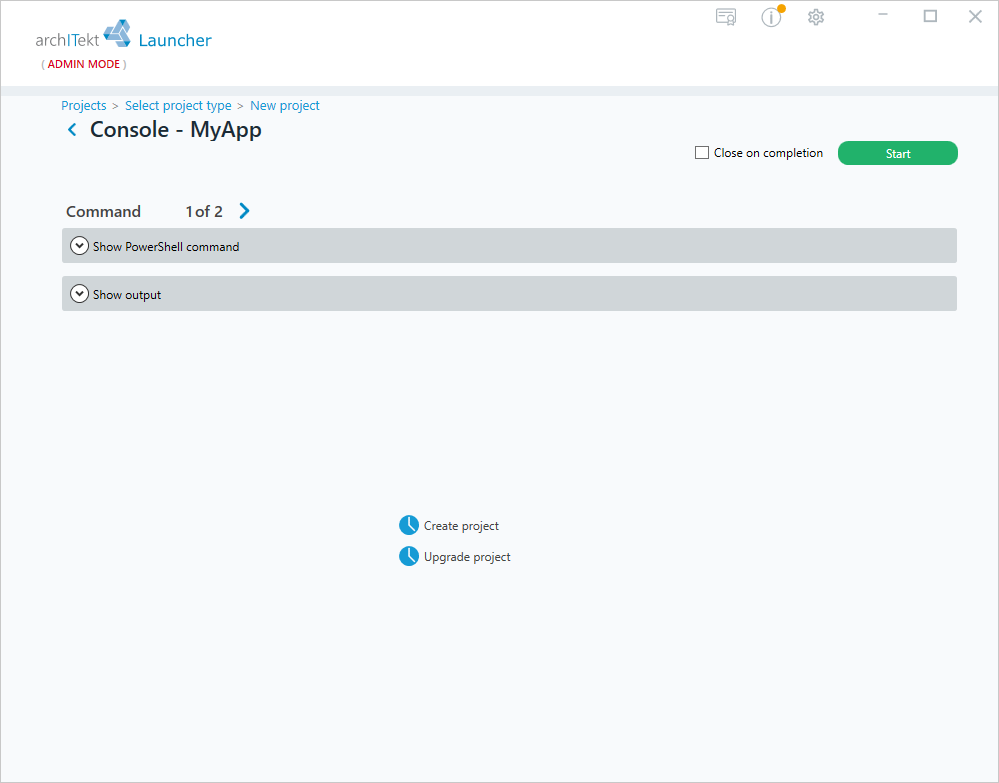
- If you are using the advanced console view, you can edit the generated commands before they are executed.
- To start creating the project, select Start.
The Copy PowerShell command option copies the command to the clipboard.
Project initialization
If the project creation process was interrupted, or was not completed after selecting Create new project, the Initialize Project command will be available in the project list, letting you finish initializing the project.
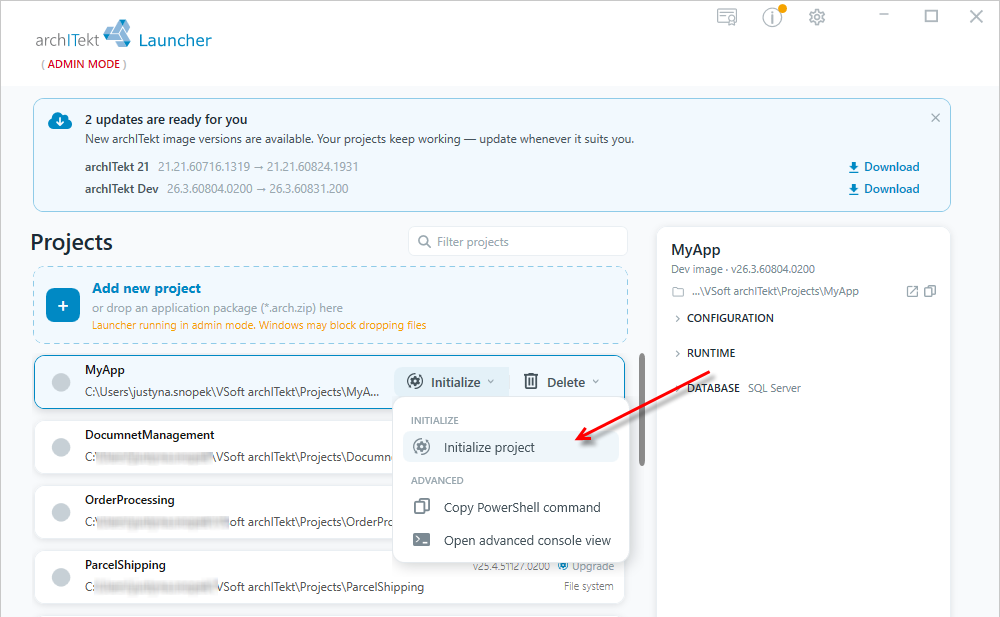
Configuration encryption
VSoft archITekt makes it possible to secure the project's configuration so that part of the configuration is stored in encrypted form. This covers both some of the configuration keys provided by the system by default, and configuration elements selected by the administrator that they add themselves when extending the system (for example, the configuration of connections to external databases).
- You can use the encryption option while creating a new project by entering a password in the Security password field.
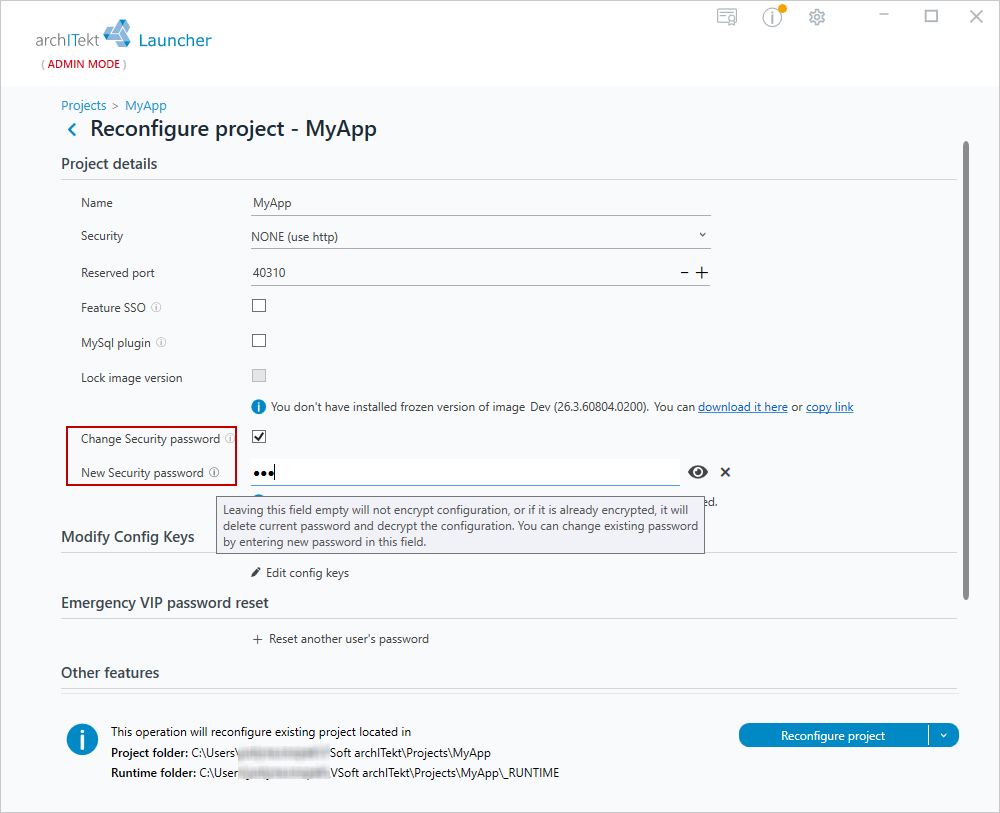
- If you want to enable encryption on an already created project, go to the project reconfiguration window
 .
. - Check the Change Security password box and enter a password in the New Security password field. This option is used both to change the password if one was previously set (for example at the project creation stage) and to assign a password to the project for the first time.
- If a security password has already been set for the project, choosing to change the password and leaving the New Security password field blank means that no security password will be in effect after the project is reconfigured.
- After entering the password, select Reconfigure project.
- After restarting VSoft archITekt Launcher, the project will be encrypted, as indicated by the key icon. You can go to the project management page, start/stop services, launch archITekt Studio, open the folder containing the project files, or proceed to set up an on-premises environment.
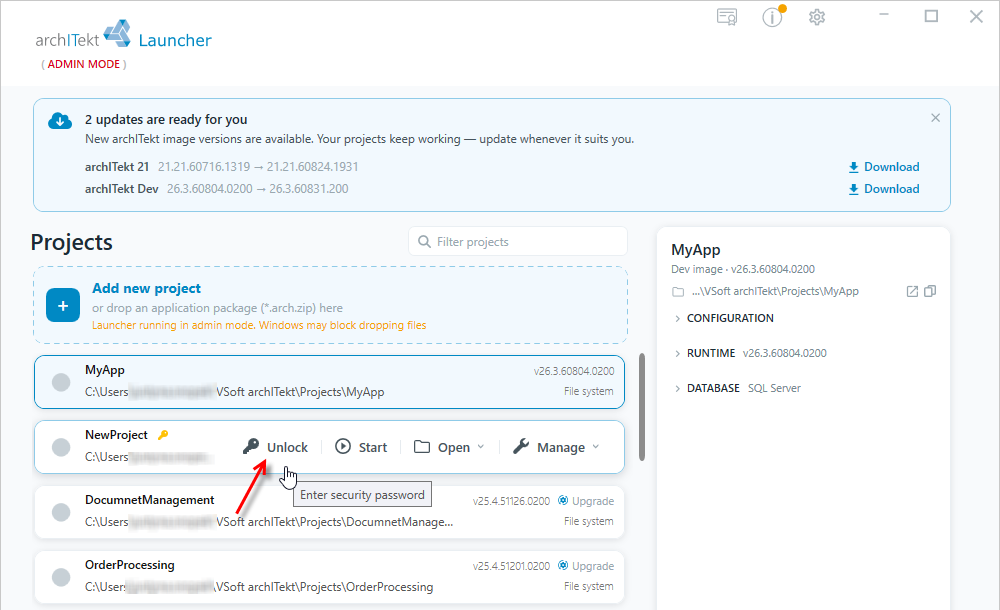
- If you want to perform a file import, upgrade, reset, delete the project, or go to the project reconfiguration page, you must enter the security password that was set in the previous step.
- Select the Unlock option next to the project and enter the password in the window that appears.

- After entering the password and unlocking the project, you can go back to the reconfiguration page and change the password, set a new one, or choose to have no password at all.
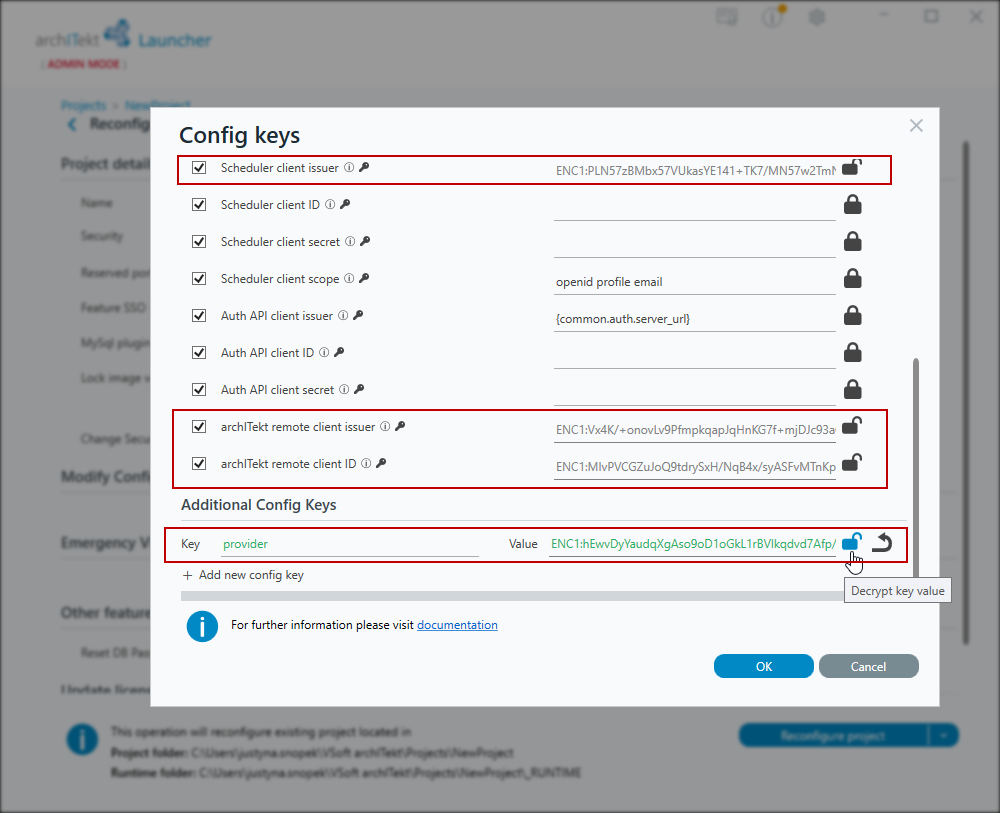
- In addition, you can also encrypt configuration keys in the Modify Config Keys section. Enter the key and its value, then select the padlock icon. To undo the encryption, select the Decrypt key value button.
For more information about the configuration encryption mechanism, see: Configuration encryption mechanism.