Project management
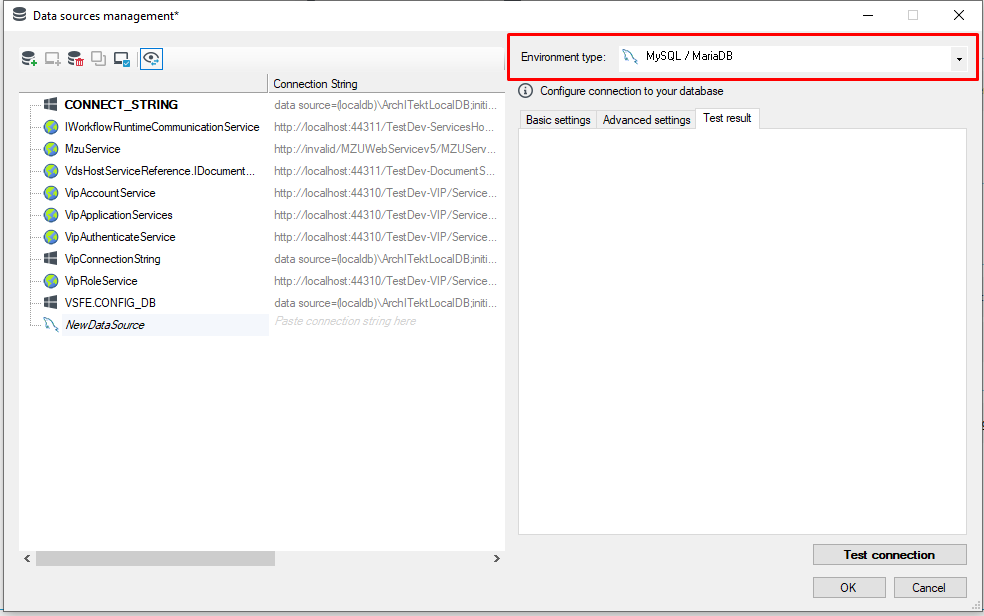
In the component management window, you can perform actions for individual services or bulk actions for all components. To open this window, on the home page, next to the selected project, click the Manage button, and then select the Manage engines option from the drop-down menu.
Actions available for single elements
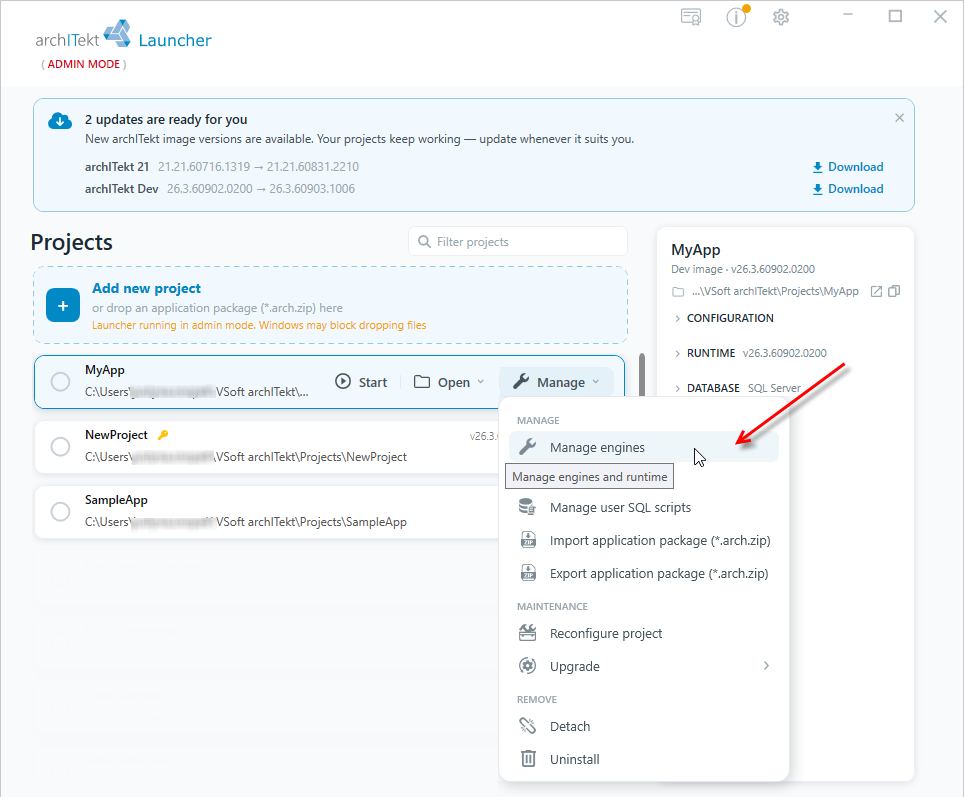
For inactive components you can:
- start the component by hovering over its row and selecting the Start button.
- open the console window by hovering over its row and selecting the Console button.
For active components you can:
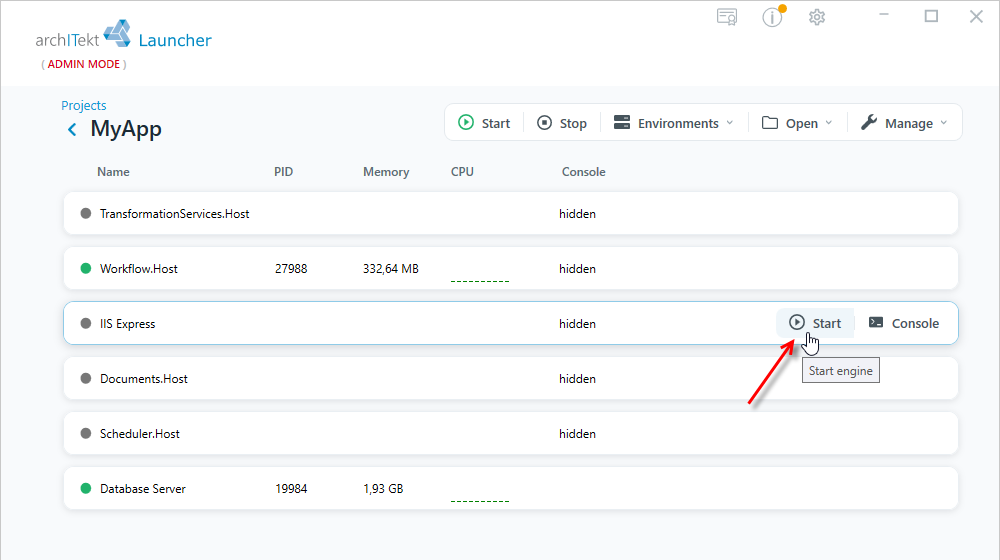
- stop the service by hovering over its row and selecting the Stop button.
- open the console window by hovering over its row and selecting the Console button.
- restart the service by hovering over its row, selecting the Engine button, and then the Restart engine option.
- force the service to stop immediately by hovering over its row, selecting the Engine button, and then the Kill engine option.
Remember, after creating/importing a project it is best to enable all services right away, so that the functionality of the whole platform is available. Among other things, enabling the IIS Express service is required in order to preview the web application.
Possible bulk actions
In the project and component management window, you can perform bulk actions for all components.
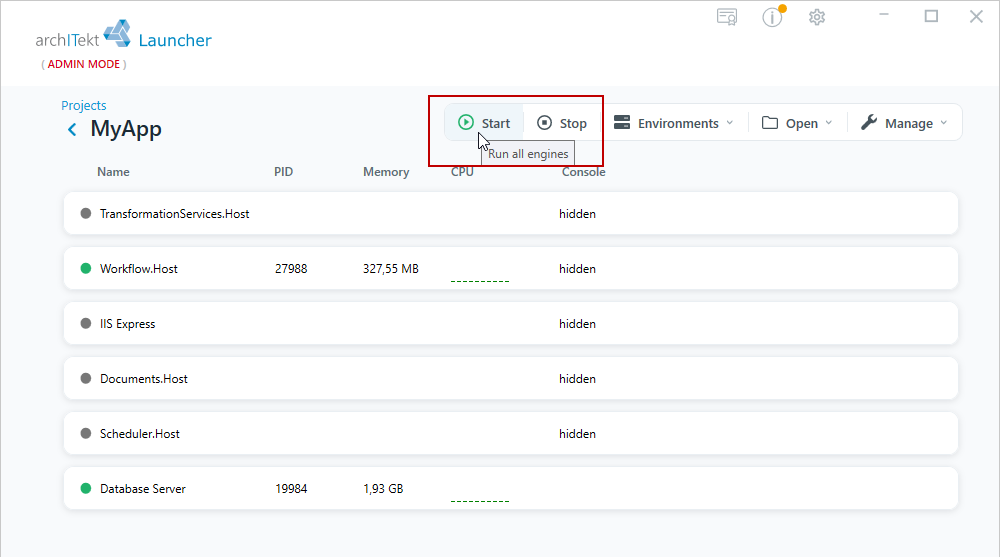
- Select the Start button in the top toolbar to start all components, or the Stop button to stop them.
Importing files into the project
In the management window, you can import a project package from a selected location in the form of a *arch.zip file.
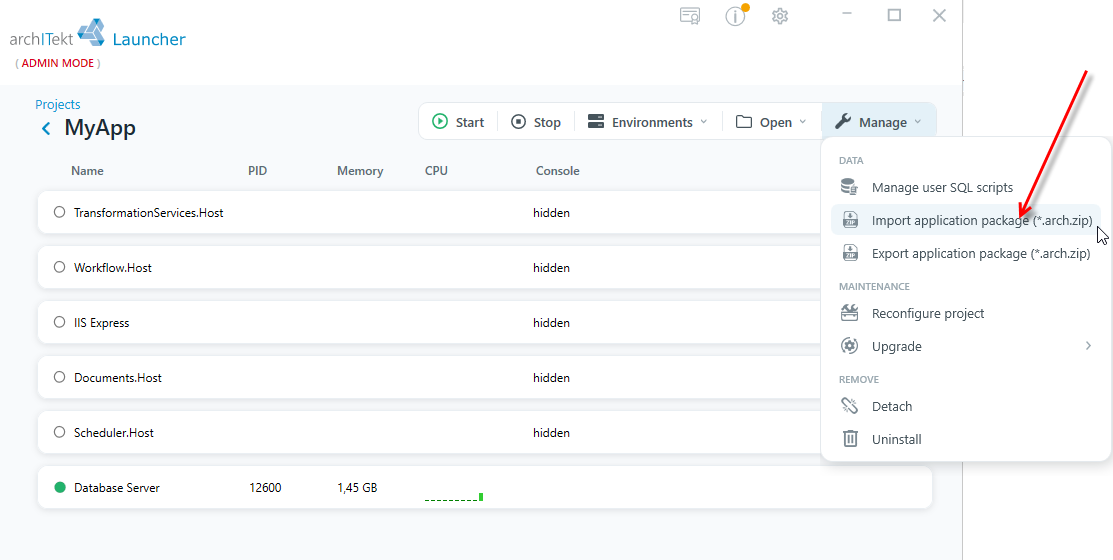
- Select the Manage button, and then the Import application package (*.arch.zip) option, to import the project files.
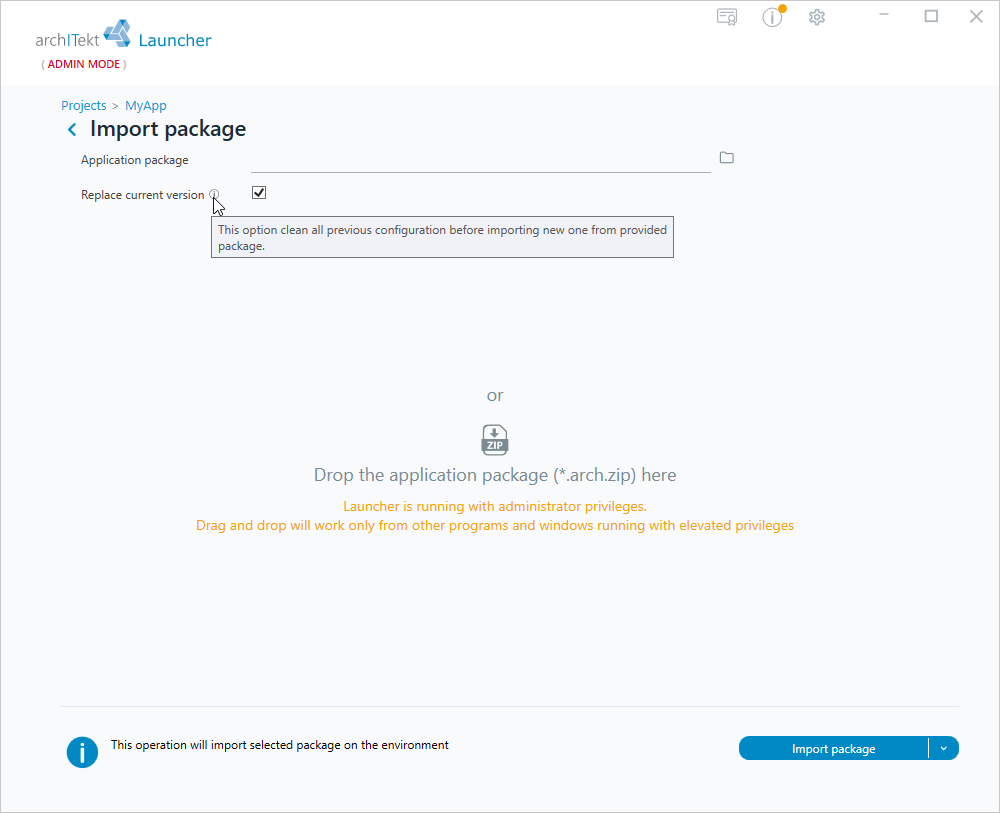
- In the next window, indicate the location of the package.
- If you select the Replace current version option, the entire previous configuration will be cleared before the new one is imported.
- Select the Import package button.
- You can also use drag&drop and move the package directly onto the VSoft archITekt Launcher window.
Exporting a project package
In the management window, you can export the project to a package in the form of a *.arch.zip file saved at a selected location.
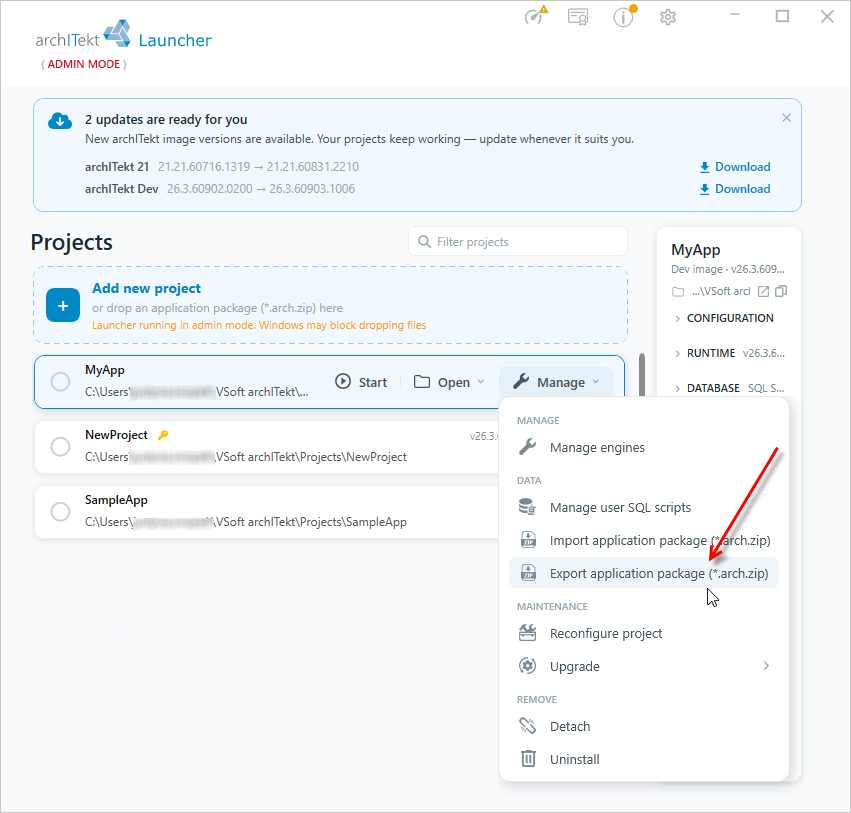
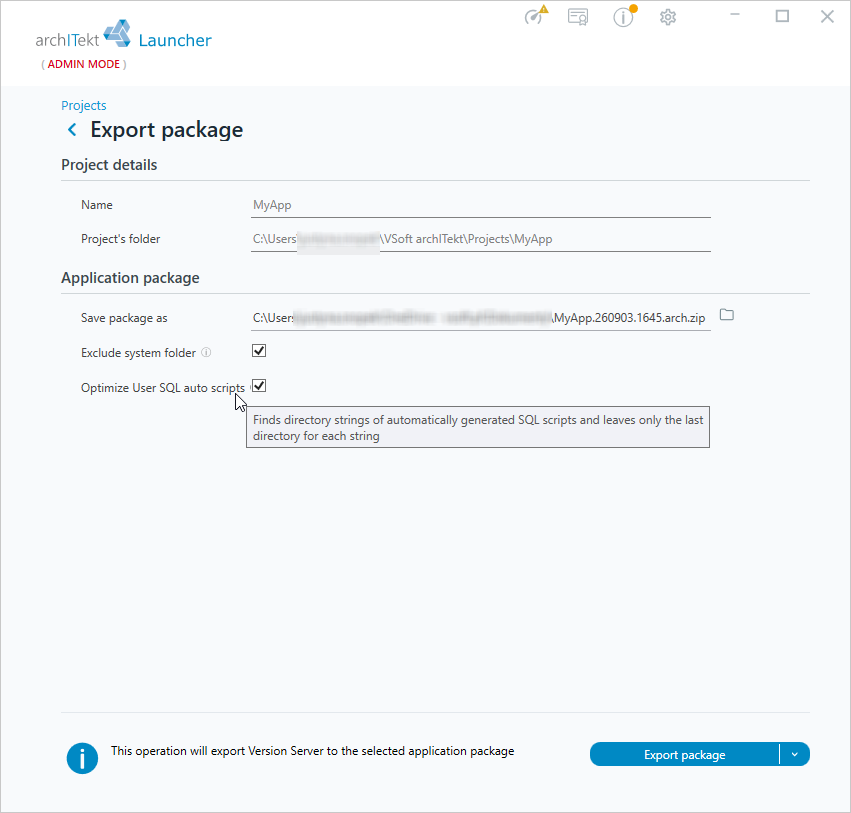
- Select the Manage button, and then the Export application package (*.arch.zip) option, to export the project files.
- In the next window, in the Application package section, specify the location and file name of the package in the Save package as field.
- Exclude system folder - select this option if you want to exclude the system folder from the exported package.
- Optimize User SQL auto scripts - select this option to find directory strings of automatically generated SQL scripts and leave only the last directory for each string.
- Select the Export package button to start the export. This operation exports the version server to the selected application package.
Access to the project location
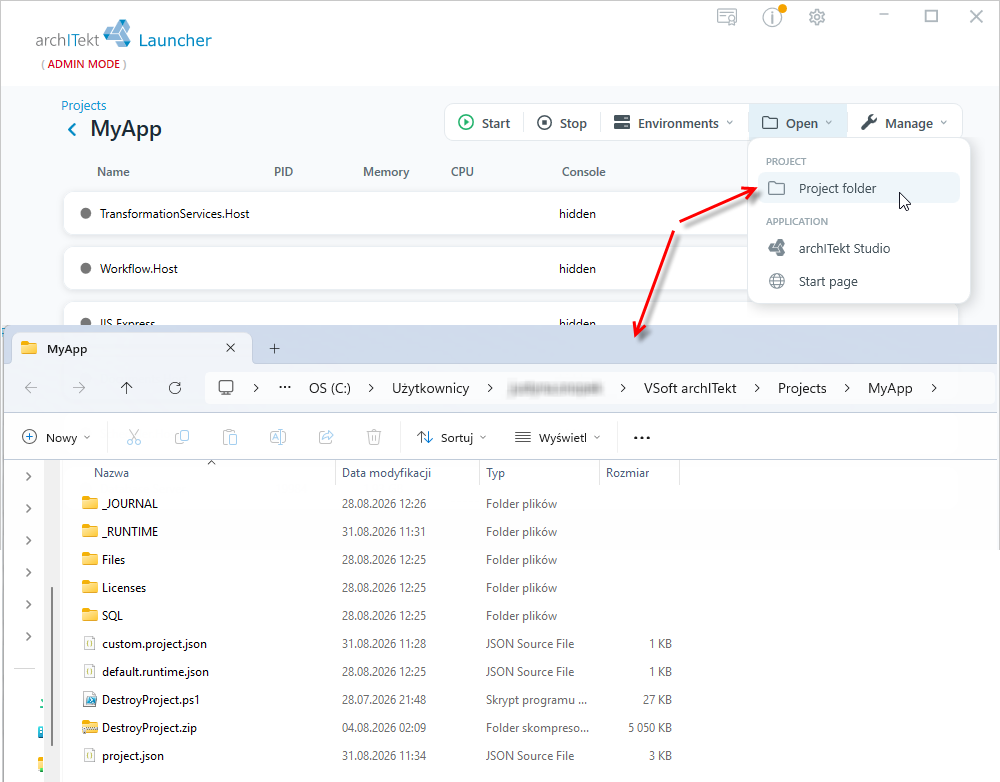
- Select the Open button, and then the Project folder option, to go to the location where the project files were placed when the project was created.
Updating, resetting the project
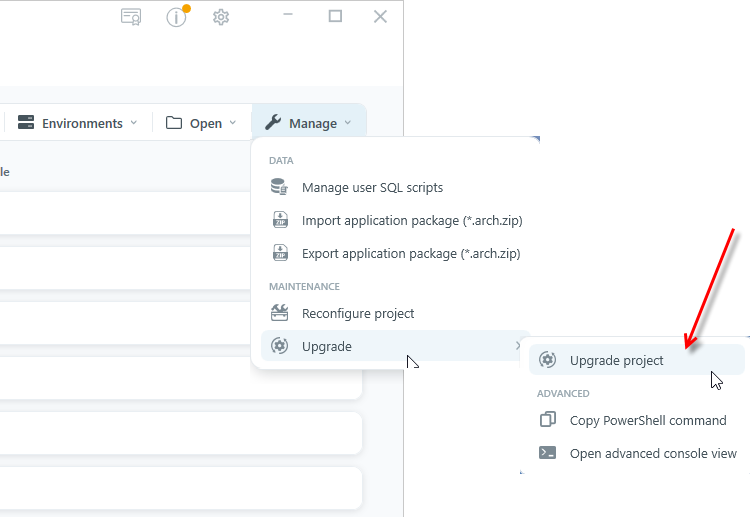
- Select the Manage button, then in the MAINTENANCE section select the Upgrade option, and from the expanded submenu select Upgrade project. This operation will overwrite the local runtime environment folder — use this option if you want to update the environment.
- The Open advanced console view option (in the ADVANCED section) allows you to enter PowerShell commands.
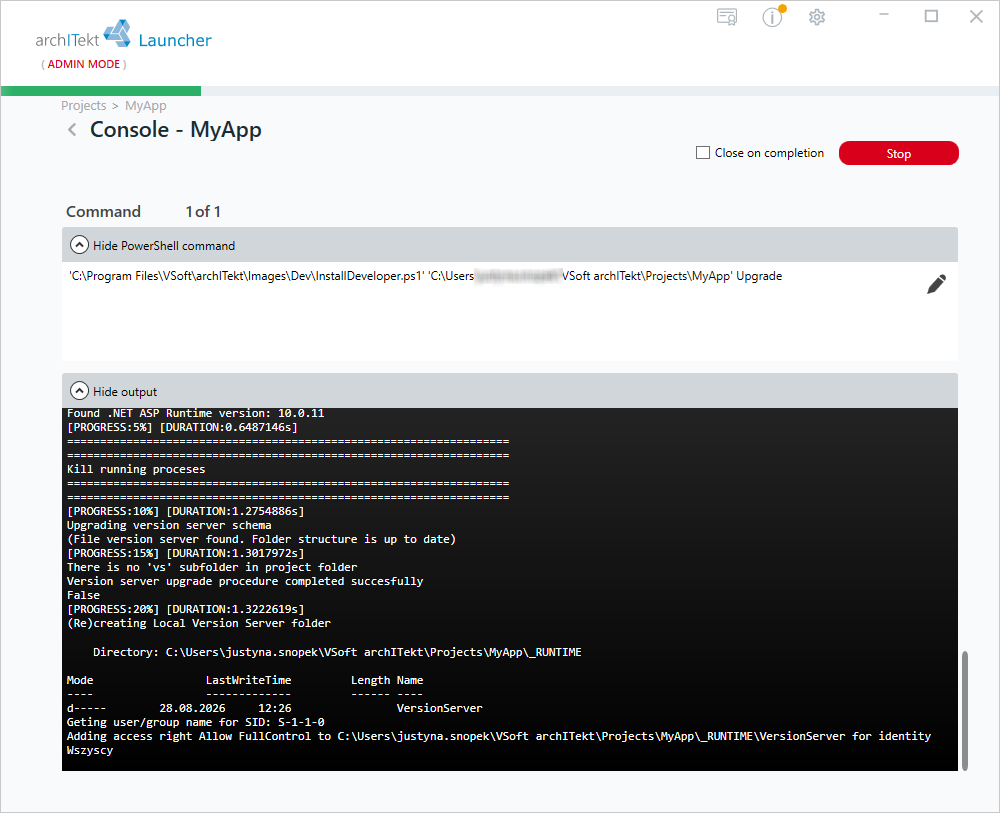
- In the next window, select Start to begin the environment update process, and once the action completes successfully, select Close.
Providing a web application for the local network
VSoft archITekt Launcher, when running with normal user privileges, allows you to use only the web pages of the application that have been created from the local computer (using the localhost network address). This is due to standard Windows security restrictions.
If you want the created application to be visible on the local network, run VSoft archITekt Launcher in administration mode:
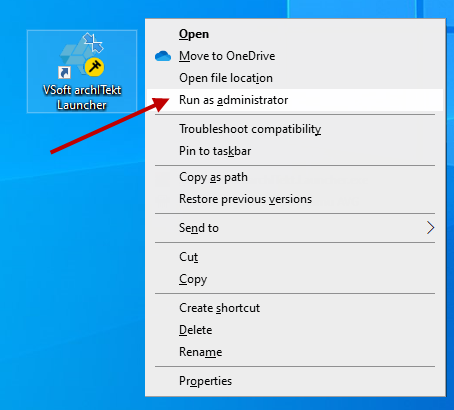
- press the shift key on the keyboard and right-click on the Launcher icon, and then select the Run as administrator option from the context menu.
VSoft archITekt Launcher will launch, and you will see in the top left corner that it is running in administration mode.
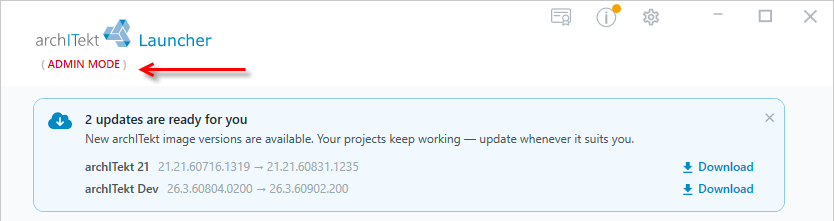
In administration mode, the IIS component is launched with a different script run_iis_admin.bat instead of run_iis.bat, which allows the application to be accessed from the local network.
License
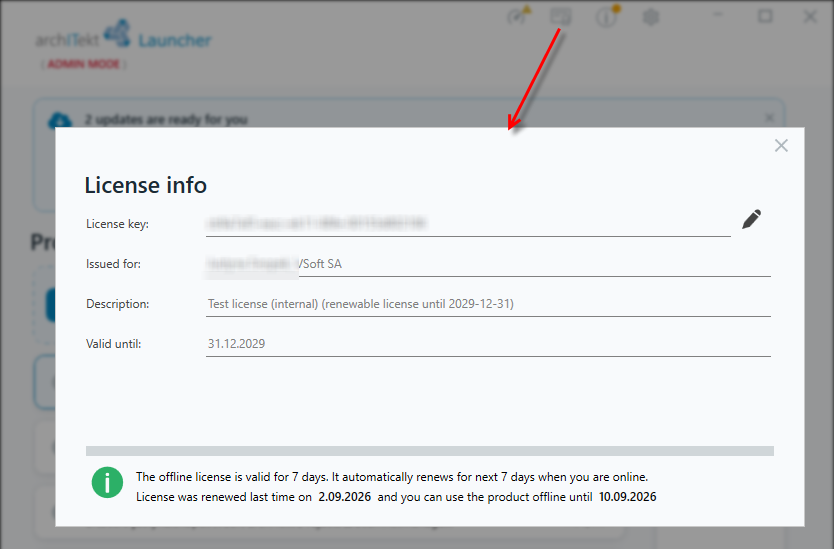
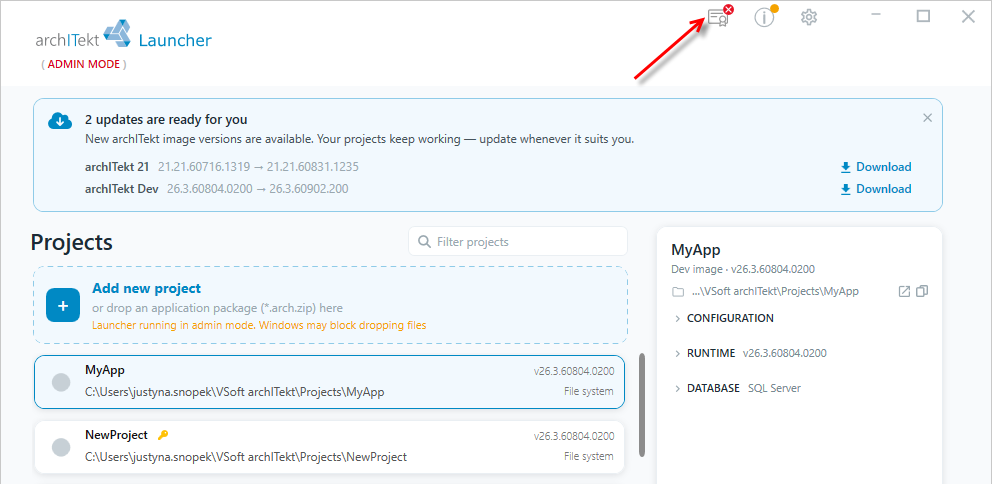
To access the license management window, click on the icon in the upper right corner. The window that appears provides basic information about the license. The license is valid for 7 days by default and is automatically renewed for another 7 days every time VSoft archITekt Launcher is launched. The license validity is refreshed in the background every 30 minutes. The license renewal process is performed until the license expiration date, which follows from the terms of the agreement between the Provider and the Customer.
When there are 7 or fewer days left until the license expires, the license icon in VSoft archITekt Launcher will display a warning.
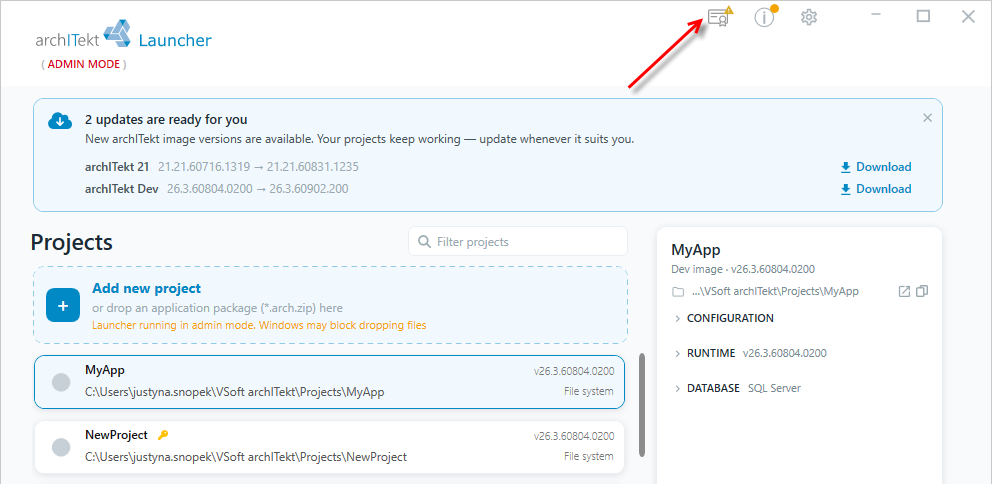
If the license expires, a notification will also be displayed in VSoft archITekt Launcher.
Connecting to the MySql database
- To connect to the MySql database, make sure that the plugin installation option was checked during image installation.
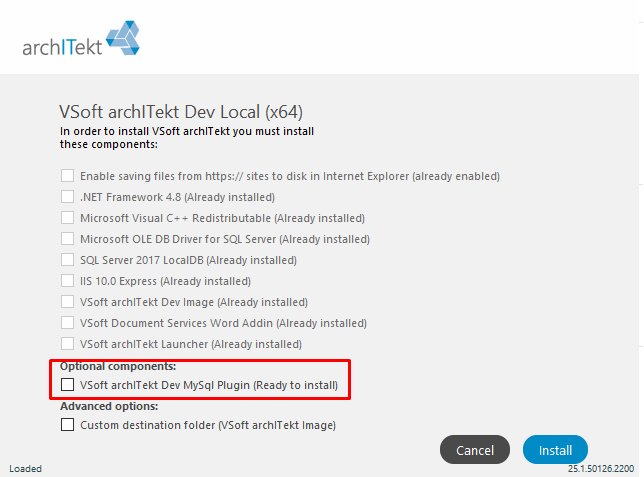
- If you have several versions of images, then the plugin needs to be installed separately for each image.
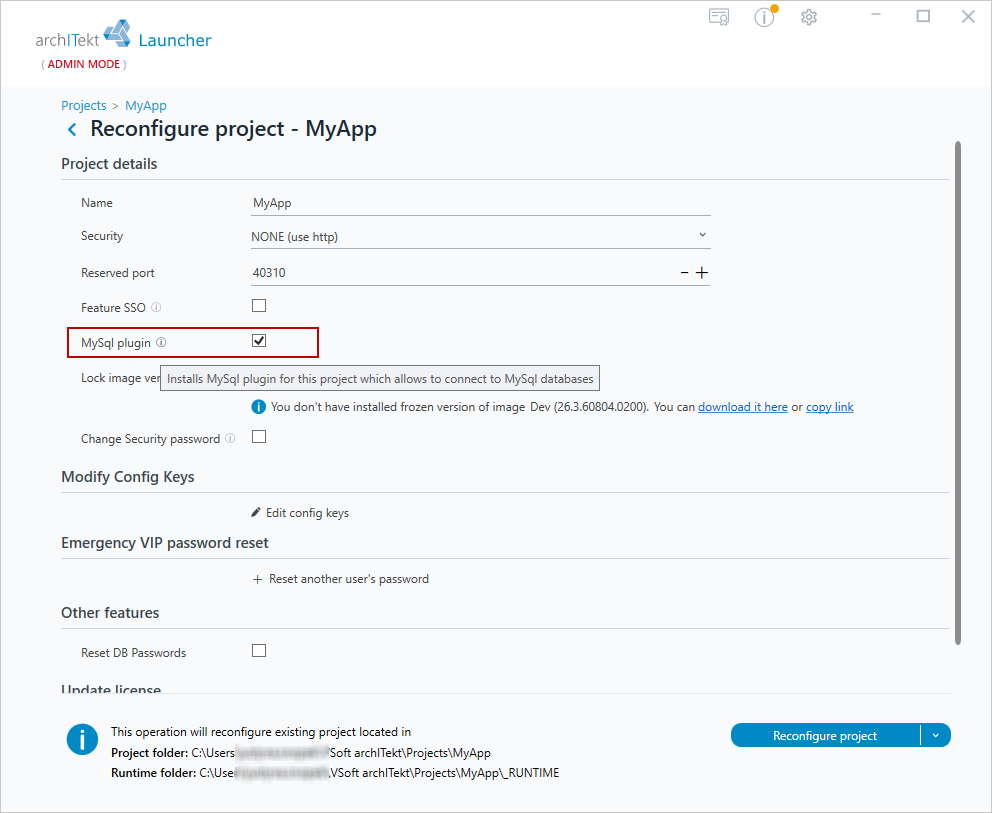
- Then go to the project reconfiguration option and check the option to add the MySql plugin to the project.
- This option can also be checked when creating a new project.
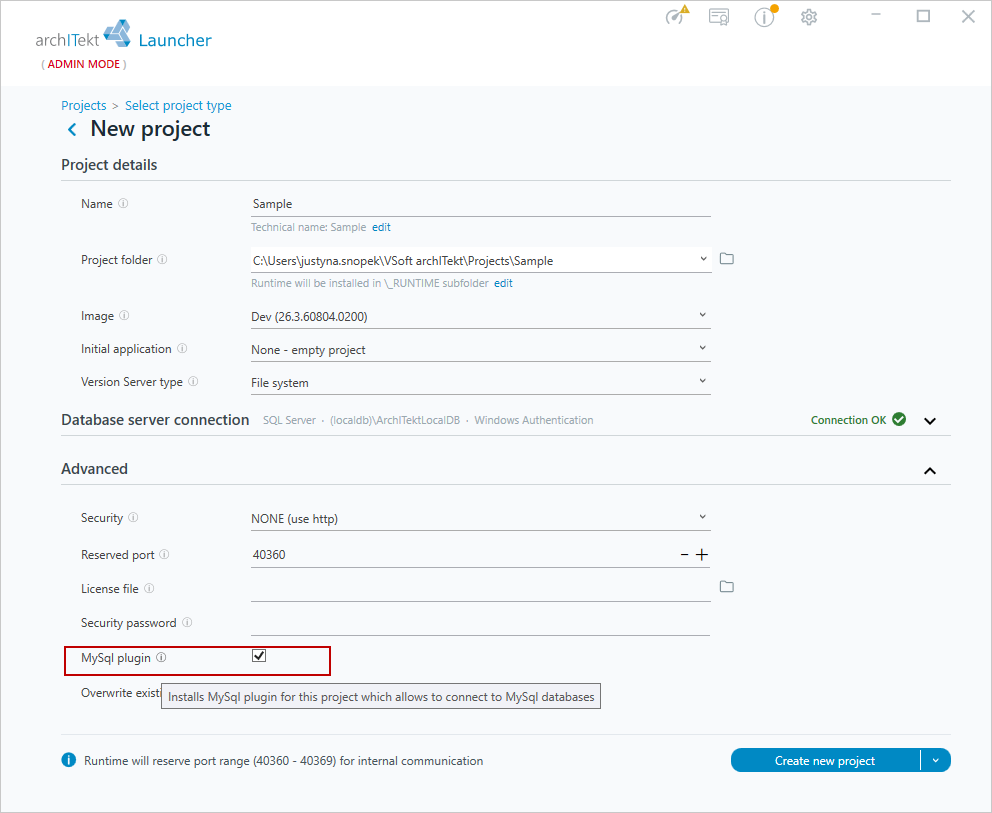
If this option is not available, it means that the plugin was not installed in the installer for the selected image.
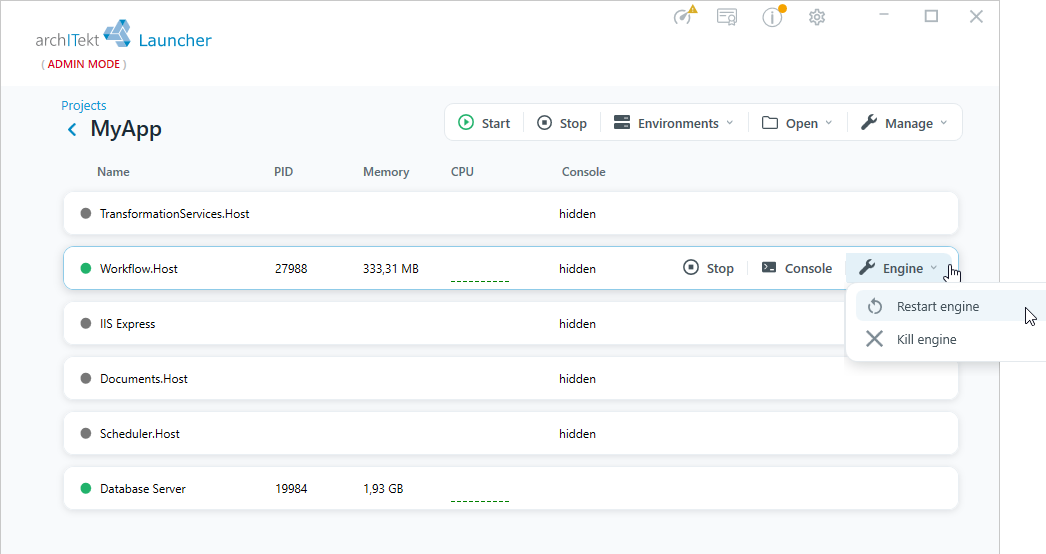
- Then, in the database panel in archITekt Studio, you can add a new connection to MySQL, and the Test result tab should not display any errors.