Project reconfiguration
Reconfiguration of the project allows you to change project parameters such as name and port, as well as add configuration parameters, secure the project, or update the license file.
You can go to reconfiguring the project both from the projects list page and from the given project's management window.
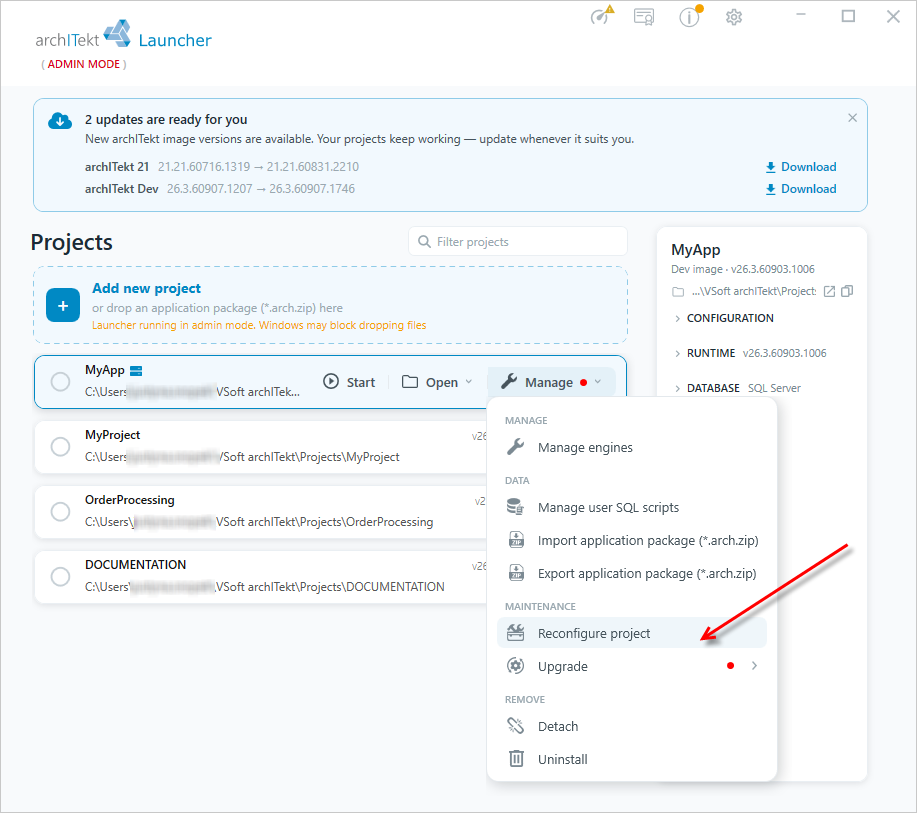
- To go to reconfiguration directly from the projects list page, go to VSoft archITekt Launcher, expand the Manage button next to the selected project and, in the MAINTENANCE section, select Reconfigure project.
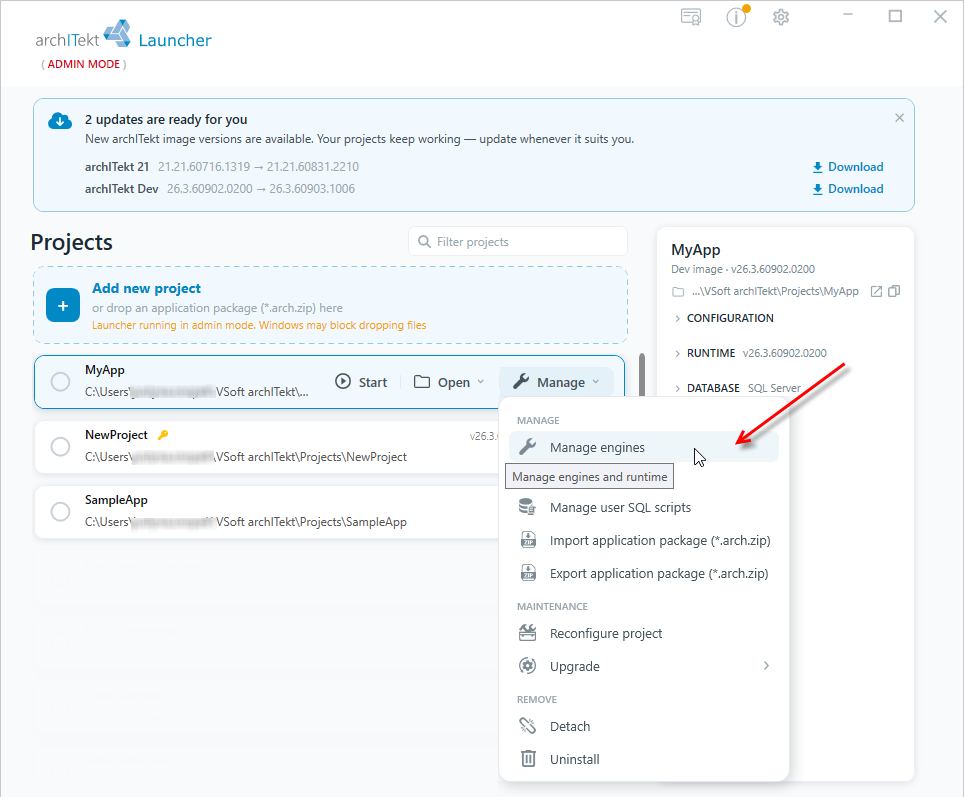
- To go to reconfiguration from the project's management window, on the main page, next to the selected project, click the Manage button and select the Manage engines option to go to the project management page.
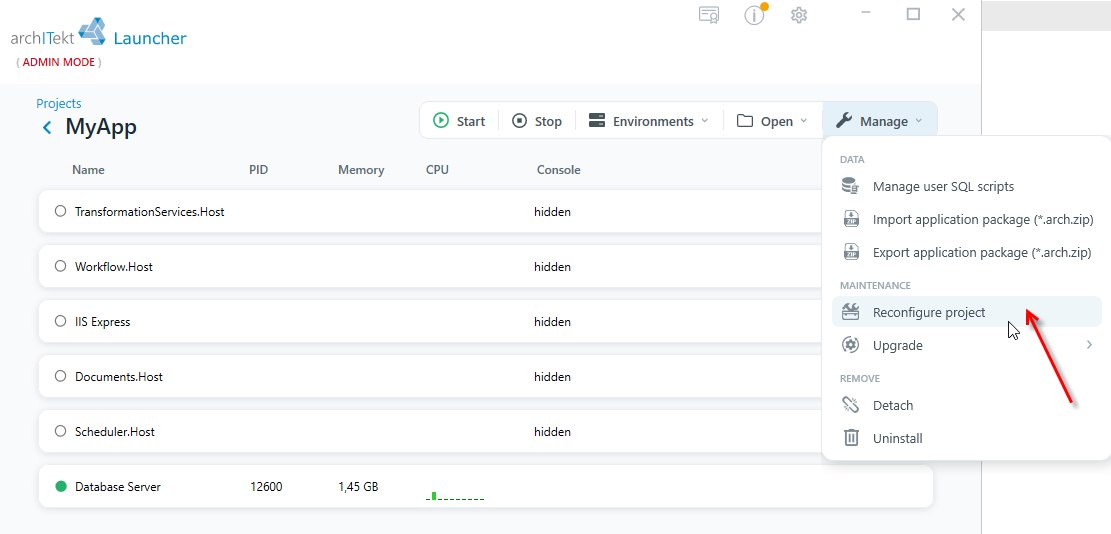
- In the component management window, select the Manage button, and then in the MAINTENANCE section select the Reconfigure project option.
- Change the project parameters and select Reconfigure project.
- In the case of using a license delivered in the form of an XML file, it is stored in the
[project directory] \ License directoryfrom where it is copied to the directories of individual components during the installation / update of system components. You can update the file in the New license file field. For more information on updating the license, see: Updating the file. - Feature SSO - Single Sign On feature that allows to sign in using Windows Authentication. Requires adding Config Keys with AD provider.
- Change Security password - enter a password to encrypt part of the project configuration- for more information see: Encrypting the configuration.
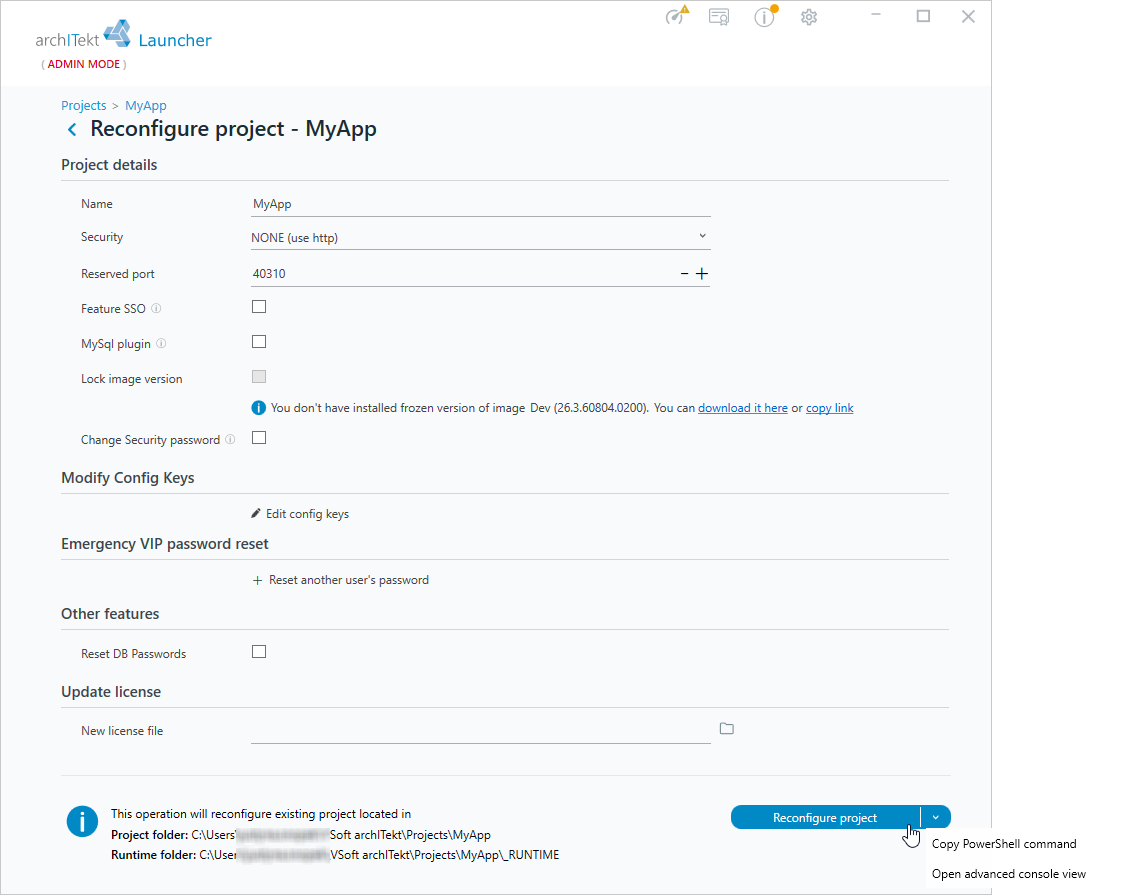
- Modify Config Keys - If you choose the option of adding or changing configuration parameters, a window with the possibility of editing and adding further parameters will be displayed. For more information on reconfiguring parameters, see: Reconfiguring the application.. Keys can also be encrypted if you enter a Security password—for more information, see: Project Encryption
- Select the feature you want to configure from the drop-down list.
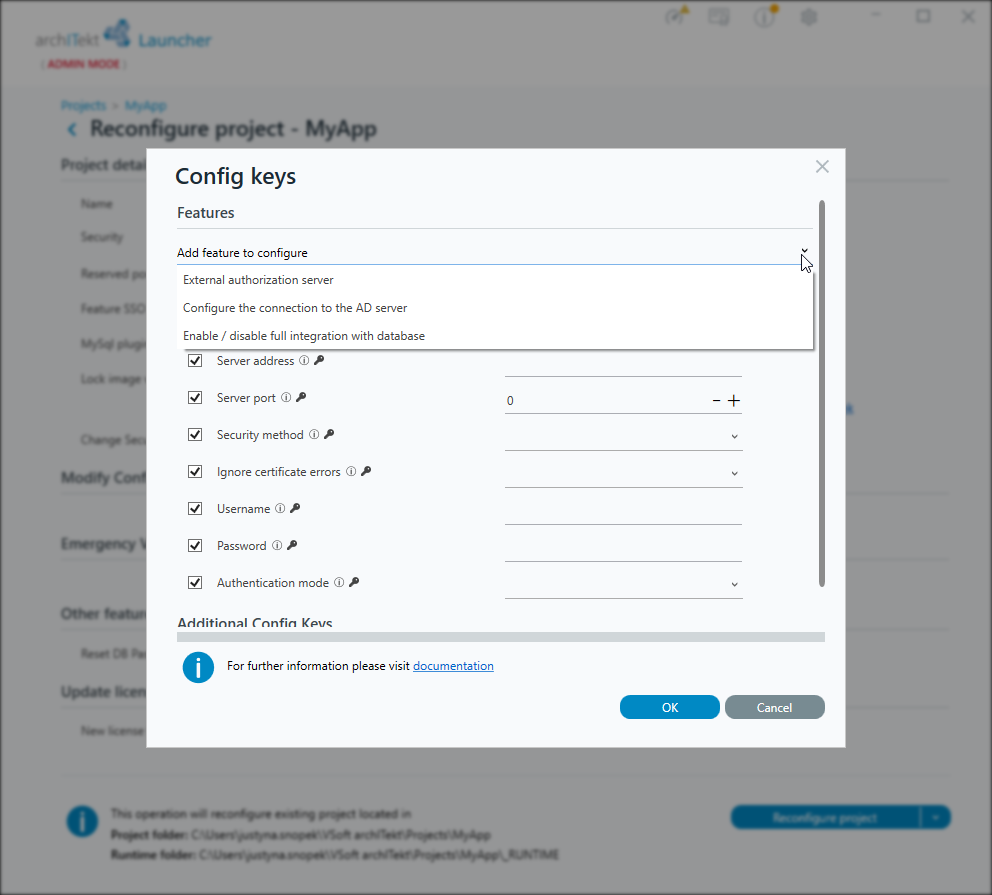
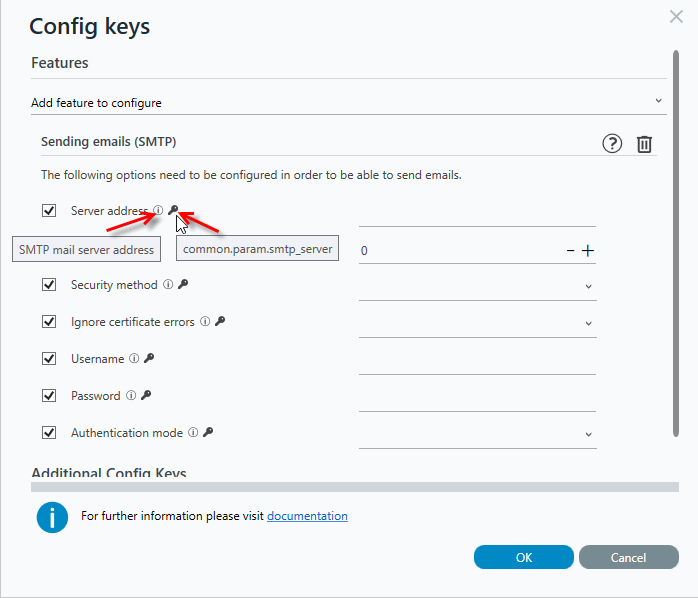
- Enter the data in each field. If you hover over the corresponding icon, you will see a description of the key and the name of the key.
- If you unchecked a key, then it will not be added to the configuration.
- Select the icon to go to the documentation

- To remove a feature from the list, select the button

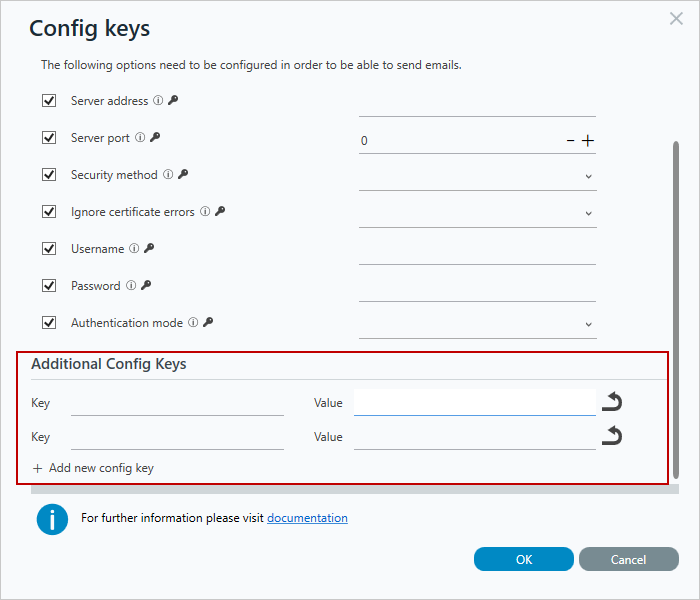
- If you want to add other configuration keys, use the Add new config key option and enter the data in the Key and Value fields.
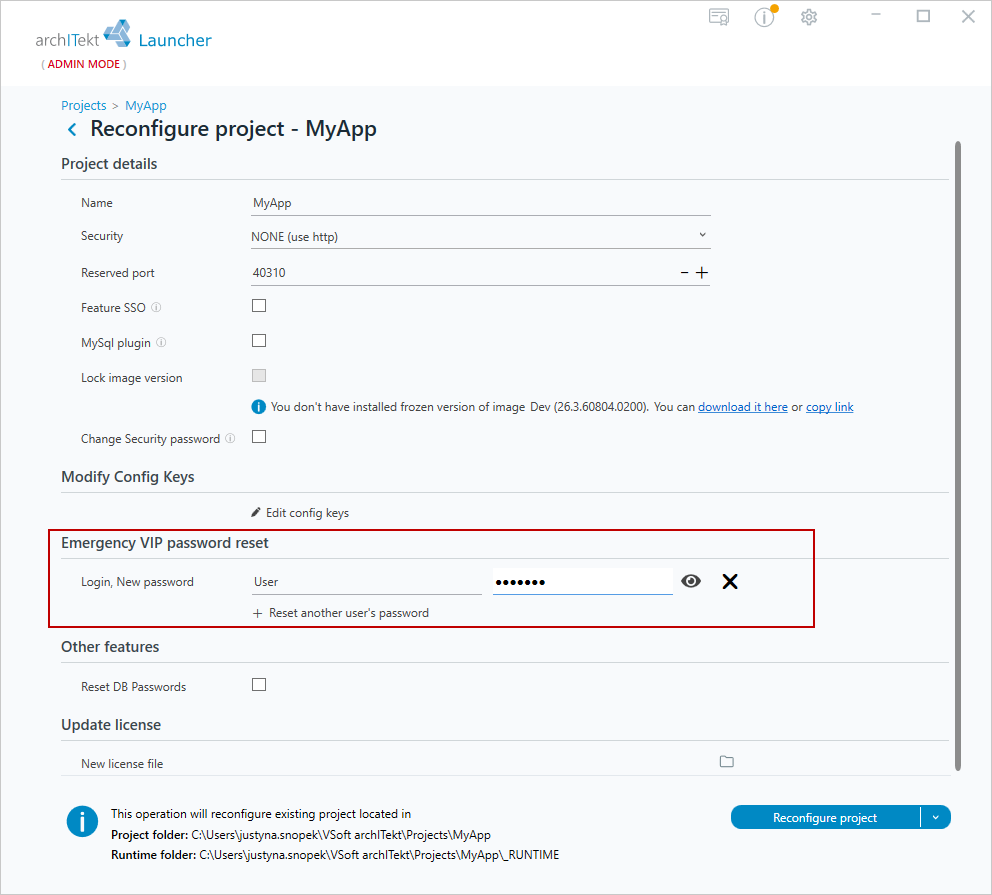
- Emergency VIP password reset - in this section you have the option to set new passwords for users defined in the authorization server.
- Reset DB Passwords - checking this option performs a reset of database user passwords.
Configuring the connection to an external server
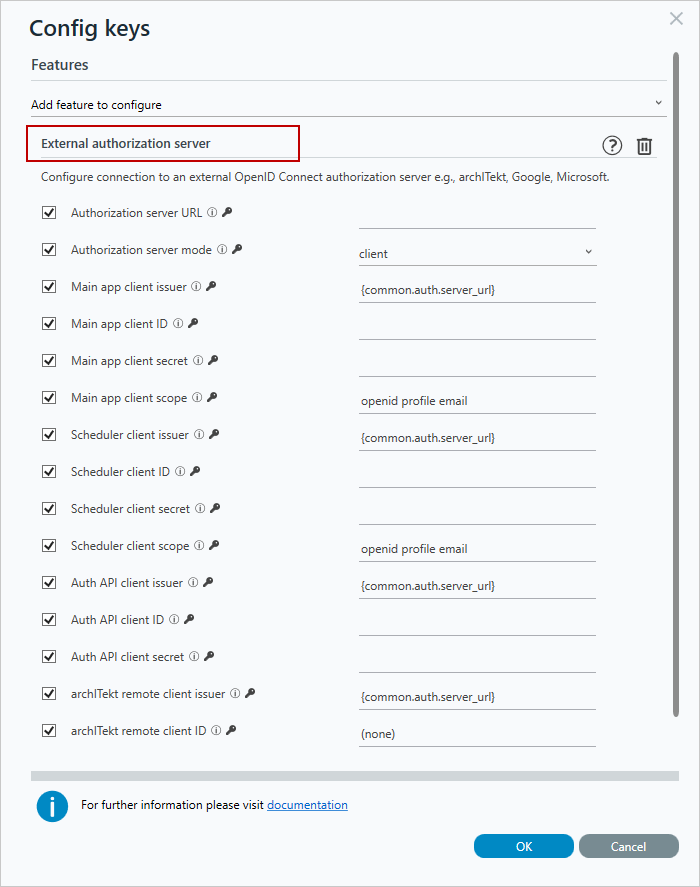
This section contains all available configuration keys. As a user responsible for configuring the archITekt project, you can configure the connection to an external OpenID Connect authorization server (e.g., archITekt, Google, or Microsoft) directly from the VSoft archITekt Launcher. This solution allows you to enter all required authentication credentials without the need to manually edit configuration files. The set of configuration keys includes:
- the authorization server URL,
- the authorization mode,
- client credentials, such as: issuer, client ID, client secret, and scope.
This configuration applies to the following components:
- the main application,
- the scheduler,
- the authorization API,
- remote archITekt clients.
For more information about the authorization server, see: Authorization Server