Reading from a CSV file and writing to a database
This chapters presents the following actions: loading a CSV input file to a database, preview of loaded data, prepare data, perform necessary mappings, classify records updating or inserting to an existing table on the basis of complex criteria.
The CSV input file: REGON, NIP, name, saving_date, balance_amount, limit_amount, warehouse_ID, state, currency. Amounts are written using a period, not a comma. REGON numbers are sorted ascending.
The file contains the company database, which we will load into a table in the COMPANY database.
Creating a simple package and previewing records which were loaded from a flat file
- Select the File menu, then New>processing package.
- The package editor and the Toolbox tab will be displayed, along with blocks for creating a graphical representation of the package.
- Drag CSV Input File block onto the editor.
- Go to the details of the block - double-click on the block or go to the Details tab.
- Load the file and select Yes in the window that appears.
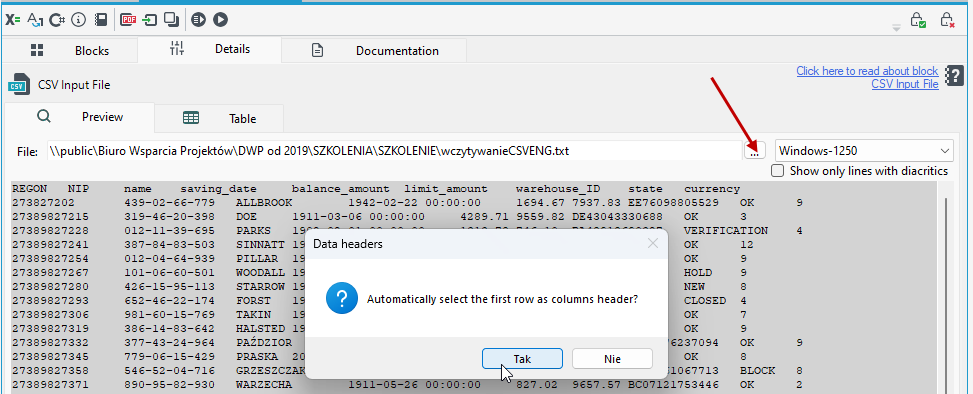
- Go to the Table tab, select the row with the header and select the Create a data structure based on the selected button. On the Schemas panel, you can see what the resulting schema looks like after loading the data from the CSV file.
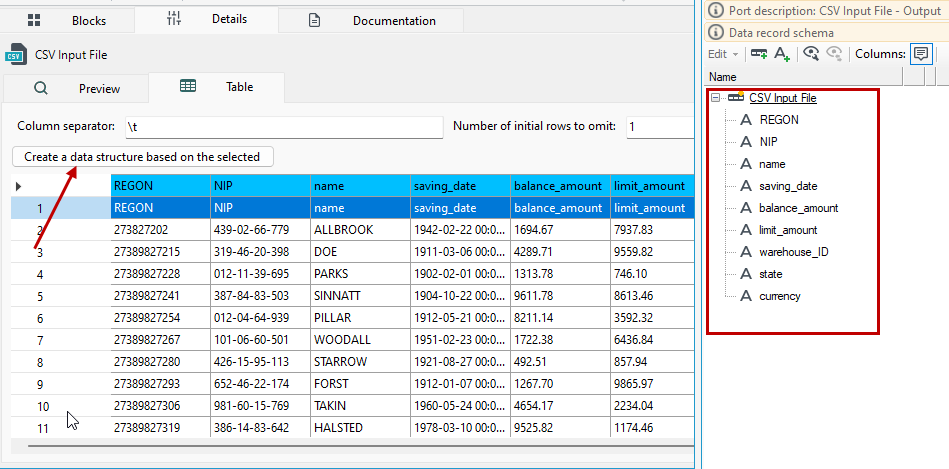
- Add a Browse Data block (the block is located in the Design tools category) and connect it to the CSV Input File block.
- Run the package by pressing F5 or Run option from the top menu.
- Once the package is running, you can preview the execution results by opening the editor for the Browse Data block. The processing report can be viewed by selecting the 3rd tab in the application's main window - Report.
Preparation of data for write to the database
Before saving the loaded data from the file to the database, make the necessary modifications:
- changing the types of variables to match the column types of the Company table from the database,
- make the appropriate configuration of the default conversion policy: text --> fixed-point number, date.
- adding in the conversion details "." in the Decimal Separator option.
- remove
-characters from the NIP field -Replace(NIP, "-","")function.
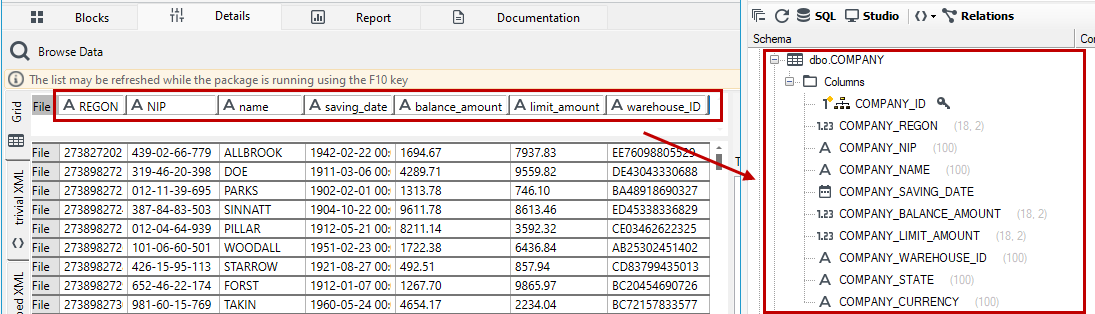
- Drag the Map In Place block and connect it to the Browse Data block.
- Go to the details of the block.
- Select the
balance_amountfield in the data schema, right click and from the context menu select Compute value>Parser. - Click on the added field annotation and from the list select the type of conversion you want to use. In this case, it is string>decimal.
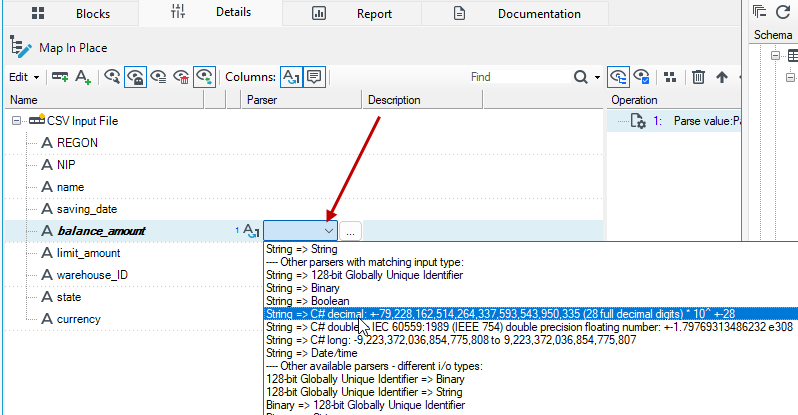
- Then click on the button next to the added parser
 and in the details indicate the decimal separator as
 .(period), as this is the separator used in the CSV input file.
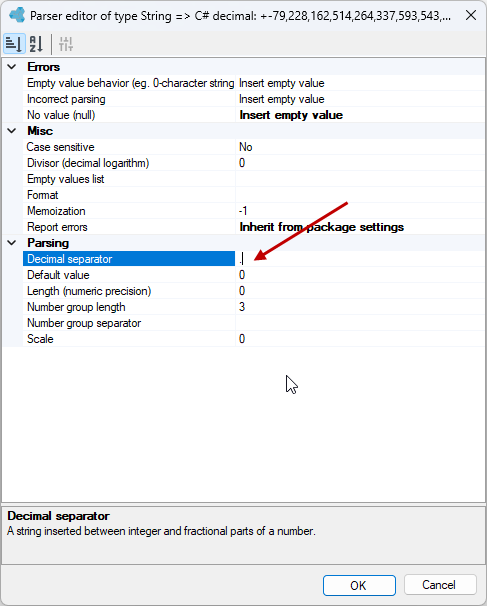
- In a similar way, add a parser and separator for the
limit_amountfield. - Add a parser for the
saving_datefield - String>Date/time and for the REGON field - String>double. - Remove the
-characters from theNIPfield. Click on the field and select Compute value>Expression from the context menu. - Select the button next to the added annotation to go to the expression editor or type the expression below on the Details panel.
- Use the
Replace (NIP, "-", "")function. This function replaces the-character in the NIP field with no character.
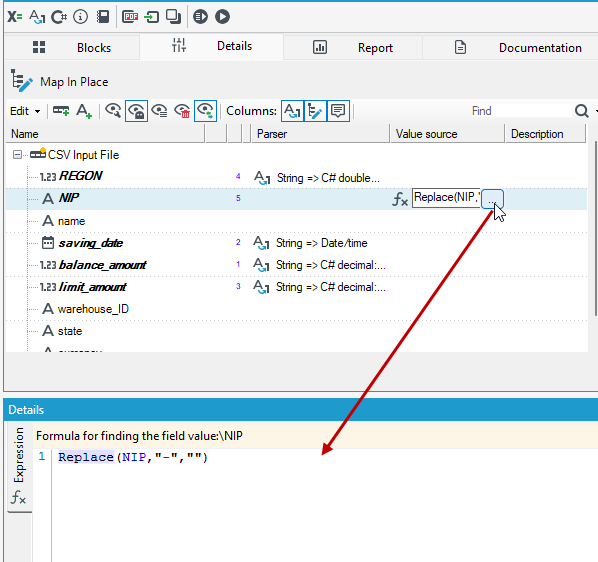
- You can optionally add a Browse Data block and run the package to see the modifications made.
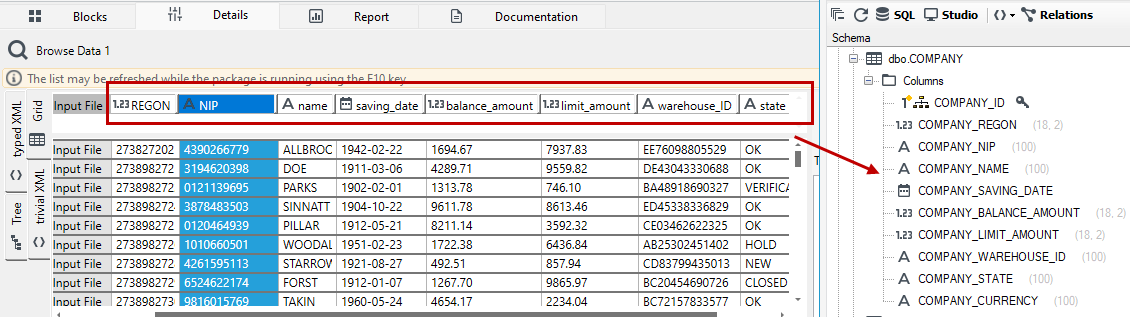
Loading data from files to database
- Add the Database Writer block (Output blocks category).
- Go to the details of the block and create a mapping that will write the data from the file to the Company table.
- To do this, select the record in the data schema, choose the rename option and start typing Company, the system will automatically suggest which table you want to load the data into, select the table from the list.
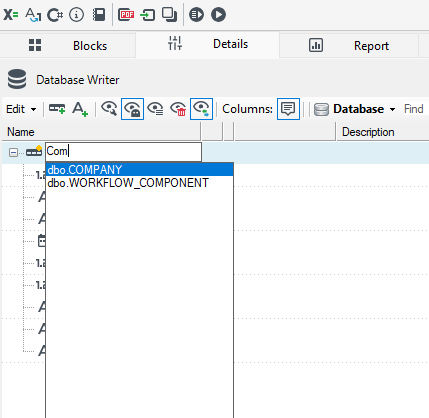
- Mark the Company record with the annotation Write record to a database (from the context menu, select Change/use record option).
- After performing the action, new fields should appear on the tree suggesting what data should be included in the database.
- After adding the annotation, choose what database operation to perform. In this case, Insert.
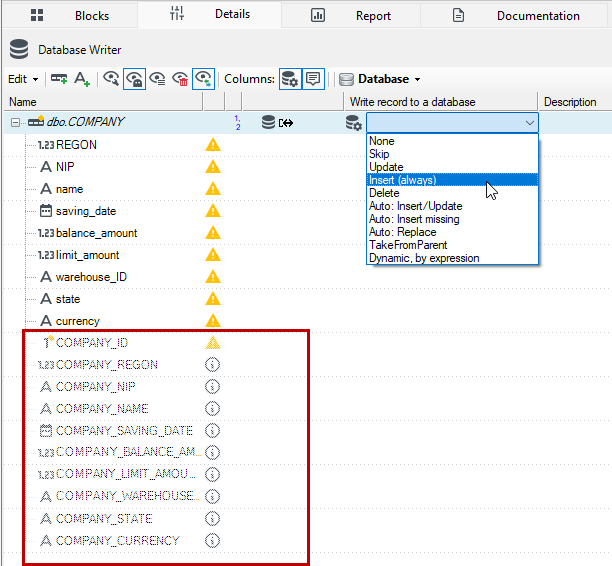
- In the data schema, we have fields from our CSV file and grayed out fields that are in the Company table in the database.
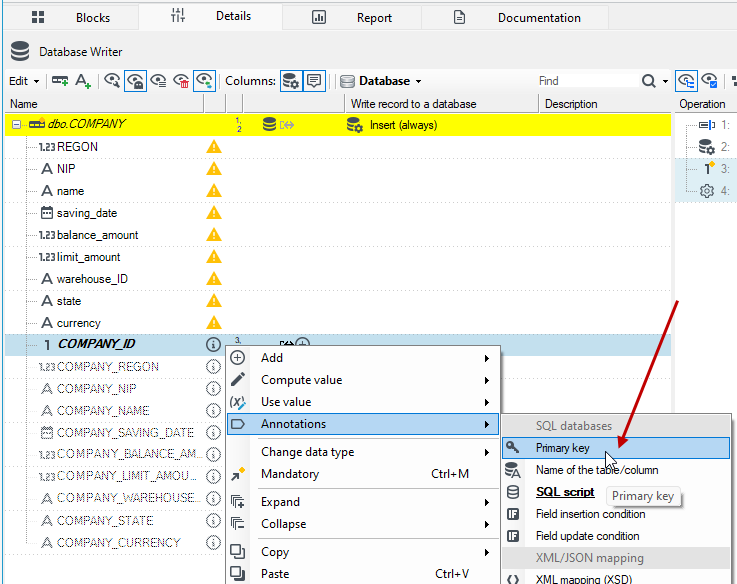
- Add Primary key - we click on the suggested field
COMPANY_IDand from the context menu select Fix>Add element, then add the Primary key annotation.
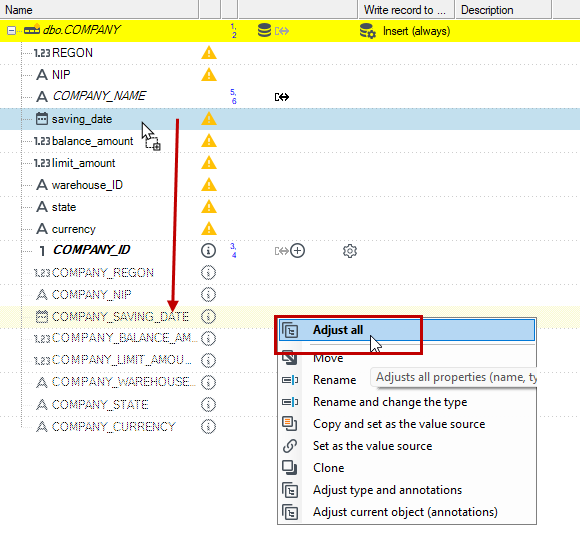
- Using drag&drop or using the Second view tab, move the existing fields to the suggested fields by selecting Rename or Adjust all from the menu.
- Run the package. The data from the CSV file should be written to a table in the database.
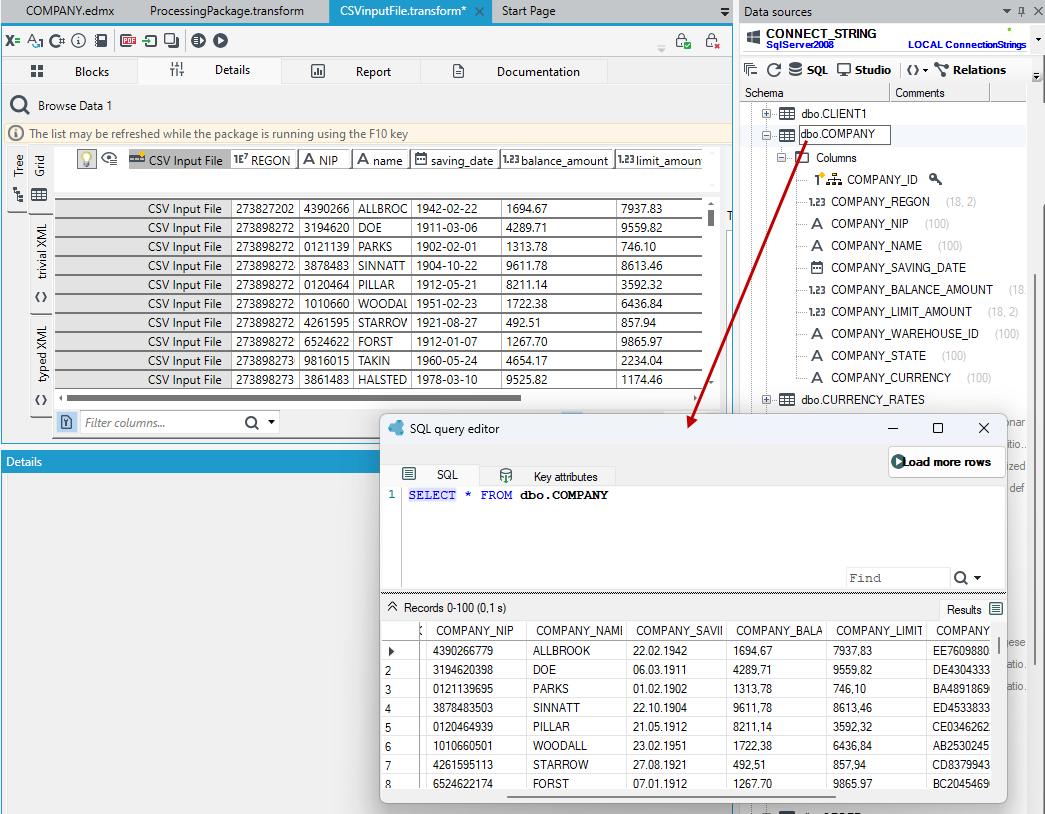
Extend the package with record classification
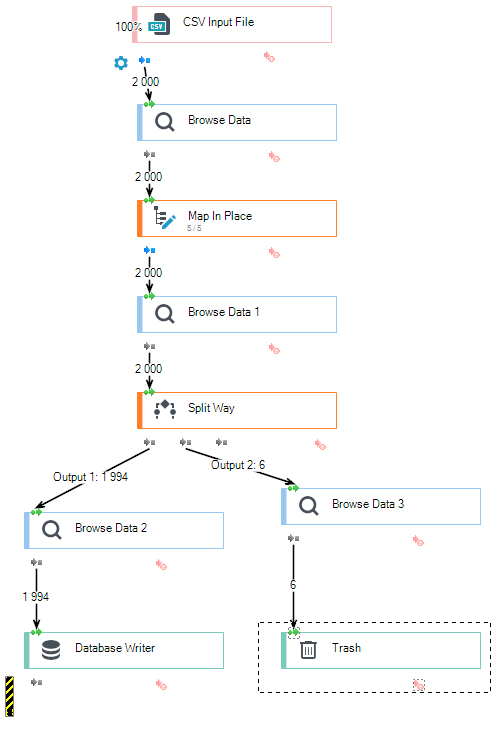
- Optionally, you can extend the package using the Split Way block and set additional conditions for the loaded data.
- Drag the Split Way block and connect it to the Map In Place and before the Database Writer block.
- The Split Way block has 3 output ports. Classification of records is done by conditioning the assignment of the results of a specific query to each port by entering an expression.
- Go to the details of the block and define the conditions for each output.
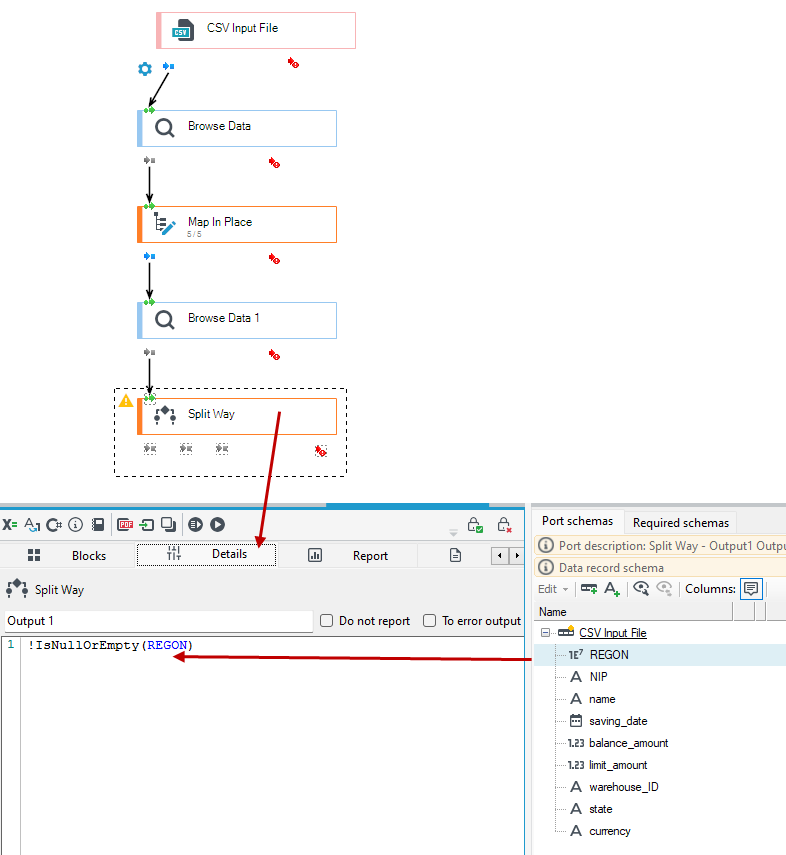
- In our case, we assume that we want to write to the database those data from the file for which the REGON field is filled in. In this case, in the Output 1 section, define the expression
!IsNullOrEmpty(REGON). From the Schema tab, you can drag the REGON field into the expression.
- Go to the workspace and connect the Split Wayblock to the existing database write block **** to Output 1 port.
- Now you can specify what will happen to the remaining records that will not be saved to the database (will not have the REGON field filled in) and will be output by Output 2 during processing.
- Depending on what you want to get, you can save these erroneous records to another database or to a CSV, Excel, etc. file, or include a Trash block that destroys incorrect records.
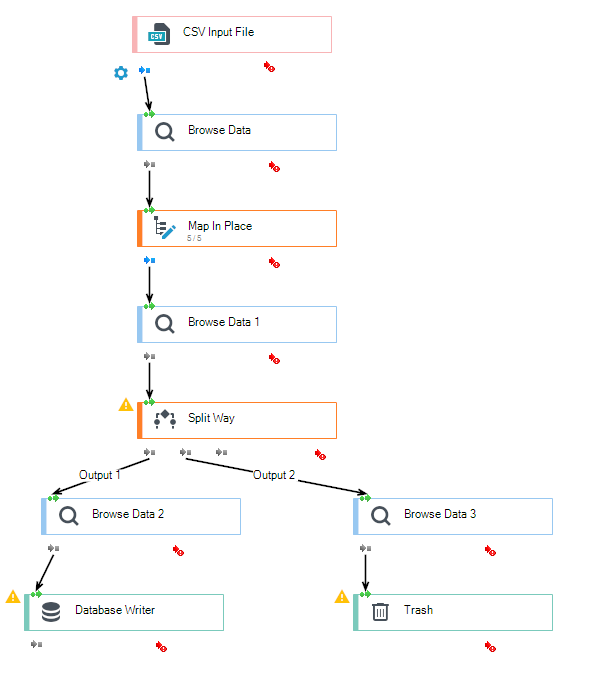
- If you want to save the error records then instead of the Trash block, add an output block for saving the file or drag the Error Collector block to the workspace.
- This block collects errors from all blocks of a phase including the Trash block.
- Next, add the Trivial XML Output File block and connect it to the Error Collector block. This will save the error records to the XML file.
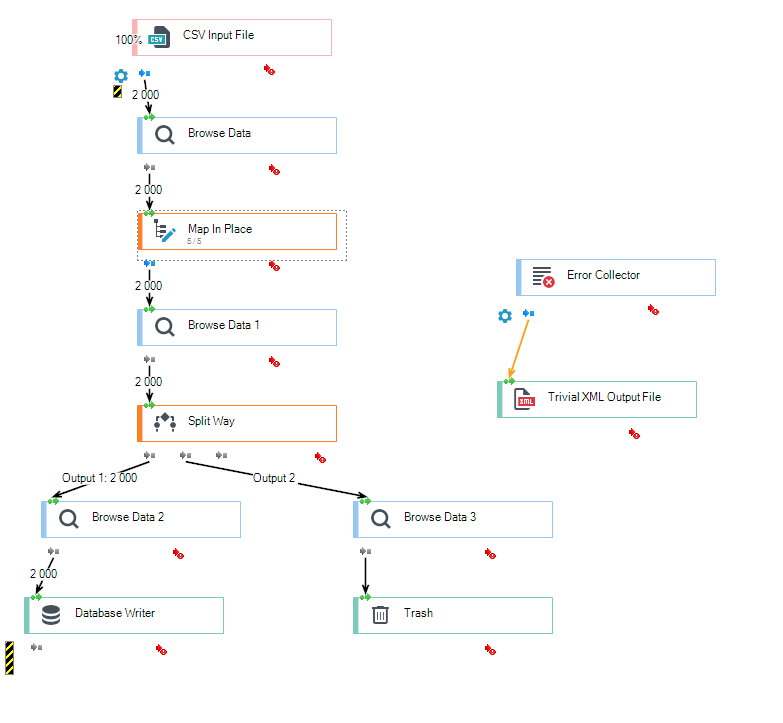
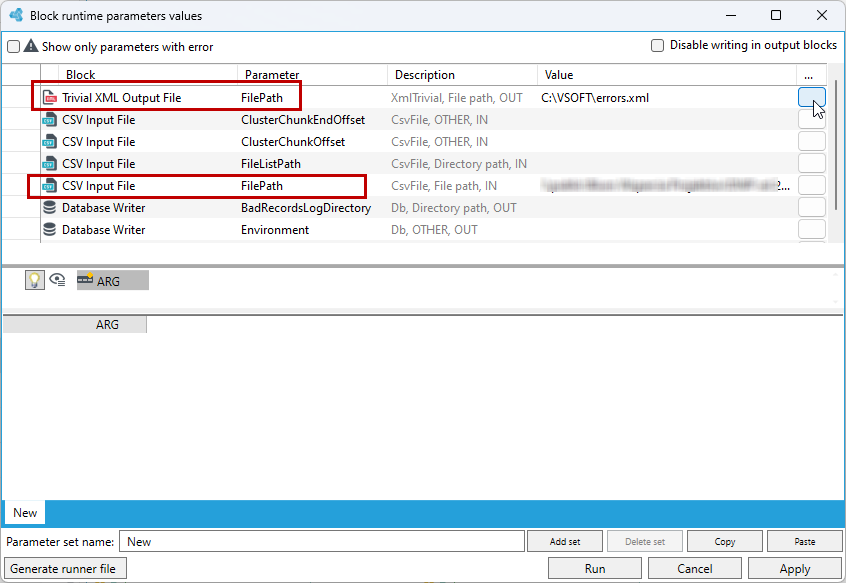
- It is necessary to specify the location of the CSV file to be loaded and where to save the XML file with the error records.
- In our case, as a result of processing, 1994 records were written to the database and 6 records went to the trash and thus to the XML file.
See also
Writing records to the database with certain conditions