Creating a DOCX document by using a template
The following example describes how to create a processing package that will generate a WORD document based on a previously created template and data loaded from a CSV file.
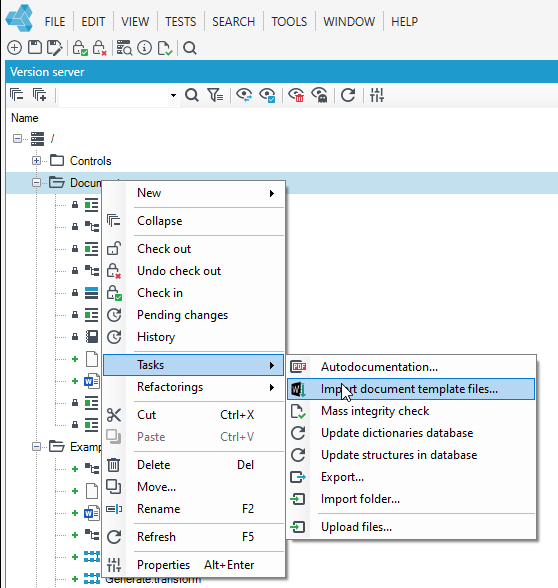
Import documents
- Go to archITekt Studio and load the previously prepared document templates along with the document data structure.
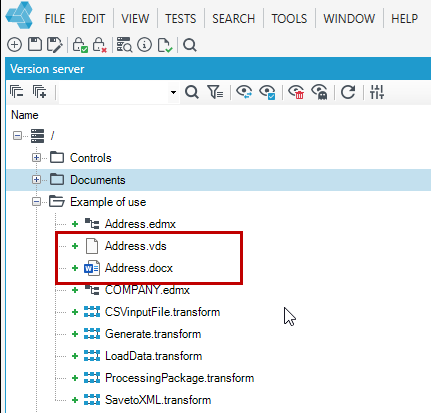
- View in the version server after file import.
Loading a CSV file with address data
- Select the File menu, then New>processing package.
- The package editor and the Toolbox tab will be displayed, along with blocks for creating a graphical representation of the package.
- Drag the block CSV Input File onto the editor.
- Go to the details of the block - double-click on the block or go to the Details tab.
- Load the file and select Yes in the window that appears. It is important to select the correct encoding.
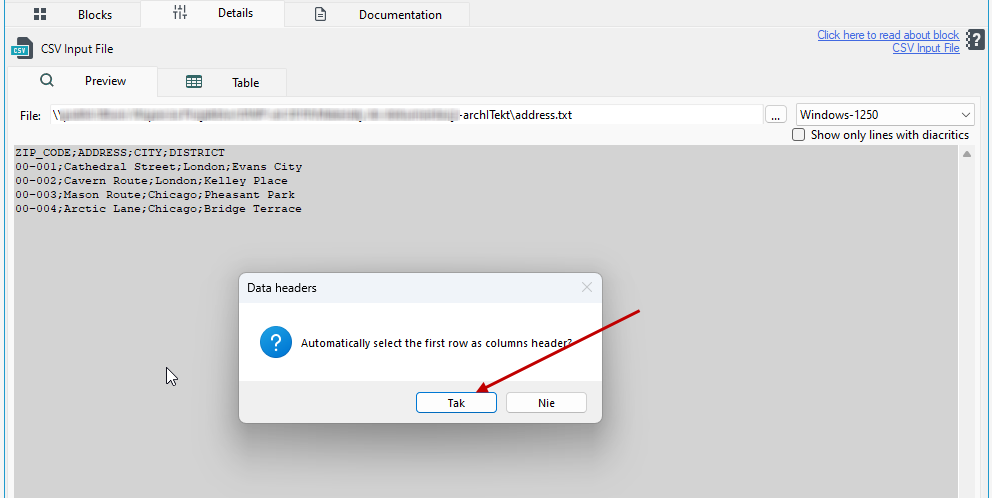
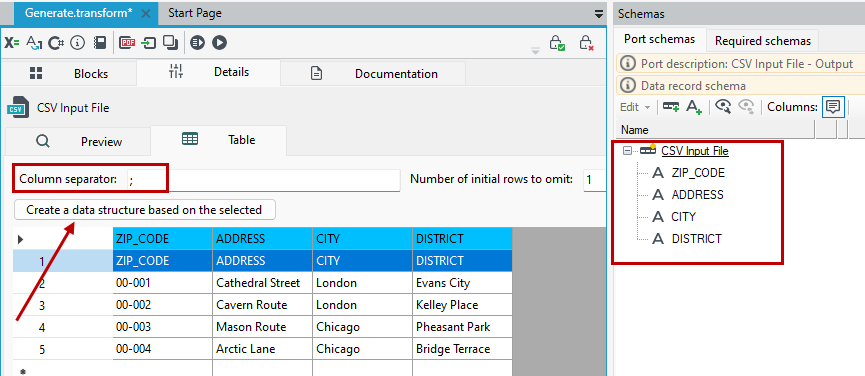
- Next, you need to specify the separator used in the CSV file (in this case,
;) and, in turn, the data structure based on a row from the file (in this case, row number 1). - Go to the Table tab, select the row with the header and select the Create a data structure based on the selected button.
- On the Schemas panel, you can see what the resulting schema looks like after loading the data from the CSV file.
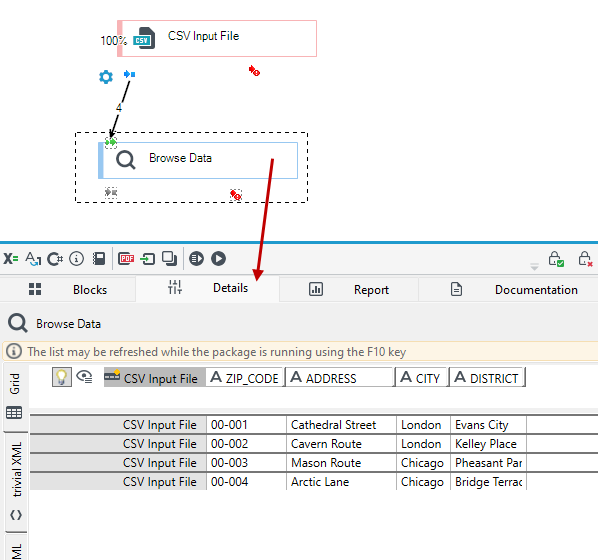
- Add the Browse Data block (the block is located in the Design Tools category) and connect it to the CSV Input File block. This is an optional action to check the result of loading the file.
- Run the package by pressing F5 or the Run option from the top menu.
- After running the package, you can preview the execution results by opening the editor for the Browse Data block.
Document generation
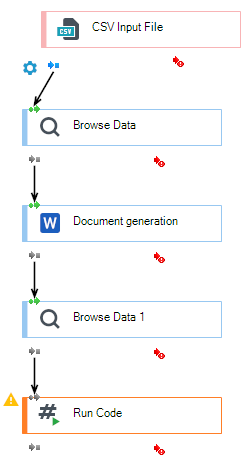
- Add a Document generation block.
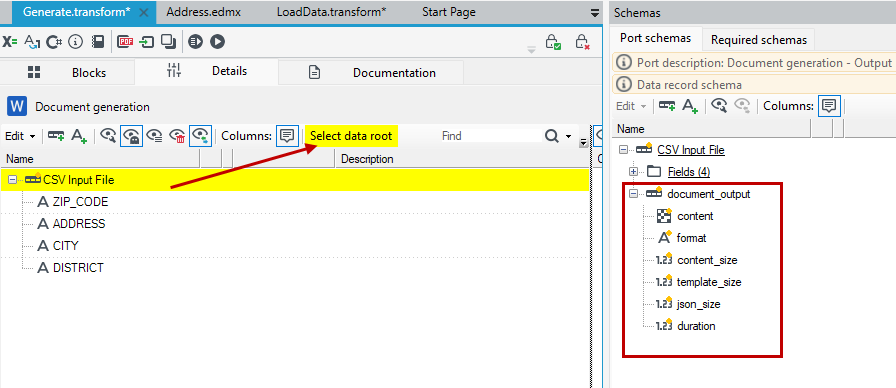
- If it has not been designated automatically then designate the root of the input data, which is the record in the data structure that will contain the source data.
- Go into the details of the block and select the record and then select the Select data root button highlighted in yellow.
- At this point, an additional structure responsible for storing the information needed when creating documents appears.
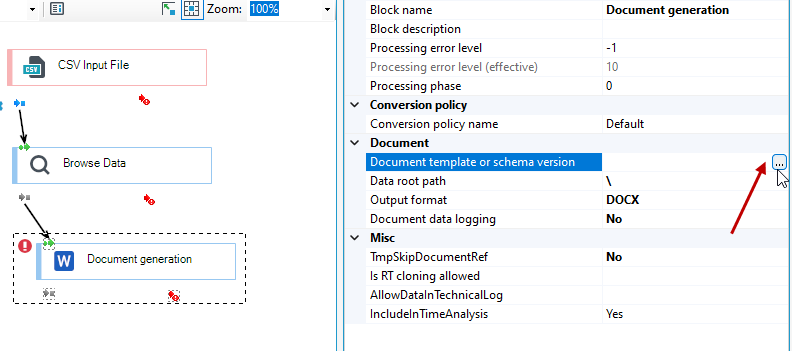
- Go to the Properties of the block and select the template from the version server.
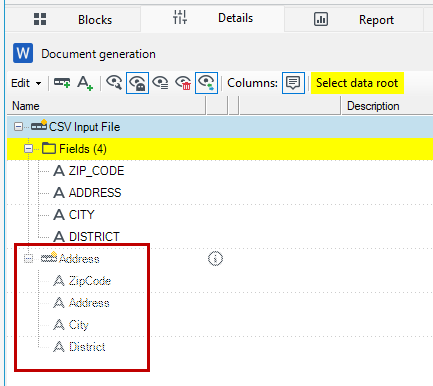
- The structure retrieved from the template appears in the data schema.
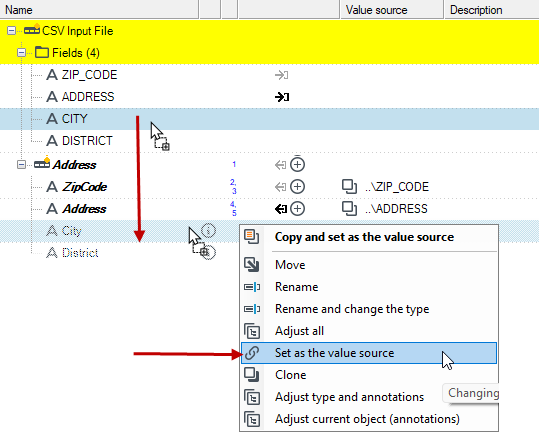
- Next, merge the empty structure from the template file with the data structure from the CSV file.
- Drag a field in the schema from the file to the corresponding field from the template and select Set as the value source from the context menu.
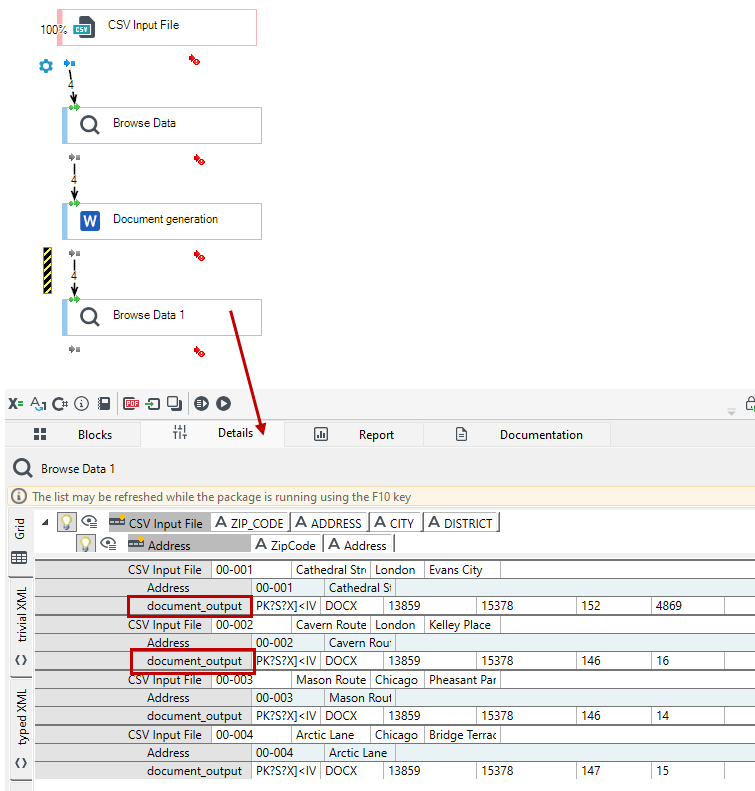
- When processing starts, the data is saved in
document_output\contentThis can be checked by adding the Broese Data block.
Saving the document
- To save the generated files to disk, use the Run Code block (saving the generated documents to disk is not a standard action, usually the results of document generation are saved to the binary fields of the database).
- Drag the block and go to its details.
- Use the
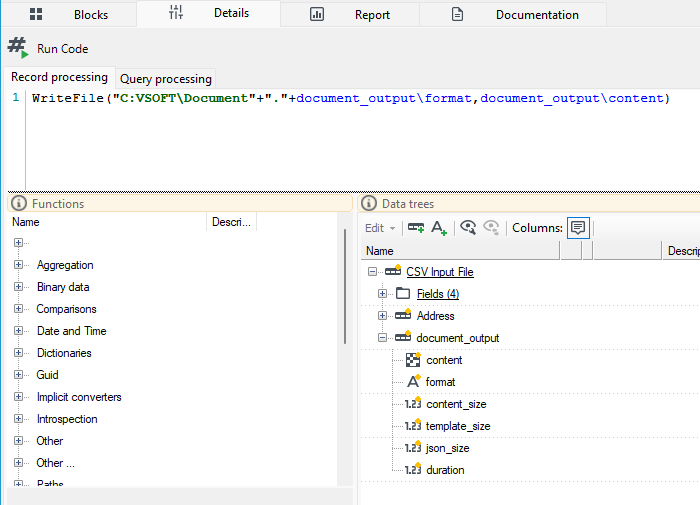
WriteFIle()function and indicate the path and name of the document, as well as the format and binary data of the document:
WriteFile(" C:VSOFT\Document "+" . "+ document_output\format , document_output\content )
Creating a document using data retrieved from a database
In a similar way, you can build a processing package in which the data for the document is fed with data from a database.
- In this example, on the document template, we want to display a report on a client with a list of applications assigned to it.
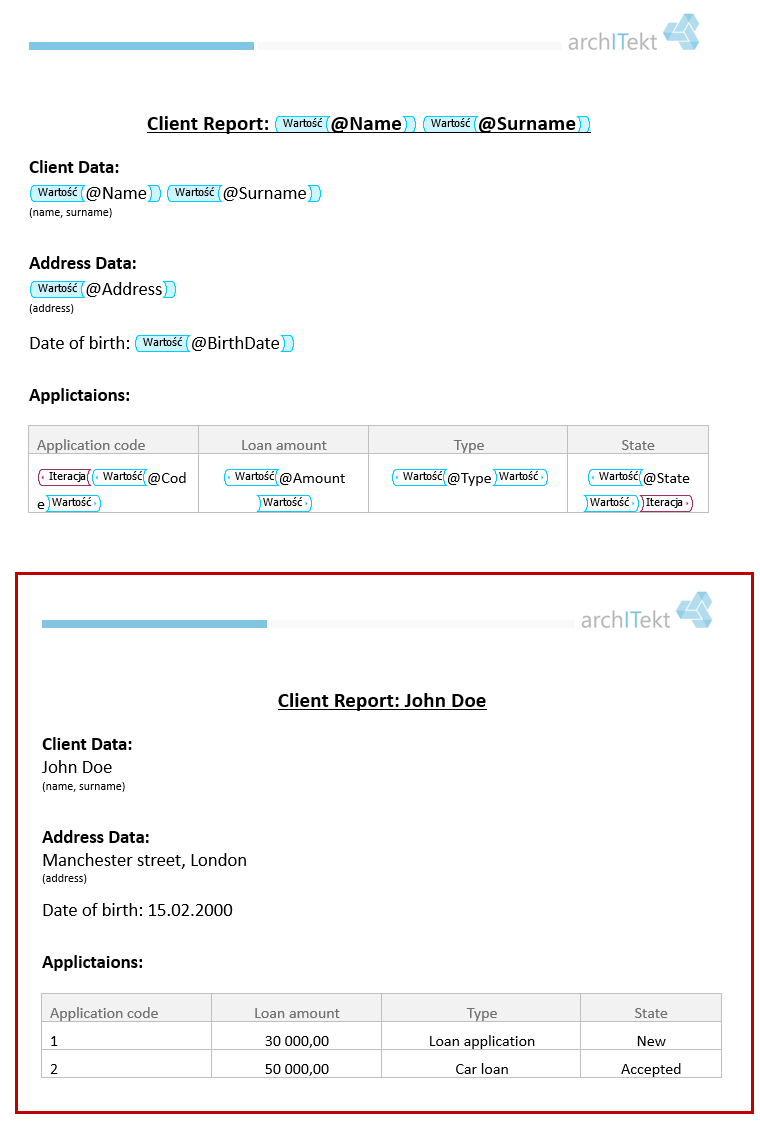
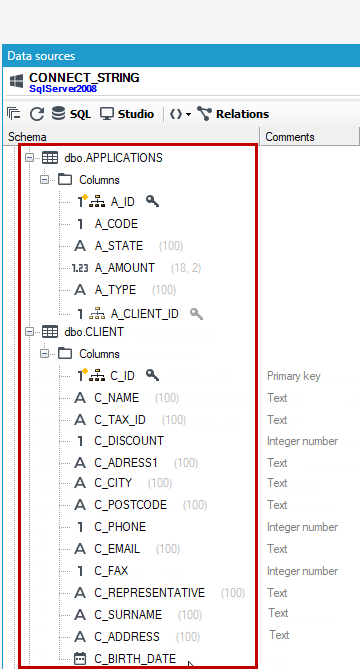
- There is a CLIENT table defined in the database and a APPLICATIONS table that has a relationship to the client data.
- Create a processing package.
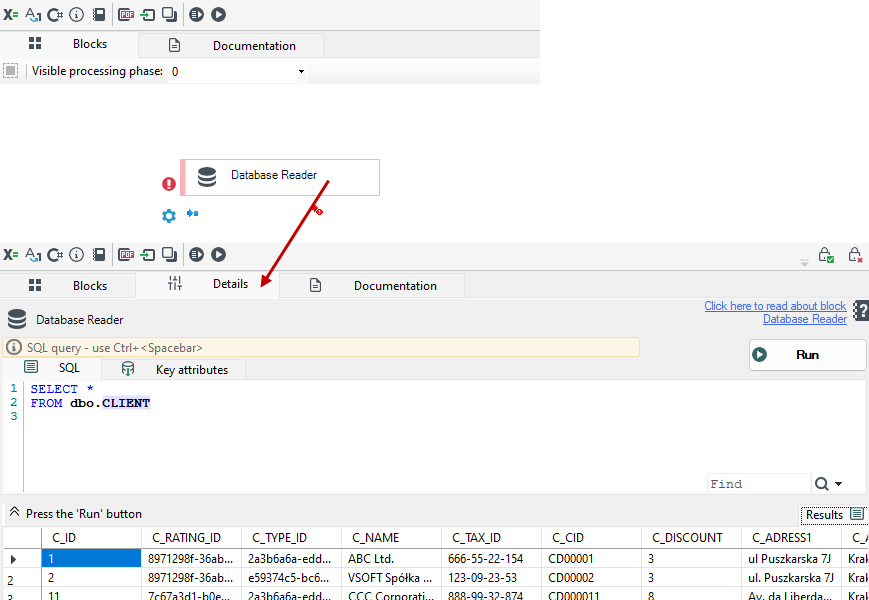
- To retrieve data from the database, drag the Database Reader from database block to the workspace.
- Go to the Details tab of the block and enter an SQL query to retrieve clinet data from the
CLIENTtable.
- Drag the Loop Join block onto the workspace and connect it to the client database reading block.
- The Loop Join block allows you to attach the results of a query from a secondary source to records from the primary source. In this case, we want to append a client's applications from the
APPLICATIONStable to the client's data. - The window Input data - from the 'Input' port shows a preview view of the schema of input data elements coming from the first source. The window next to it allows you to present a query to the port 'QueryInput' - data from an additional source. Only data that meets the set requirements will be passed through.
- Go to the details of the block and move the
C_IDfield to the right side to the output port.
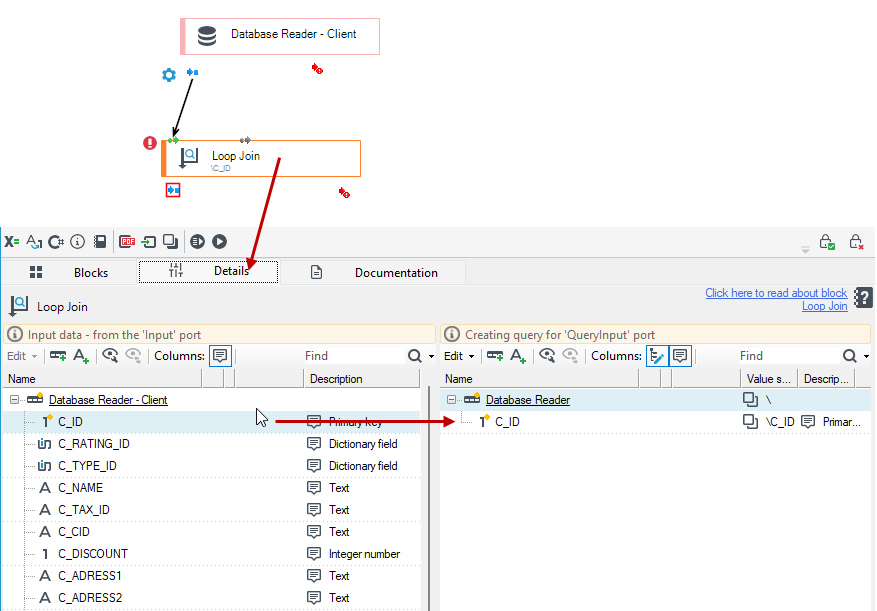
- Drag another Database Reader block to retrieve the application data.
- Go to the details of the Database Reader - Applications block and in the SQL query enter the condition after which the data should be merged with the first data source. We want to display the applications of a particular client in the document. In this case, the data from the table
CLIENTandAPPLICATIONSare related to each other by a relationship. - Drag the appropriate fields into the query or type:
SELECT * FROM dbo.APPLICATIONS where A_CLIENT_ID= #(C_ID)#
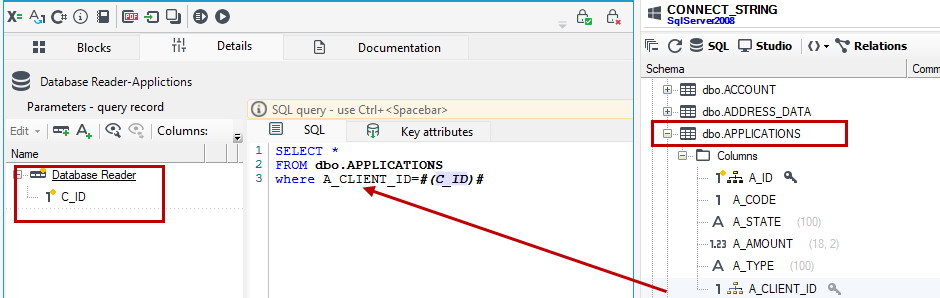
- Then add the Document generation block and indicate the template on the Properties panel and the Run Code block and define where to save the document. Analogous to the previous example.
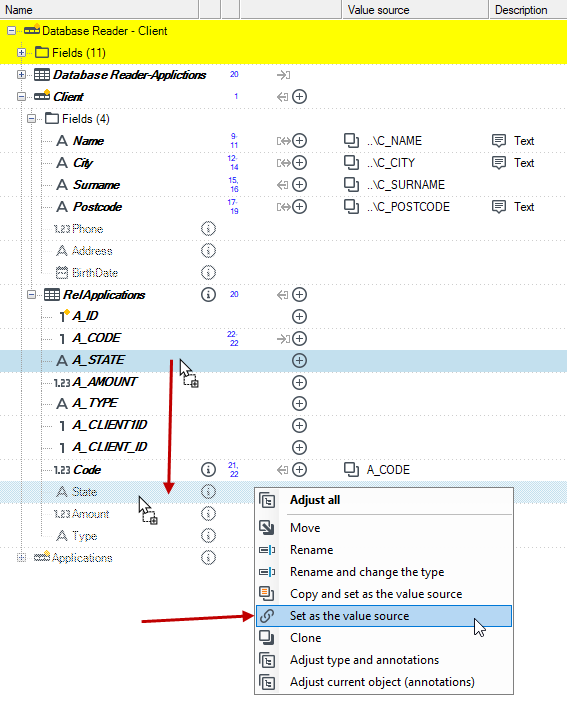
- hen defining the data source for the fields from the document, drag the fields from the data structure to the fields from the document as in the previous case. Fields from
CLIENTdatabase (record Database Reader- Client) to fields from the document structure - Client . - Select Set as the value source from the context menu.
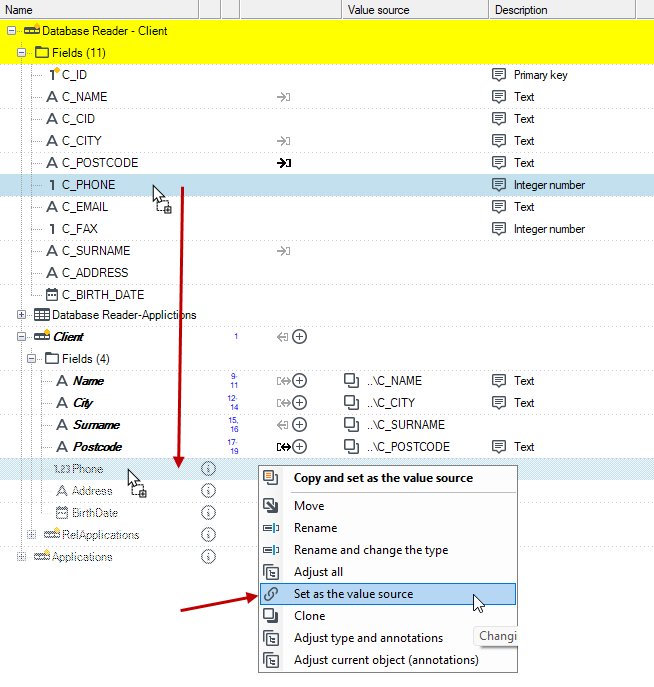
- The record Database Reader - Applications is a multiple record and corresponds to data from the document from the Applications table.
- Here you should remember to map the data to the correct record. This depends on how the fields from the document data structure were inserted into the template. In this case, a relationship was created in the document from the Client table to the RelApplications table and along this path the fields in the tags were inserted into the document.
- In this case, in order to map the data correctly, move the Database Reader - Applications record to the RelApplications record and select Clone.
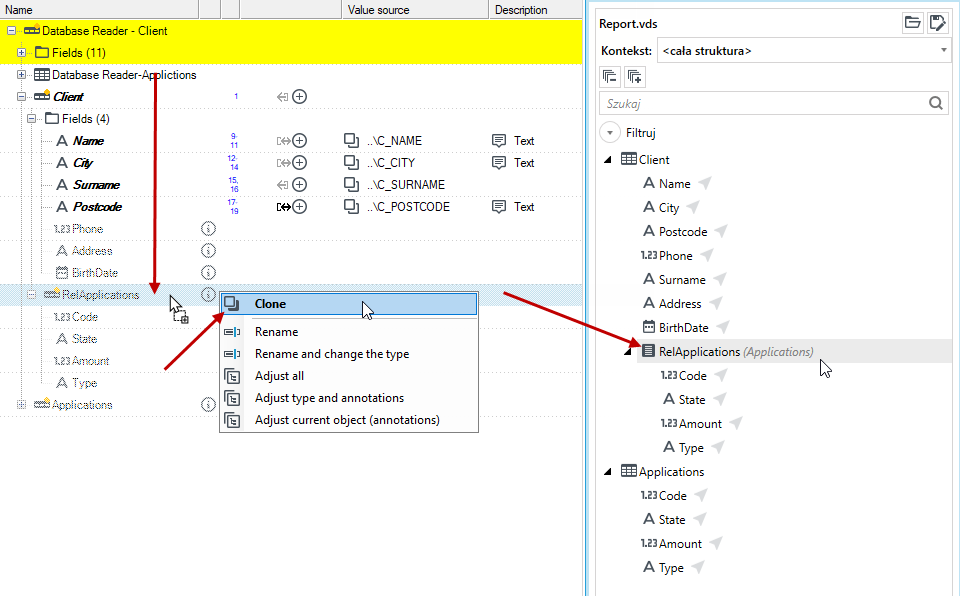
- Then map the cloned data to the fields from the document and select Set as the value source from the context menu.
Save document to database
- Add a Database Writer block (Output blocks category).
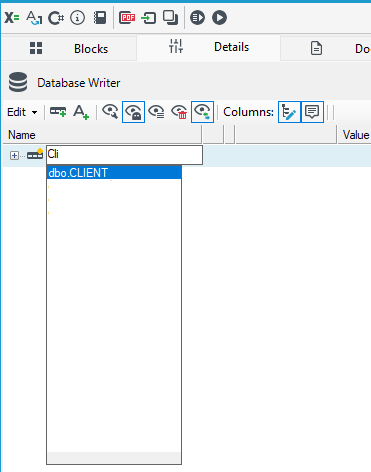
- On the root record, start typing Client and choose which database to save the data to, i.e.
dbo.CLIENT
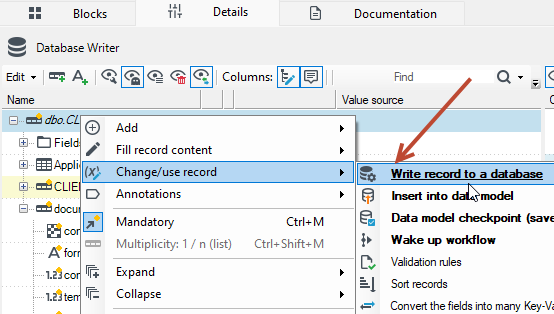
- Mark the Client record with the Write record to a database annotation (from the context menu, select Change/use record). After performing the action, new fields should appear on the tree suggesting what data should be in the database.
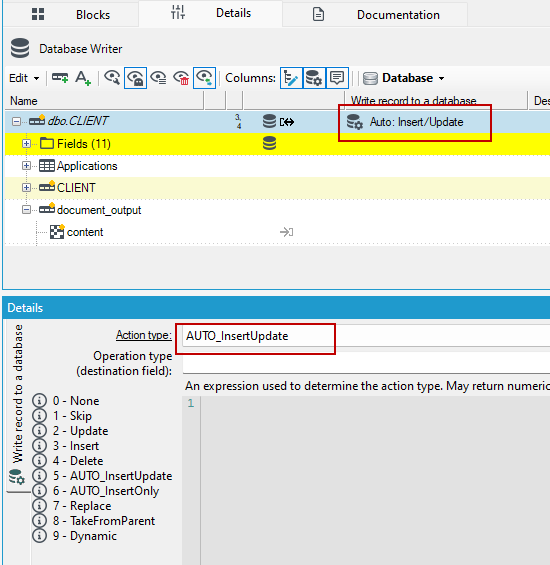
- On the annotation on the database record, select the action type as Auto_InsertUpdate.
- Mark the
C_IDfield with the Primary key annotation. - From the
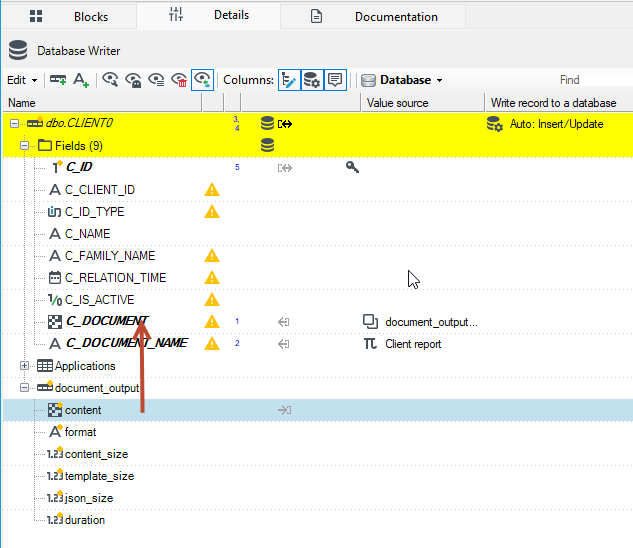
document_outputrecord, drag the binary content field to a field from theC_DOCUMENTclient structure and select Set as the value source from the context menu. - On the
C_DOCUMENT_NAMEfield of the file, you can use the Constant annotation and enter how the document will be named.