Preparation of infrastructure on the OnPremises environment
The application built on the VSoft archITekt platform requires the following components for its production operation:
Application server (single or cluster):
- Physical server or virtual machine.
- Windows 2019 or Windows 2022 operating system with all critical and security patches installed.
- VSoft archITekt Image installed in the version on which the installed application is built.
- The application server has open traffic to the database server (by default port 1433 for MS SQL Server or port 5432 for PostgreSQL).
- The user installing the application must have administrator rights on the server.
The application can run on one of two database engines: MS SQL Server or PostgreSQL. The engine is selected during installation with the dbServerProvider parameter.
MS SQL Server database server:
- MS SQL Server 2019 or later.
- Database engine edition: SQL Express or higher.
- SQL Server Full-Text Search installed.
- The user installing the application must have administrator rights on the database server (they must have the rights to create databases and users on the server).
- When installing the application on SQL Server system accounts, the login and password authentication must be enabled (Mixed Mode Authentication).
PostgreSQL database server:
- A PostgreSQL version supported by the PostgreSQL community (supported versions and their end-of-life dates: https://www.postgresql.org/support/versioning/). Version 16 or later is recommended – the VSoft archITekt platform is tested on versions 16, 17 and 18.
- The standard (community) PostgreSQL distribution is sufficient. No additional extensions or full-text search dictionaries are required.
- The database cluster should use UTF8 encoding. The installer does not specify an encoding or collation when it creates the databases – they inherit the settings of the
template1template. - The user installing the application must be a superuser of the PostgreSQL server (e.g.
postgres). The installer creates roles and databases, transfers database ownership to other roles, and grants default privileges on behalf of other roles. - The
postgresdatabase must exist and the user installing the application must have access to it. The installer uses it to verify the connection to the server. - The application connects to the database only with a login and password (
applicationDbAuthentication=UserPassword). Windows authentication is not supported. - The server must accept TCP connections (the
listen_addressesparameter inpostgresql.conf). Inpg_hba.conf, password logins (thescram-sha-256method is recommended) must be allowed from the application servers and from the computer the installation is run from. - Set the
max_connectionsparameter according to the number of application servers. Each application process keeps its own connection pools to the CONFIG, DATA and SCHEDULER databases. A value of 200 is enough for a typical single-server deployment. - The file-system version server is required (
versionProvider=FileSystem). The database version server is not available for PostgreSQL.
Additional information:
The environment assumes that each server can belong to one or both of the following groups:
- Web - web components are installed on it.
- App - Windows services are installed on it.
In the case of installation on a single-server environment, it should be assumed that the server belongs to both of these groups (both groups of components will be installed on the same server).
In the case of installation on a clustered environment, servers can be freely assigned to the groups.
- VSoft archITekt Image installer automatically installs all its required components (including .NET Framework).
- Upon final installation of the application on the server, the installation mechanism will automatically enable the required Windows roles (a separate set of roles depending on which group the given server belongs to: Web or App).
Target application installer:
- automatically installs a series of web applications supported by IIS on the Web group servers,
- automatically installs a series of Windows services on the servers of the App group,
- automatically creates dedicated users and application databases on the database server.
| Scope of data | Parameter | Parameter name | Comments |
|---|---|---|---|
| Database server | Instance address | dbServer | e.g. mydbserver\SQLEXPRESS (MS SQL Server) or mydbserver (PostgreSQL) |
| User | dbUser | Not required if a domain user is used. | |
| Password | dbPassword | Not required if a domain user is used. | |
| Application server | The name of the server | targetAppServers targetWebServers | Computer name (hostname). |
| Start of reserved ports block. | reservedPortsBlockBegin. | e.g. 48000 | |
| The name by which the application server is visible on the network. | appServerFQDNAddress webServerFQDNAddress | e.g. myserver.local.domain |
Clarifications
Start of reserved ports block used internally by the application (e.g. 48000)
- No other application can use any port in the reserved block.
- The application uses internally a block of "2+N" port size, where N is the number of running document generation service converters (by default 1 converter is running).
- For typical production deployments, it is suggested to reserve 10 ports for the application.
In the case of remote installation of the application
If the user installs the application from their computer on the server remotely, it is required that:
- Traffic from the user's computer to the database server was open (by default port 1433 for MS SQL Server or port 5432 for PostgreSQL).
- Traffic from the user's computer to the application server was open via PS Remoting (by default on port 5985).
- PS Remoting was enabled on the application server.
Enabling PS Remoting on the server with the PowerShell command:
Enable-PSRemoting
When installing remotely on a computer outside of the domain
In the case of remote installation on a server outside of the domain, on the computer from which the remote installation will be launched:
- Add the application server to trusted computers so that you can connect to it with PS Remoting.
Adding the server to computers trusted by PS-Remoting (Note: you must run PowerShell with administrator rights):
Set-Item WSMan:\localhost\Client\TrustedHosts -Value <ComputerName>;[,<ComputerName>]
where <ComputerName> is the server name or IP address or * (* means any address)
Technical data to be provided during installation:
| Scope of data | Parameter | Parameter name | Comments |
|---|---|---|---|
| Application server | Server name or IP address | targetAppServers targetWebServers | A connection will be made to this address via PS-Remoting. |
Explains
The value of the targetAppServers and targetWebServers parameters when installing the application outside of the domain and it is not possible to connect to the server using its name ("computername") should be entered in the format <computername>:<name or ip address> where <name or ip address> is the address used for connection to the server with PS-Remoting.
Example of use:
-targetAppServers "myserver4: 13.95.136.102" - targetWebServers "myserver5: 40.68.91.205"
In case of installation with SSL certificates
In case of installation of the application with the https protocol (secured with SSL certificates), the following is required:
placing an SSL certificate on the server:
- in the "LocalMachine\My" container
- together with a private key
- issued to the name under which the application server will be visible in the network
Technical data to be provided during installation:
| Scope of data | Parameter | Parameter name | Comments |
|---|---|---|---|
| Application server | Security type | securityMode | SSL |
| Certificate thumbprint | appServer_HttpsCertificate webServer_HttpsCertificate | Thumbprint of the SSL certificate usedL |
Example of use:
-appServer_HttpsCertificate "0000000000000000000000000000000000000000"
Additional information:
- In some versions of Windows, when copying the certificate thumbprint from the system window, a non-printable character is copied at the beginning of the text. Be sure to delete it.
Best practices
When using SSL, it is also a good practice to enable the HSTS (HTTP Strict Transport Security) flag for a web page. The flag forces the user's browser to connect to a given website using HTTPS only .
Setting this flag affects all applications running on a given website. It will be possible to connect to each of them using HTTPS only.
The HSTS flag in the IIS server can be enabled:
- using the IIS configuration management module
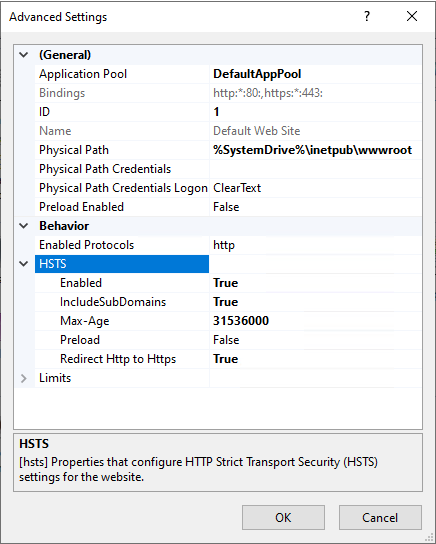
- or by using the PowerShell script
Import-Module WebAdministration
$siteName = "Default Web Site"
Set-ItemProperty "IIS:Sites$siteName" -Name "HSTS.enabled" -Value $true
Set-ItemProperty "IIS:\Sites$siteName" -Name "HSTS.max-age" -Value 31536000
Set-ItemProperty "IIS:\Sites$siteName" -Name "HSTS.includeSubDomains" -Value $true
Set-ItemProperty "IIS:\Sites$siteName" -Name "HSTS.redirectHttpToHttps" -Value $true
It is also advisable to install a mechanism that redirects traffic from http to https in the IIS server using the UrlRewrite add-on. To do this, you need to:
- Install the UrlRewrite add-on from https://www.iis.net/downloads/microsoft/url-rewrite
- Add in the root directory of IIS the configuration file C:\inetpub.Config with the contents:
<configuration>
     <system.webServer>
        <rewrite>
            <rules>
                <rule name="Redirect to https" stopProcessing="true">
                    <match url="(.*)" />
                    <conditions>
                        <add input="{HTTPS}" pattern="^OFF$" />
                    </conditions>
                    <action type="Redirect" url="https://{HTTP_HOST}{REQUEST_URI}" appendQueryString="false" />
                </rule>
            </rules>
        </rewrite>
</system.webServer>
 </configuration>
Installation that is to run under a domain account
By default, applications use the standard built-in Windows accounts to run the pool of web applications and Windows services. The installed application can also run on the indicated domain account. To this purpose, information about this account must be provided.
Technical data to be provided during installation:
| Scope of data | Parameter | Parameter name | Comments |
|---|---|---|---|
| Application server | Domain username | applicationCredentialUser | In the format DOMAIN\user |
| Domain user password | applicationCredentialPassword | ||
| Database | The application authenticating method in the database | applicationDbAuthentication | Selecting one of the values: UserPassword or Windows |
Database server configuration
If you use the MS SQL Server database engine, no additional configuration is required.
If using the PostgreSQL database engine, you need to:
- Modify the
pg_ident.conffile adding the mapping of local users and domain users to PostgreSQL accounts according to the documentation of the database engine.
The following is an example of adding a mapping for the MYDOMAIN domain in the pg_ident.conf file
The following rule will cause database user names to be created based on domain user names, omitting the suffix in the form of the domain name (i.e. "sample.user@mydomain" will be mapped to the database user "sample.user")

The domain name can be obtained by running the PowerShell command Nazwę domeny można uzyskać uruchamiając polecenie PowerShell $env:USERDOMAIN
- Modify the
pg_hba.conffile by adding the authentication rule defined in the previous section.
The following is an example of adding the authentication rule from the previous point to the pg_hba.conf file.

The configuration changes will take effect after restarting the database server.
Explanations
If the application components are launched under a domain account, it is possible to connect the application to the database with Windows authentication. In this case, the installer does not create dedicated user accounts on the database server.
Installation on a clustered environment
Applications can be installed on a clustered environment, optionally it is also possible to separate the components of the presentation (web) and application (app) layers into separate groups of servers.
Each server can belong to either one or both groups.
In the case of installation on a clustered environment, each server must meet the requirements as in the case of installation in a single-server environment - described at the beginning of this chapter.
For the installation on a clustered environment it is additionally required to:
- Open traffic between servers, for the reserved port block used for internal communication by the application.
- Create cluster addresses for both server groups.
- Configure LoadBalancer on the Web group servers. For this purpose, you can use the built-in Windows LoadBalancer or use a third-party solution.
- Configure the failover cluster on App group servers.
Technical data to be provided during installation:
| Scope of data | Parameter | Parameter name | Comments |
|---|---|---|---|
| Web layer servers | The name by which the web layer servers are visible on the network. | webServerFQDNAddress | e.g. webserver.local.domain |
| The names of all servers in this group. | targetWebServers | Computer name (hostname) | |
| App layer servers | The name by which the App layer servers are visible on the network. | appServerFQDNAddress | e.g. appserver.local.domain |
| The names of all servers in this group. | targetAppServers | Computer name (hostname) |
When using the automatic e-mail sending functionality
If the end application being installed uses the automatic e-mail sending functionality, it is required to configure the SMTP connection. It is required to:
- Open traffic from the level of the App group servers to the mail server on the port used by SMTP.
Technical data to be provided during installation:
| Scope of data | Parameter | Parameter name | Comments |
|---|---|---|---|
| Server SMTP | The address of the SMTP mail server | configKeys/ common.param.smtp_server | |
| SMTP service port | configKeys/ common.param.smtp_port | Default value: 25 | |
| The method of securing the connection | configKeys / common.param.smtp_security | Default value: Auto Acceptable values: None, Auto, SslOnConnect, StartTls, StartTlsWhenAvailable | |
| A flag to ignore some mail server certificate errors | configKeys/ common.param.smtp_ignore_certificate_errors | Default value: None Acceptable values: None, All, RemoteCertificateNotAvailable,RemoteCertificateNameMismatch, RemoteCertificateChainErrors. You can combine multiple flags by separating them with a comma. | |
| Username for the SMTP service | configKeys/ common.param.smtp_username | ||
| User password for the SMTP service | configKeys/ common.param.smtp_password |
Detailed information on permissible parameter values can be found in the technical documentation in chapter: SMTP configuration - common.param.smtp_
When logging in via AD, enable SSO (Single Sign On)
If the installed application uses the authorization and authentication with AD, the connection with the AciveDirectory provider should be configured.
It is required to:
- Open traffic from the Web and App group servers to the ActiveDirectory server.
Technical data to be provided during installation:
| Scope of data | Parameter | Parameter name | Comments | --- | --- | --- | --- | Common parameters when connecting to AD | Connection to the AD server. | configKeys/ common.connection.provider_ad | LDAP://[ldap_server]:[port] eg.: LDAP://server_address:389 LDAPS LDAP://server_address:636 The connection string should always begin with capital letters: LDAP | Username with which we connect to AD. | configKeys/ common.param.provider_ad_user | Empty values in the user and password fields will enforce connecting to AD as the user running the application. | Password of the user with which we connect to AD. | configKeys/ common.param.provider_ad_password | Empty values in the user and password fields will enforce connecting to AD as the user running the application. | Authentication of users | Name of the login provider. | configKeys/ common.param.user_provider | In case of a connection with AD, the value of AD should be given. Valid values: AD, VIP, VIPService, FAKE. | User authorization | Name of the role provider. | configKeys/ common.param.role_provider | In case of a connection with AD, the value of AD should be given. Valid values: AD, VIP, VIPService, FAKE. | Definition of the role container in AD from which the roles will be retrieved (narrowing). | configKeys/ common.param.provider_ad_container | AD container path, e.g. "OU = Security Groups, OU = Accounts and auxiliary groups, DC = mydomain, DC = local" (hint: use AD Explorer). |
| Scope of data | Parameter | Parameter name | Comments |
|---|---|---|---|
| Common parameters when connecting to AD | Connection to the AD server. | configKeys/common.connection.provider_ad | LDAP://[ldap_server]:[port] e.g.: LDAP://server_address:389 LDAPS LDAP://server_address:636 The connection string should always begin with capital letters: LDAP |
| Username with which we connect to AD. | configKeys/common.param.provider_ad_user | Empty values in the user and password fields will enforce connecting to AD as the user running the application. | |
| Password of the user with which we connect to AD. | configKeys/common.param.provider_ad_password | Empty values in the user and password fields will enforce connecting to AD as the user running the application. | |
| Authentication of users | Name of the login provider. | configKeys/common.param.user_provider | In case of a connection with AD, the value of AD should be given Valid values: AD, VIP, VIPService, FAKE. |
| User authorization | Name of the role provider. | configKeys/common.param.role_provider | In case of a connection with AD, the value of AD should be given. Valid values: AD, VIP, VIPService, FAKE. |
| Definition of the role container in AD from which the roles will be retrieved (narrowing). | configKeys/common.param.provider_ad_role_container | Ścieżka kontenera AD, np. „OU=Grupy Zabezpieczeń, OU=Konta i grupy pomocnicze, DC=mydomain, DC=local” (hint: użyj AD Explorera). | |
| Definicja kontenera użytkowników w AD, z którego będą pobierani użytkownicy (zawężenie) | configKeys/common.param.provider_ad_user_container | Ścieżka kontenera AD, np. „CN=Users,DC=mydomain,DC=local” (hint: użyj AD Explorera). W przypadku pustej wartości wyszukiwanie obejmie całe AD |
Additionally, if you want to enable SSO (Single Sign On) login, you must provide the following parameters:
| Scope of data | Parameter | Parameter name | Comments |
|---|---|---|---|
| Common parameters when connecting to AD | Showing SSO login link on standard login page. | configKeys/ www.param.windows_authentication | To show the SSO login link, enter the value "true". |
When creating a project, enable the SSO (Single Sign On) functionality by specifying the "-FeatureSSO On" parameter.
The use of SSO login in the application also requires two conditions:
- The address of the server to which you connect must be treated as the address of your local intranet. The server address can be added to the Intranet zone by modifying Internet Properties:
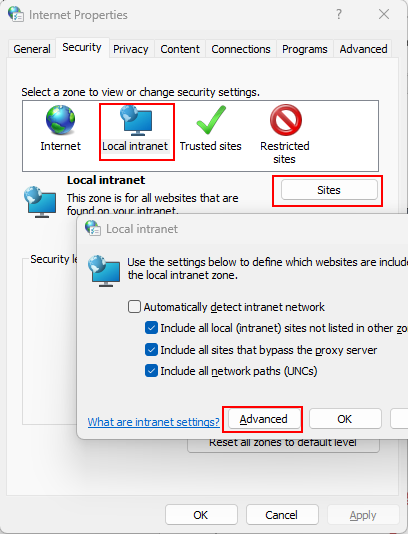
- or it can be added automatically at the domain level - for example, as described at https://learn.microsoft.com/en-us/entra/identity/hybrid/connect/how-to-connect-sso-quick-start#why-you-need-to-modify-user-intranet-zone-settings
(Note: addresses added this way are respected by Edge and Chrome browsers)
- It is also necessary to correctly configure Service Principal Names for SSO. How to configure SPNs is described here, for example: https://www.microsoft.com/en-us/dynamics-365/blog/it-professional/2009/08/06/configuring-service-principal-names/
In case of logging in through Active Directory Federation Services (AD FS)
If the end application uses AD FS service authentication then:
- configure authentication and authorization through the selected provider (AD, VipService, etc.) and ensure that the logins of users logging in through ADFS are also in the selected provider,
- add the application to the trusted providers in the AD FS service.
The mechanism for logging in via AD FS works as follows:
- The user logs into AD FS with a login and password.
- In the configured user provider, based on the user's login, the user's identifier is found (if not found, the user is automatically redirected to the AD FS logout page).
- The found user identifier is used in the configured privilege provider to retrieve user roles.
Technical data required to be provided during installation
| Scope of data | Parameter | Parameter name | Comments |
|---|---|---|---|
| Common parameters when connecting to AD FS | Enabling authentication by AD FS services | configKeys/common.param.adfs_authentication | To show the SSO login link, enter the value "true". |
| The URL of the xml file with the metadata of the AD FS service | configKeys/common.param.adfs_metadata | Adress https e.g. https://[serwerADFS]/FederationMetadata/2007-06/FederationMetadata.xml |
Getting the URL of the xml federation metadata
We can get the relative address of the metadata xml file from the AD FS management window on the server by selecting AD FS ->Service ->Endpoints. The URL should be visible in the Metadata section.

Adding a WEB application to a trusted entity
- To add an ending application to a relying party trusts, select AD FS -> Trust Relationships -> Relying Party Trusts in the AD FS management window on the server and select -> Add Relying Party Trust in the action window.
- In the wizard for adding a trust for a relying party we click start and select the option to manually enter data about the relying party organization.
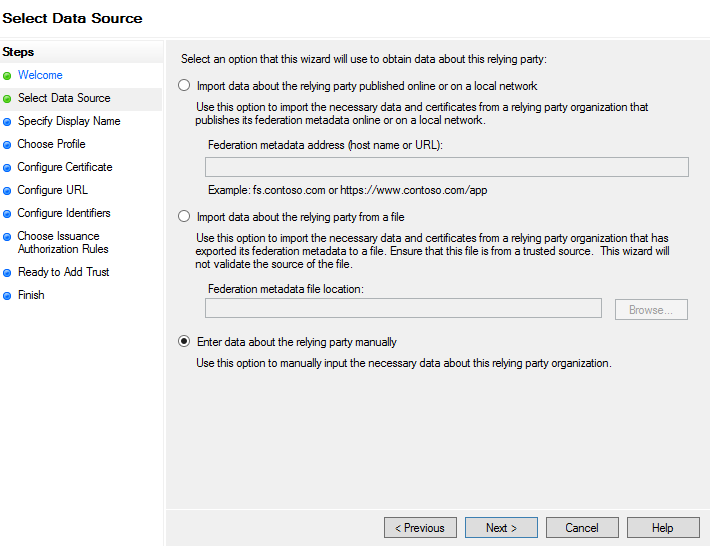
- In the Specify display name section, we enter a name that identifies the relying party.
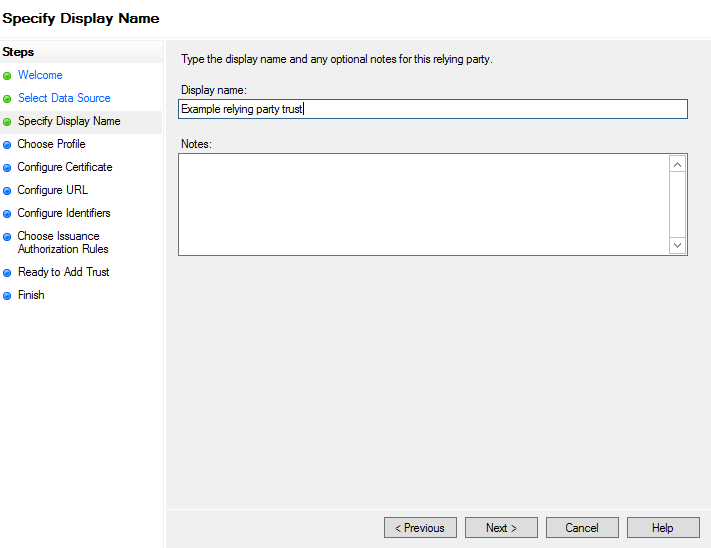
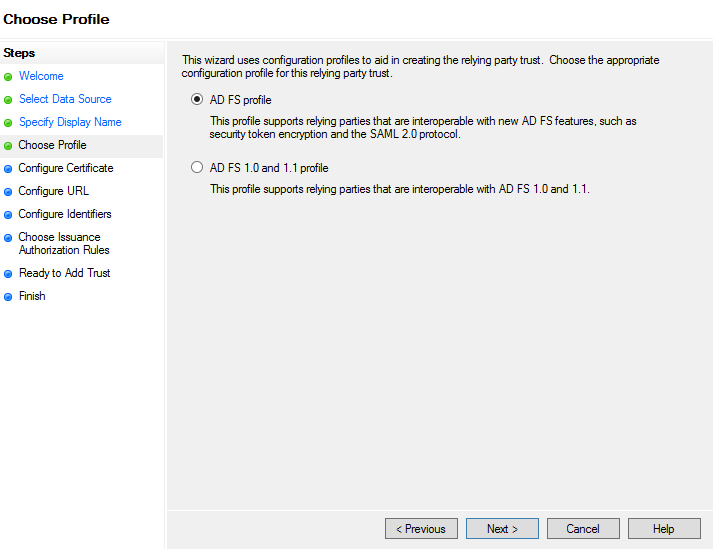
- In the Choose profile section, we select the AD FS profile appropriate for the environment.
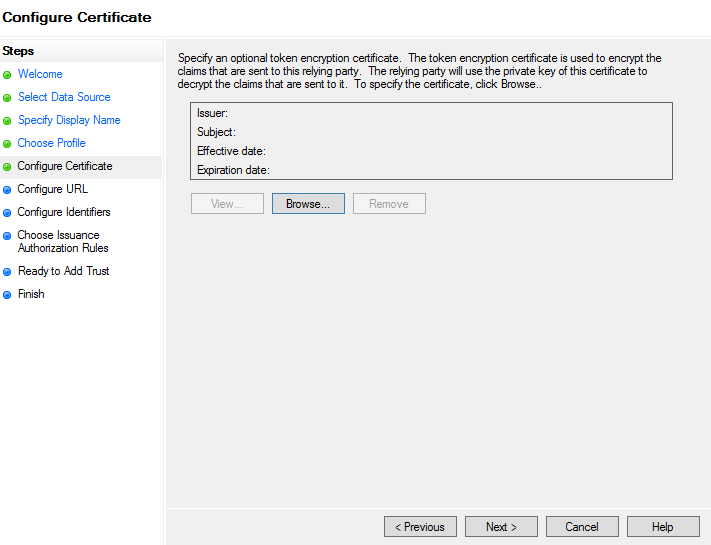
- In the Configure Certificate section, we use the default settings.
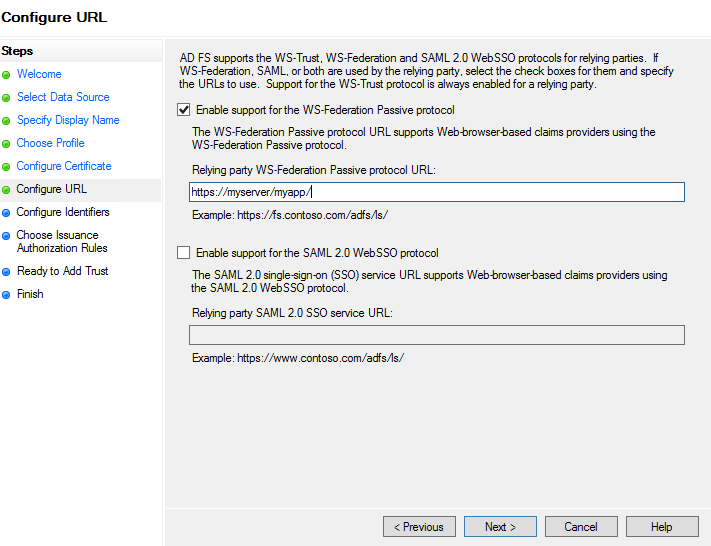
- In the Configure URL section, we check the checkbox Enable support for the WS-Federation Passive protocol and enter the URL of the end application ending with a slash.
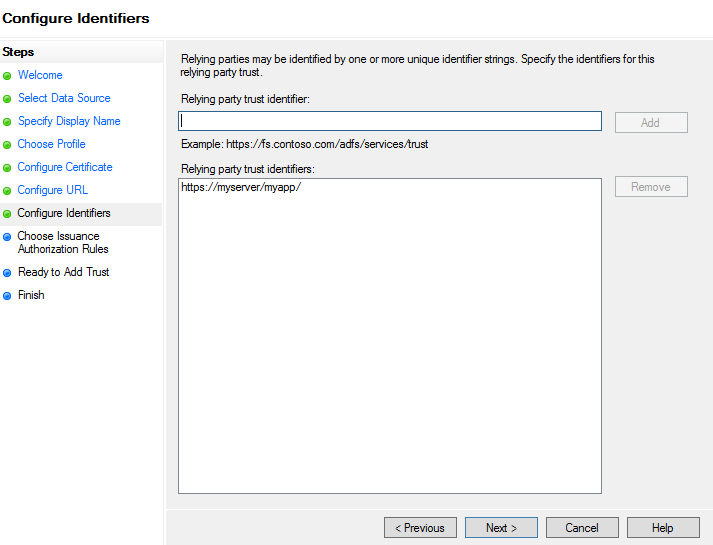
- In the Configure Identifiers section, we use the default settings.
- In the Choose Issuance Authorization Rules section, we select Permit all users to access this relying party.
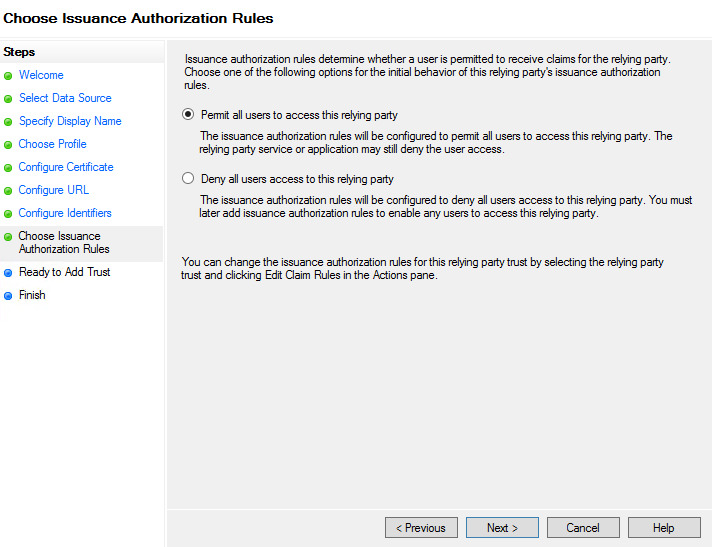
- In the section Ready to Add Trust we make sure that the configuration is correct.
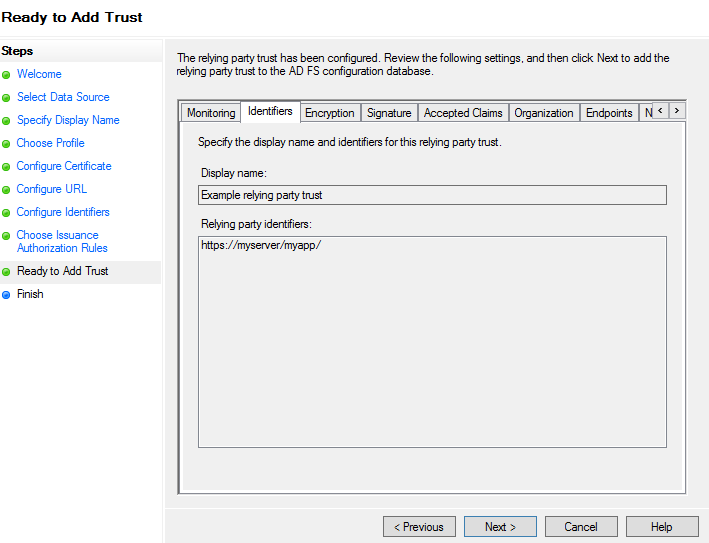
- In the final section, we check the option to automatically open the rule credentials editing dialog.
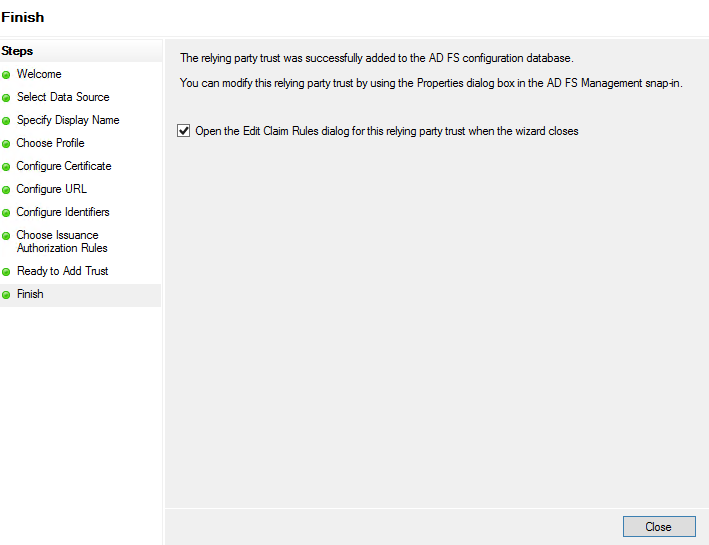
- In the new wizard window, we press the Add rule button.
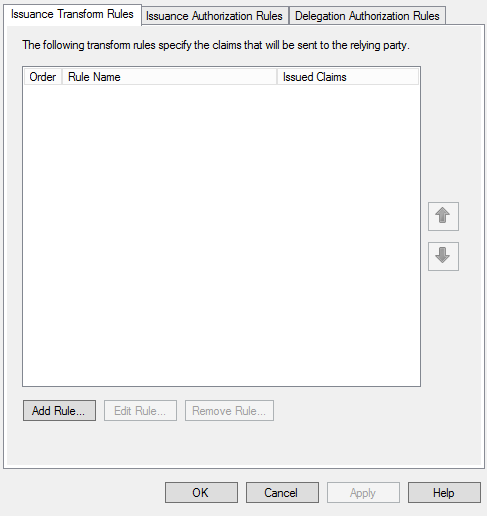
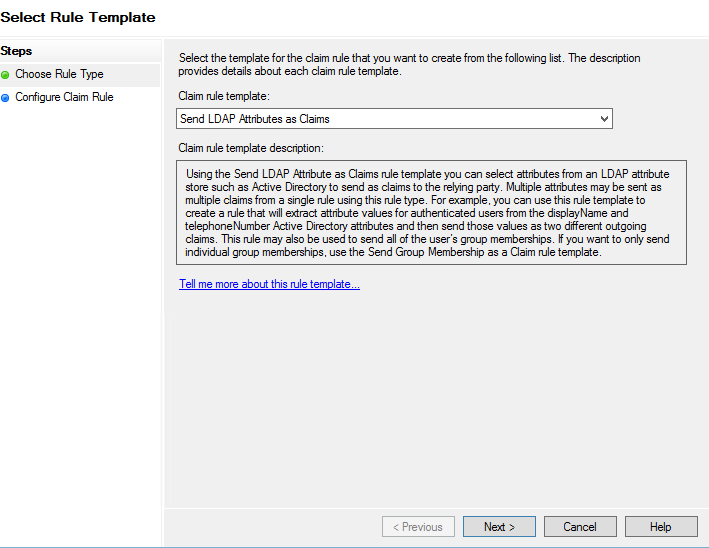
- In the Choose Rule Type section we select Send LDAP Attributes as Claims.
- In the rule configuration section, we fill in the name of the rule, the value for the attribute store and the mappings of LDAP attributes to outgoing credential types according to the following table.
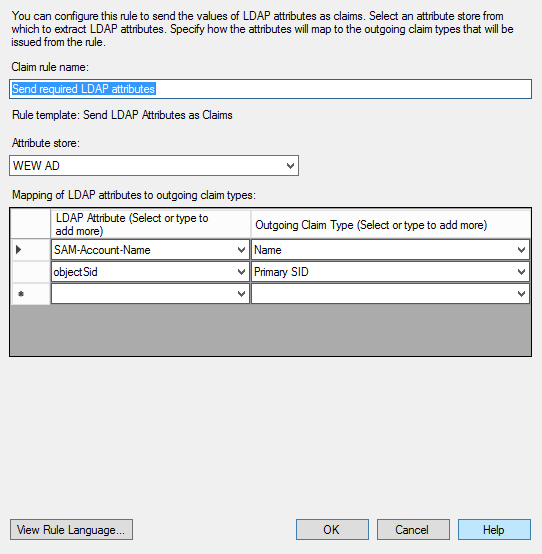
The table contains the mappings that are required for authentication by AD FS services.
| LDAP attribute | Outgoing credential type | Comments |
|---|---|---|
| SAM-Account-Name | Name | The SAM-Account-Name attribute is the user's login, based on which identifier will be searched for in the user provider. |
| objectSid | Primary SID | The objectSid attribute contains the user's unique SID, the name may be different depending on the AD configuration. |
When installing on a FailOver cluster
VSoft archITekt installation scripts allow you to install services on a FailOver cluster. In order to install on a cluster, you need to provide information to the installation scripts:
- Cluster name
- Name of the group (name of the role of type "Generic service" to which archITekt services will be added).
The installation scripts automatically create resources in the specified role of type "Generic service" for each installed service. In the uninstall process, the resources are removed from the role.
When installing archITekt on a FailOver cluster, application services are installed in manual mode. Starting/stopping them is done using the FailOver cluster API.
Application time zone
The application running on VSoft archITekt can run in a different time zone than the one configured on the server. This means that for the application, the system time will be the same as the configured time, regardless of the time zone in which the application server and database server operate.
The above configuration option is important when we run the application in a containerized VSoftCloud cloud environment, in which all servers operate based on UTC time, and many applications are running on one server, each of which can work in a different time zone.
To change the time zone in which the application is to operate, add a configuration setting (modify Config Key)
common.param.systemtimezone
and the value should be given:
- the time zone in accordance with the IANA standard (https://nodatime.org/TimeZones ; https://www.iana.org/time-zones), eg "Europe / Warsaw".
- Or the text "Local" if a time zone compatible with the server's time zone is to be used.
Failure to provide this entry will work as if "Local" was entered - the server's time zone will be used.
Storing sessions in the database
By default, the application stores user session data in memory. This means that when the web application is restarted, users are logged out of the application. It is possible to change this behavior.
User sessions can be stored in the database, which will mean that they will not be logged out if the web application restarts.
To change how sessions are stored, add a configuration setting (modify Config Key)
www.param.session_mode
The variable takes values:
- storing the session in memory (default setting): InProc
- storing sessions in a database (DATA base):
- when the application runs on a SQL Server database server: SQLServer
- when the application runs on a PostgreSQL database server: Custom