Tools menu functionality
The Tools menu provides functionalities that are used when working with individual component and general options that you can use separately from a given element.
Those are:
- applications properties - to define permissions, add new entries in the selected language version,
- configure application,
- mass version validation,
- script generation and updating of data structures,
- updating of the dictionary database,
- configuring additional options,
- defining business parameters,
- project management – see: Launcher
- export the package,
- viewing logs - log list and a search engine that allows you to search for the entries you are interested in,
- database profile - allows you to generate a file - a report from the data profile, saved in the indicated place,
- data generation - allows you to enter test data into the database,
- tables’ migration package generation - allows you to create a package or task hierarchy for data migration between the source and target systems with a similar structure.
- process manager - enables displaying the list of executed processes - see: Workflow
- preview of the exported process flow - allows you to load a previously exported process flow - See: Workflow
Application properties - Defining permissions
In the Application properties window the Permissions section contains the defined Special Pages and System permissions that are necessary for the proper functioning of the application. These permissions determine the access, depending on the Administrators or Users role, to edit business parameters and view logs, as well as access to special pages such as Change Password or User Account. By default, the Administrators role has access to all options. You can change the scope of permissions or add new ones.
You cannot remove predefined permissions from the System folder and Special Pages. They are already used in predefined forms and lists (in the System directory) that allow you to display parameters and logs. Still, special pages can be used when creating the application menu.
- Select Permissions and multilingualism from the Tools menu.
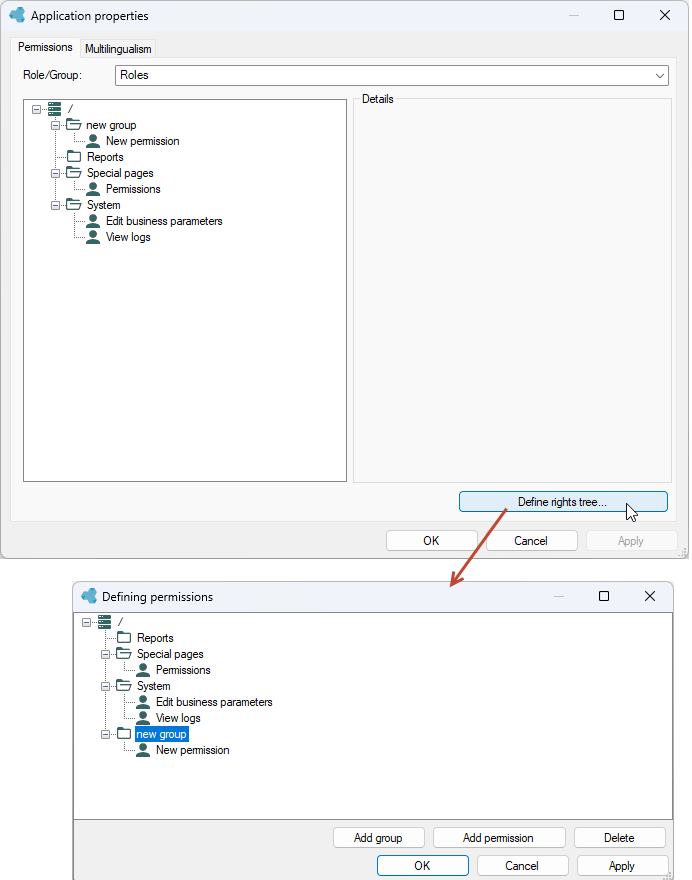
- Select Define rights here.
- In the next window define your own permissions (Add group and Add permission).
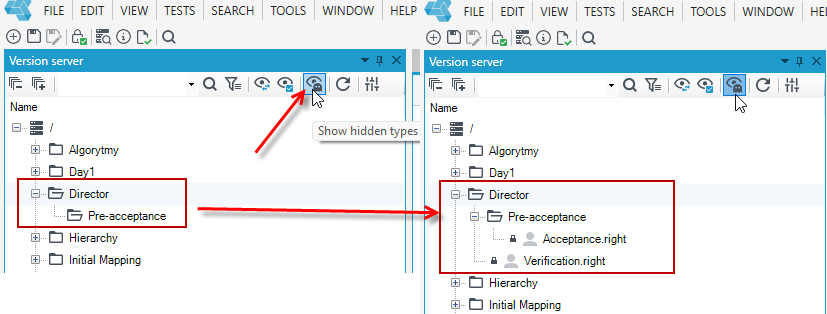
- The added permission hierarchy is reflected in the version server. If you add permissions or a group of permissions, etc. here, these files are also available on the Version server panel. To make individual permission files visible, enable the Show hidden types option.
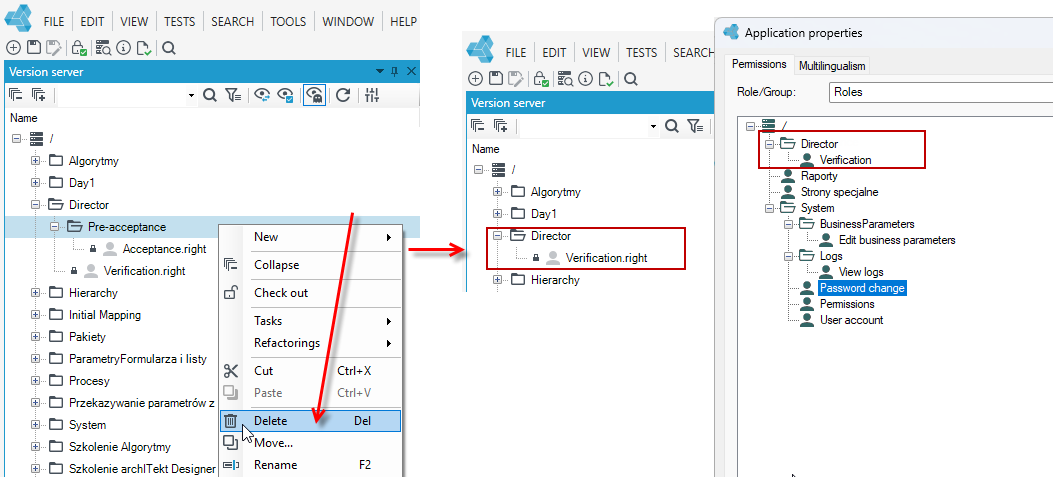
- If you rename, delete a directory, permission, or move a given permission at the version server panel level, then the changes will also be updated in the permission definition window.
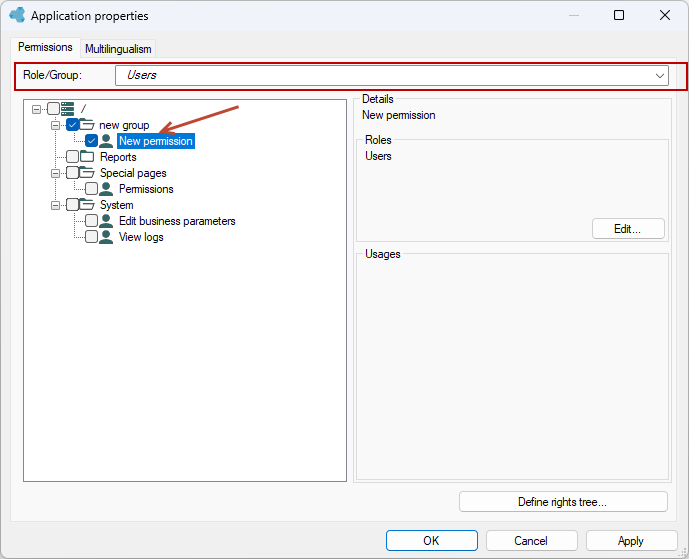
- Now you can assign defined permissions to the Administrators or Users role (if you have other roles defined in the system, also to other roles). Select the role for which you want to modify permissions.
- In the permission tree, check or unchecked a given permission.
You can now use the new permissions for example on a form in the Permission section and define the availability scope of the form for a user with the appropriate permissions.
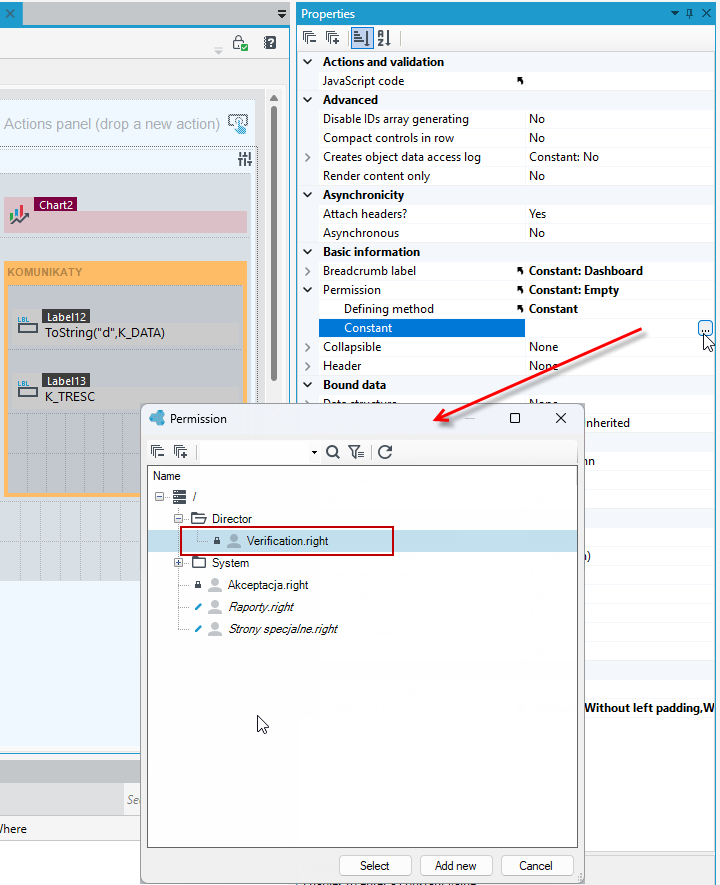
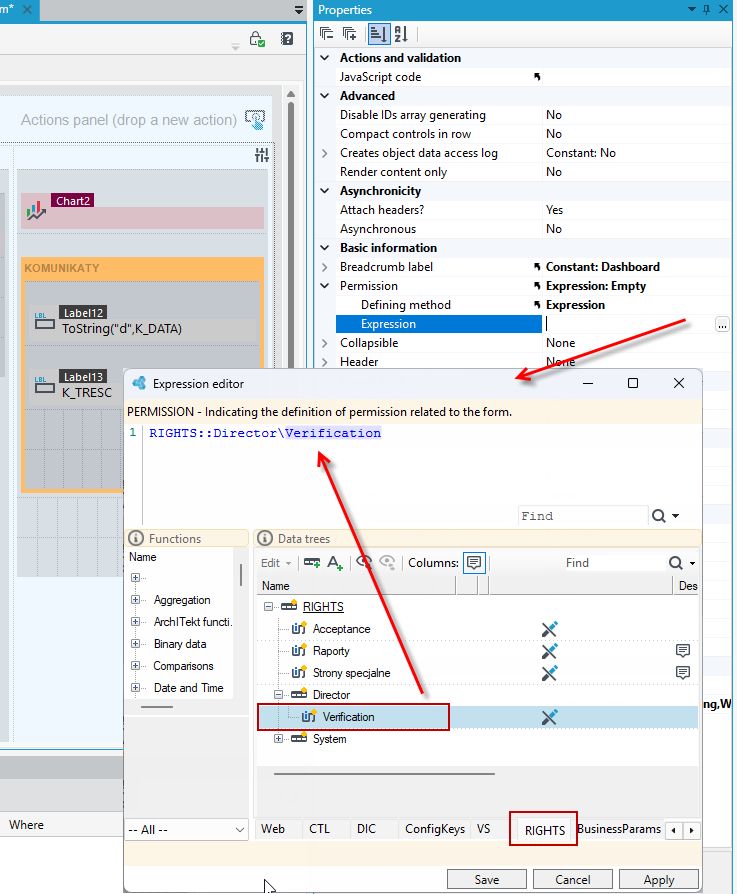
In the above example, the defining method of specifying the permission was chosen as Constant, which means you should choose the permission form the version server panel. You can also use the expression. On the RIGHTS page, all permissions defined in archITekt Studio are available.
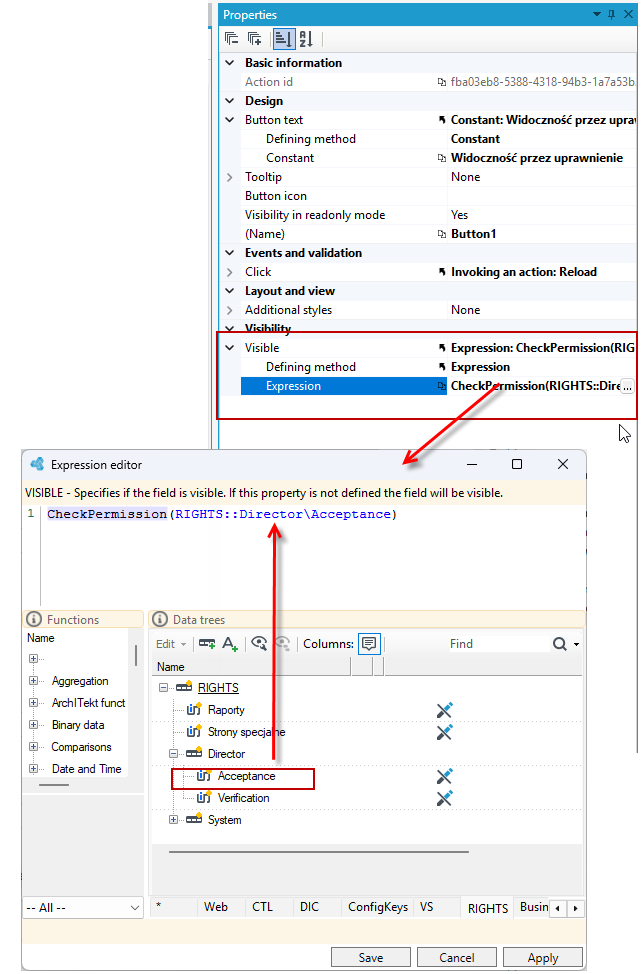
In other properties of a given object, you can use the function in the expression CheckPermission() which checks whether a given user has the specified permission. Below, a given application object (form, container, button, etc.) will be visible to a user who has the Acceptance permission defined and assigned.
You can assign several roles to a given permission.
- Go to the permission tree and select the given permission.
- On the right side of the window, select the Edit button.
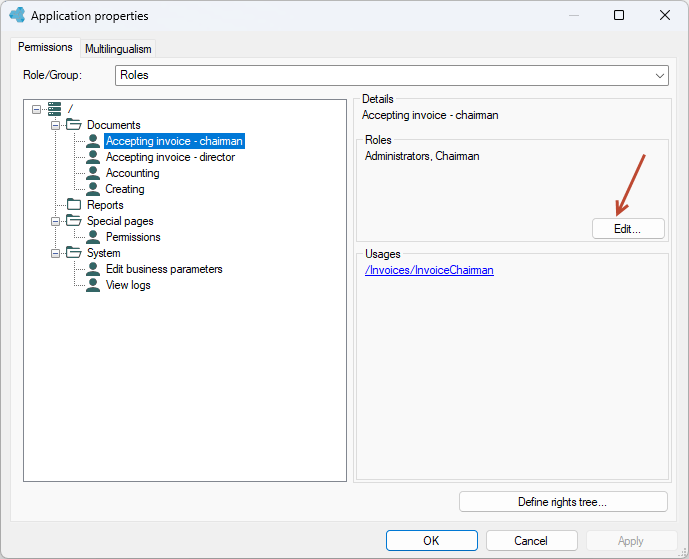
- In the next window, select an available role from the list or type its name and select the Save button.
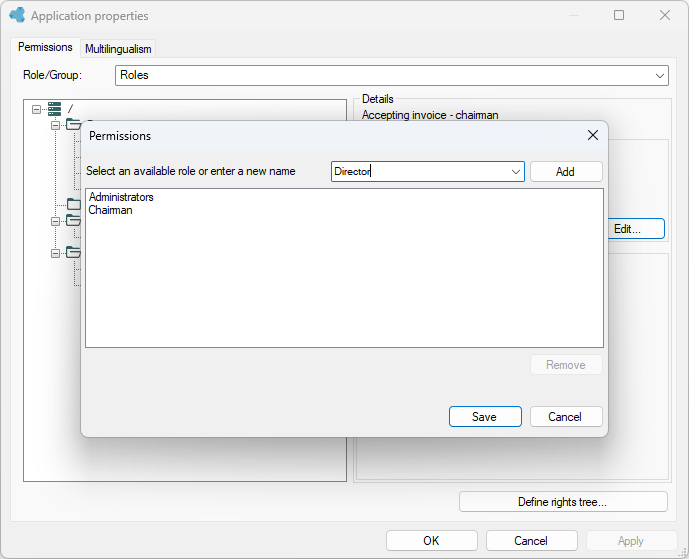
As long as you do not assign any permissions to a role, then they will not be available in the drop-down list.
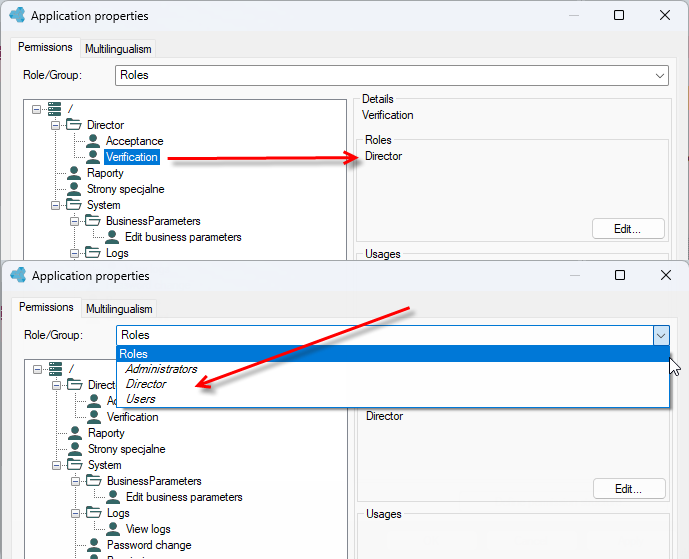
Depending on which provider you use, you should enter roles accordingly. If you define users and roles in the VIP user management application, then enter the role symbol. For more see Authorization server
Multilingualism
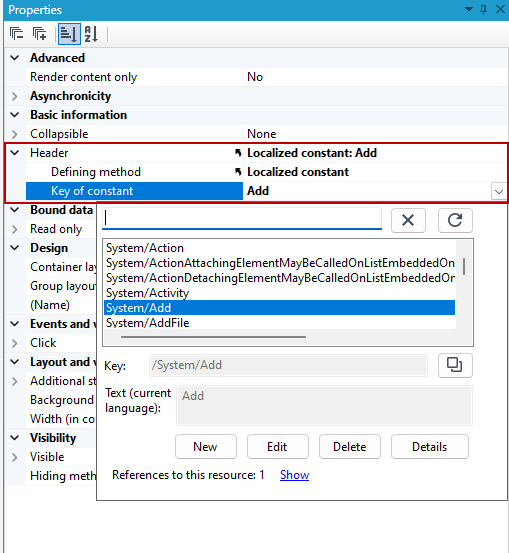
In the Multilingualism section, there are predefined entries in the application. You can use these entries by selecting the Localized constant option in the Properties panel. In addition to the predefined entries, you can add new ones.
- Select Permissions and multilingualism from the Tools menu.
- Select the Multilingualism section.
- Select the language for the entry, then the New button and enter the key and display text in the current language.
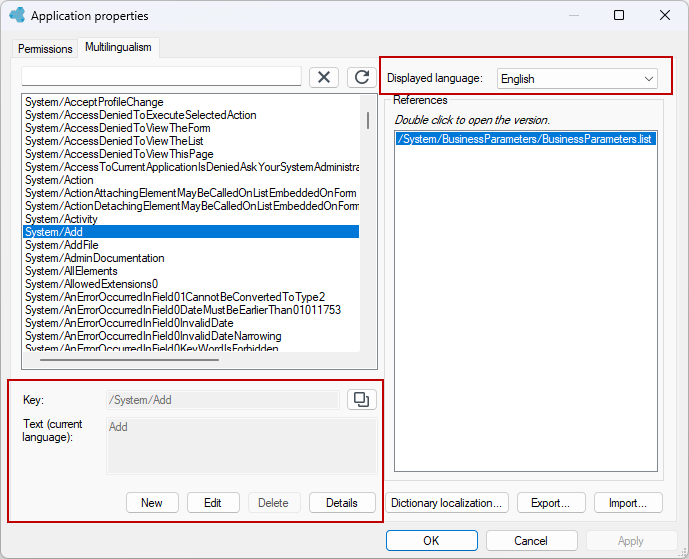
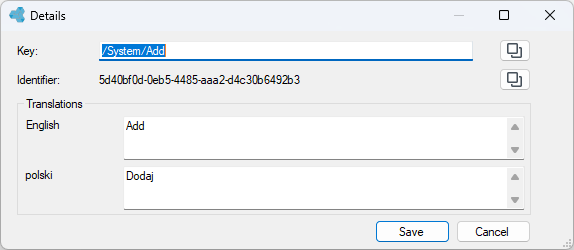
You can enter a value for an entry in a different language. Go to the listing details.
Now you can use the entry on the form and in other components, in places where localized constants are available in the Properties panel.
Options
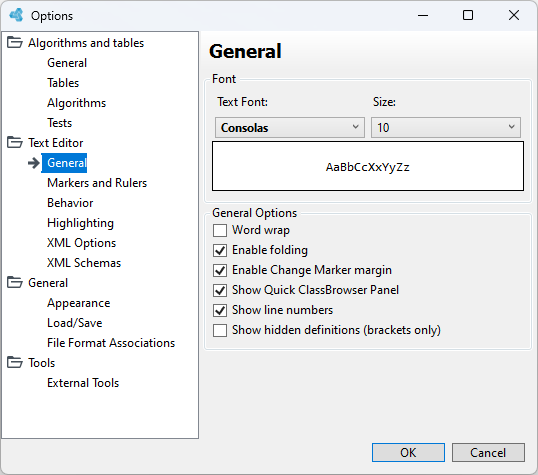
General functionalities for modifying the XML file text editor, configuring the application's appearance, as well as the appearance of algorithms and tables, and loading and saving configuration options are collected in the Tools>Options menu.
Exporting a package
You can export a package with a project, which you can then use when creating a new project (as an initial package).
The bundle export functionality creates a bundle containing all the information necessary to create a new project:
- Scripts creating the structures in the operational database and filling the dictionary tables with data are automatically generated in the SQL directory.
- The Files directory contains project plug-ins and modified application configuration files (if you have made such changes).
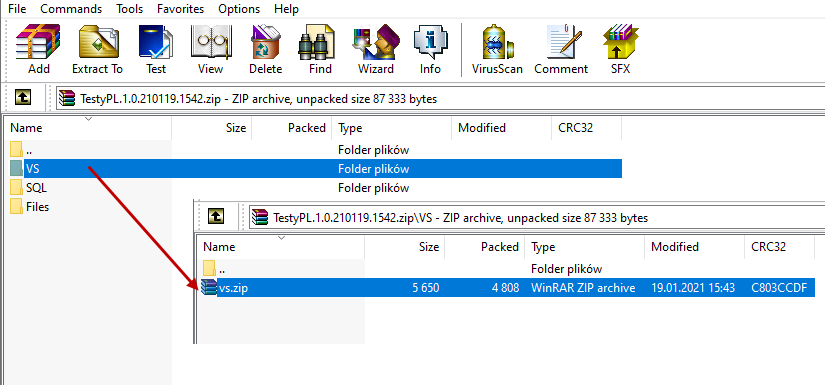
- In the VS directory, the content of the Version Server is exported as a
*.zip file

The exported package is compressed to the .zip format, thanks to which its content can be conveniently viewed.
Note!
You need to distinguish between exporting files from the version server and exporting the package:
Exporting all or part of the version server files contains only the definitions of objects contained in the version server and is a convenient way to transfer definitions between different archITekt Studios.
Exporting the initial package
The package export creates a full installation package that can be used as part of the procedure of creating a new environment and/or updating the existing environment.
You can use it in VSoft archITekt Launcher when adding a project based on an initial package.
The package is always exported as an *arch.zip file.
- Select the Export a package option from the Tools menu.
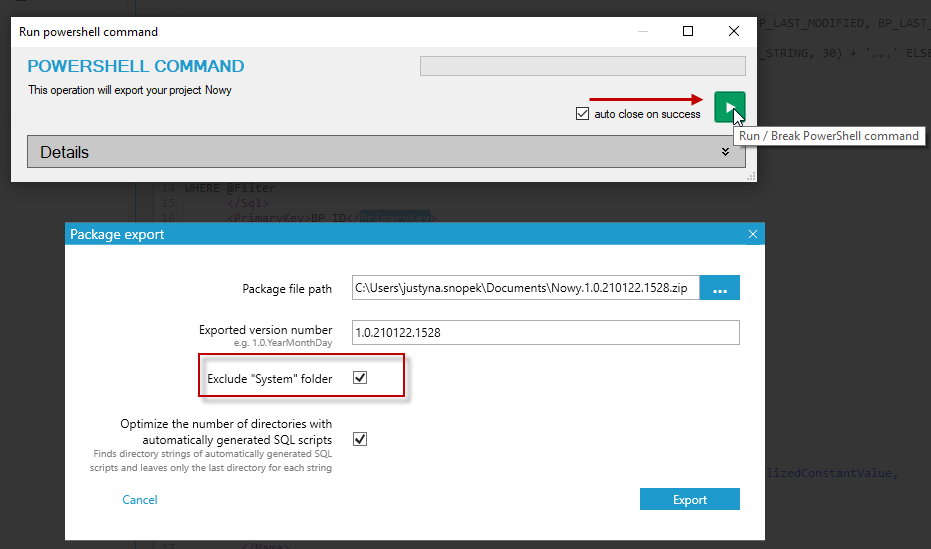
- In the export window, indicate where the package should be saved, you can also unchecked the option to skip the export of the System directory. By default, the System directory is not exported.
- Then, in the next window, select the button that starts the export process.
If you want to import only the contents of the Version Server in the project that you just exported to another project, then go to the VS directory where the zipped contents of the Version Server are located and only import this zipped folder.
If you do not want to export the entire project, but only a given folder or file, use the context menu available after selecting a given file or folder on the Version Server.
Generating test data
archITekt Studio provides the functionality of generating test data and saving them to the database. You can configure how many records are to be generated and other parameters.
- Select Data generator from the Tools menu.
- Select a database and then select the table you want to operate on.
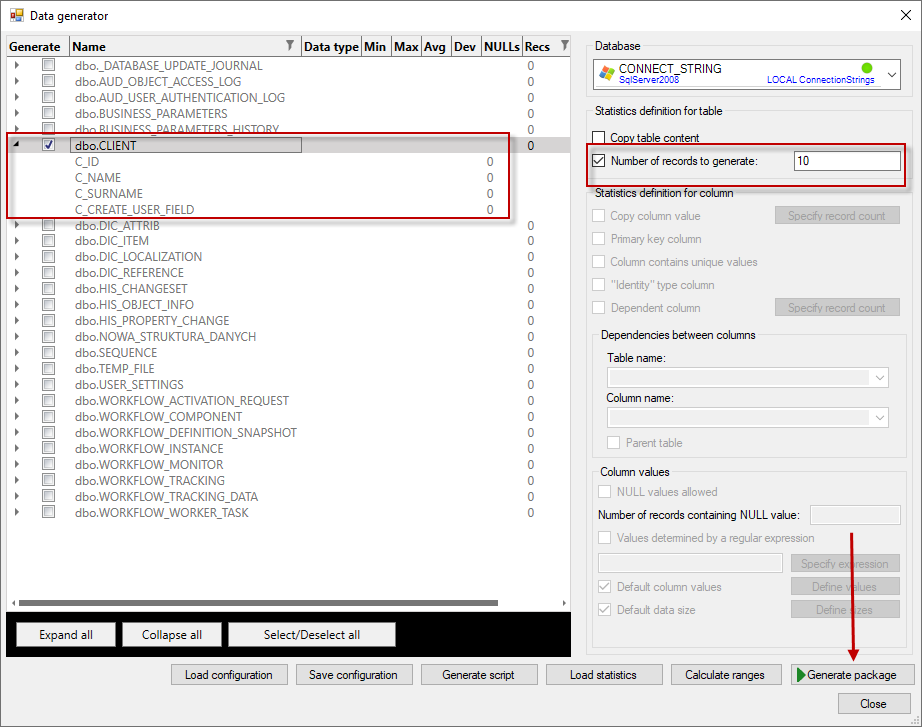
- In the example below, we want to generate 10 test data records for the Client table.
- Enter the data and select Generate package. The processing package will be created automatically with predefined blocks, allowing you to add records to the database.
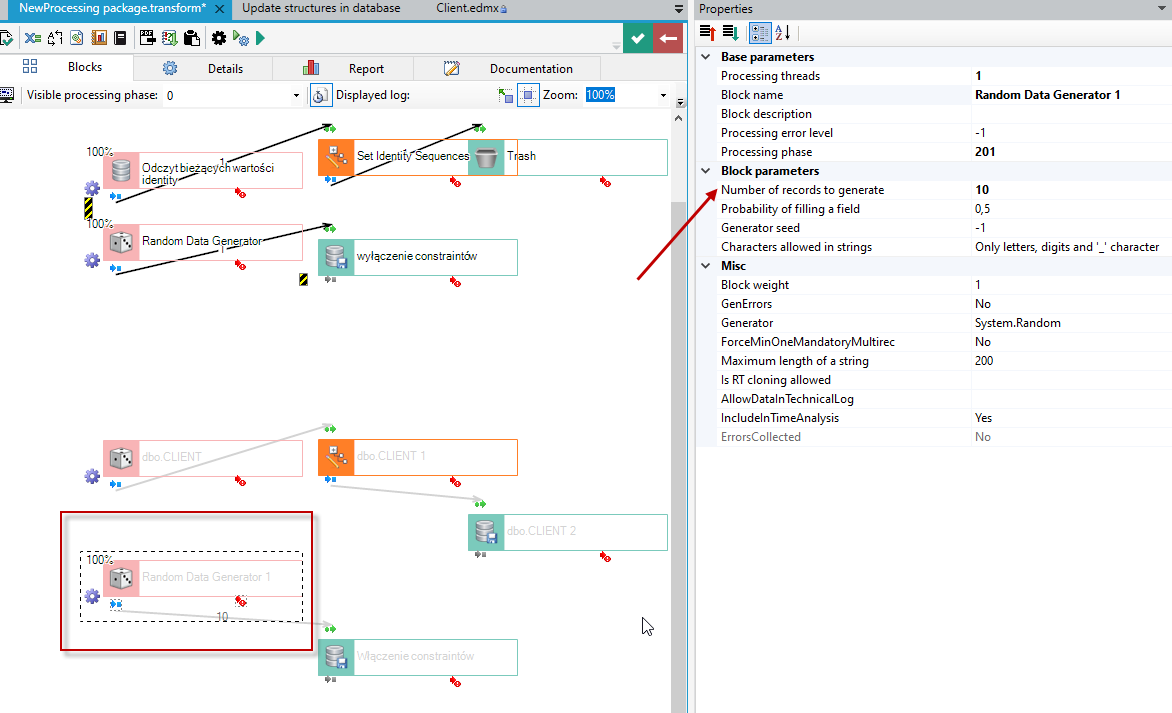
- Run the processing package. In the properties of the random data generation block, you can see the number of records to be generated as 10. 10 new records with random test data have been added to the Client database.
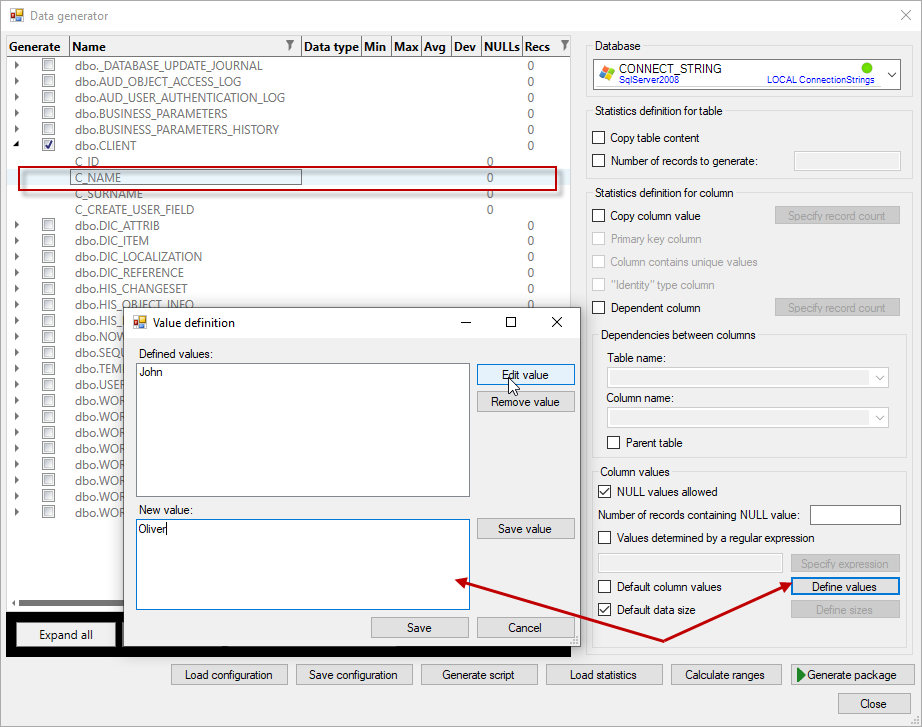
- You can also define the test data precisely and enter your own data. Select the column for which you want to define data, select Define values and enter the data. For the selected field from the
C_NAMEdatabase, 2 example names were entered.
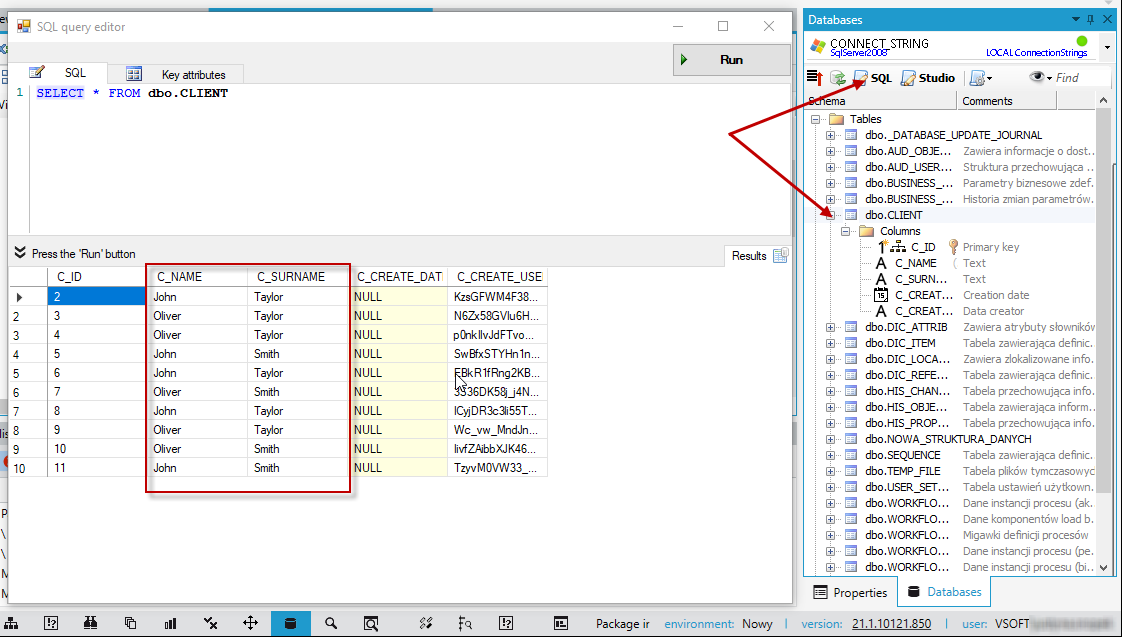
- Generate the package, run it, and then check in the database whether your test data has been added to the database. In the following example, values have been entered for the First Name and Last Name fields. Fields with the values that we defined have been added to the database.
You can save a given test data configuration and use it for the next generation of test data. Use the Save configuration and Load configuration options.