Action mappings
For each action, you can specify its additional mappings on the Action mappings tab.
- The Action mappings tab is activated by double-clicking on an action.
- Go to the Actions tab and click on the action.
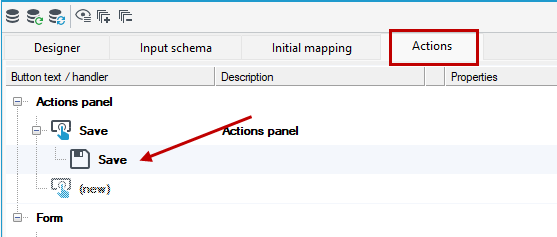
- On the Action mappings tab, there is a data schema and a list of operations analogous to the Initial mapping tab. The range of available functionalities is analogous. For more see Initial mapping.
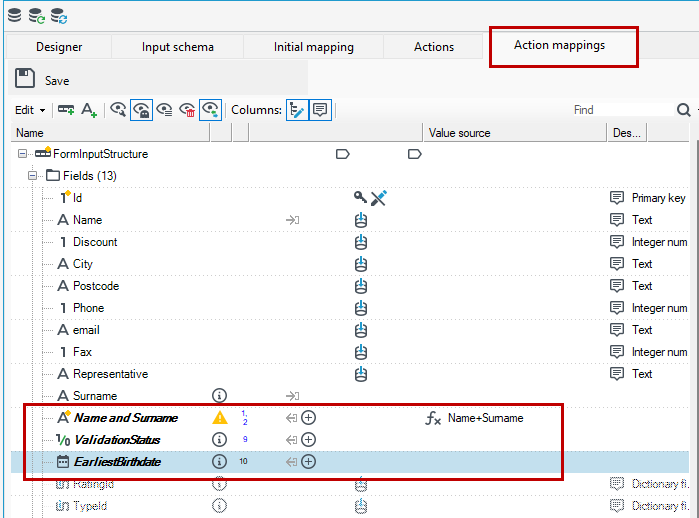
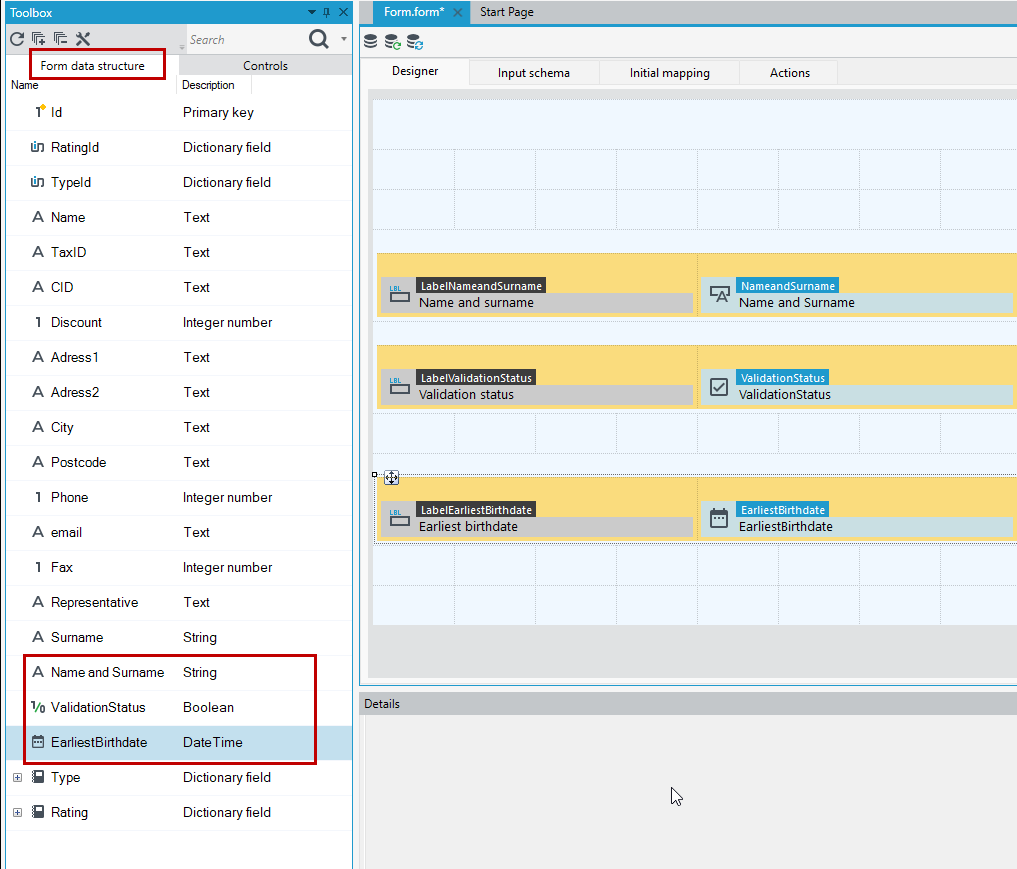
- You can add field mappings here, assign them a value using annotations, or add new fields, which will then be available in the Toolbox on the Form data structure panel.
- Fields coming from action mappings are set in read-only mode. All mappings defined here will be executed when the action is pressed on the form.
For example:
-
Go to the Save action mappings. Double-click on the action on the Actions tab.
-
Add a new field Name and Surname.
-
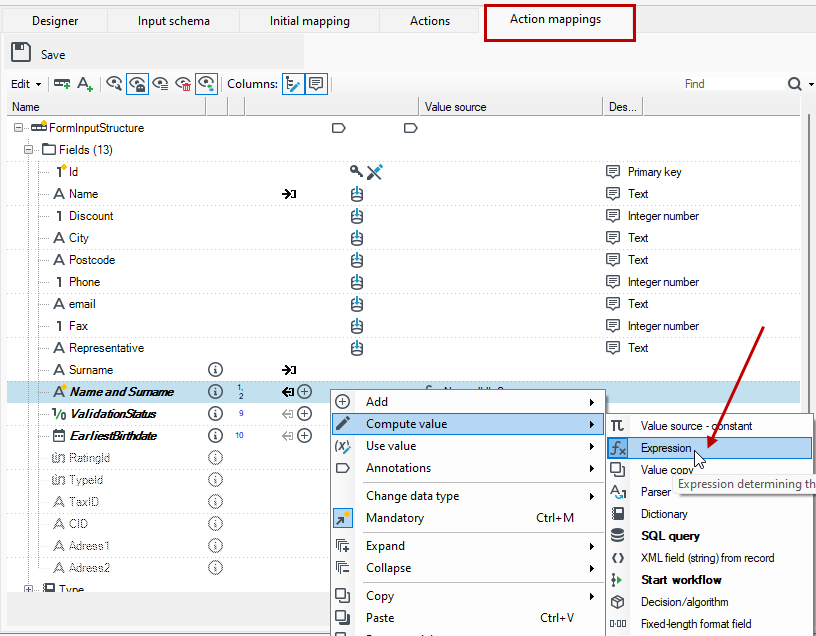
Add an Expression annotation to the field as a way to set its value. Right-click on the field and select Compute value>Expression from the context menu.
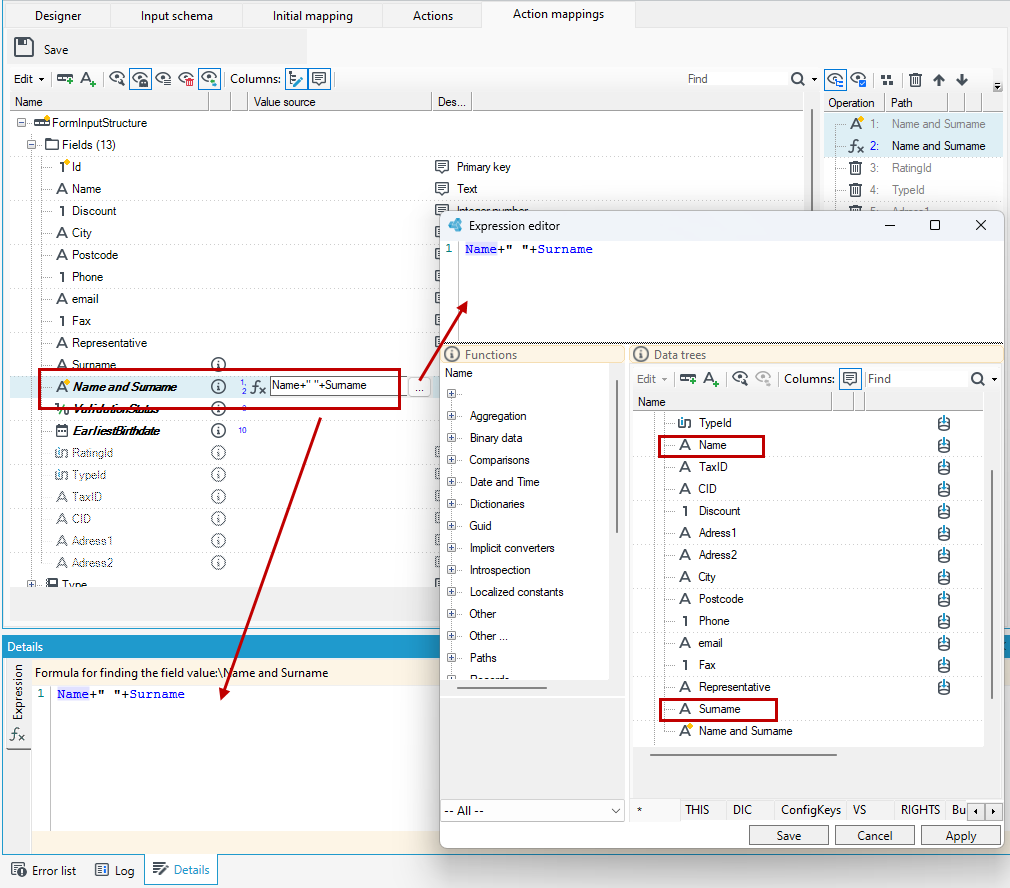
- In this example, we will use an expression to set the value of the Name and Surname field. Go to the expression editor or in the Details panel, write the expression content.
- There is a Name and Surname field in our data structure, so in the new field added in the action mapping, we want to present the first and last name separated by a space.
- Write the expression content:
Name+" "+Surname
- Now you can go to the Designer tab and use the new field on the form from the Form data structure tab in the Toolbox.
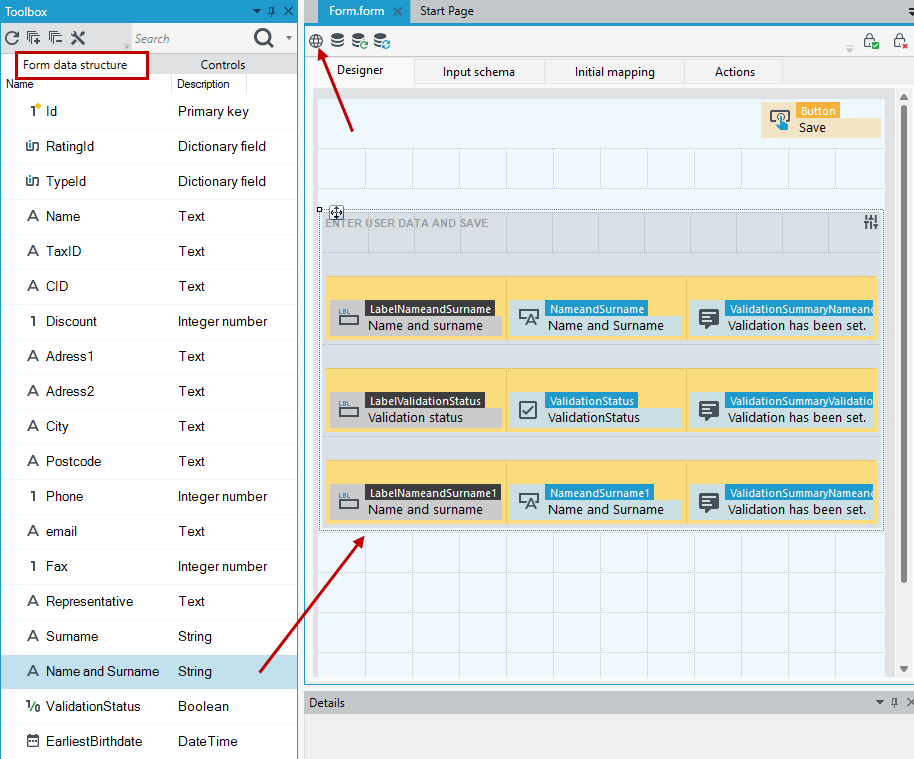
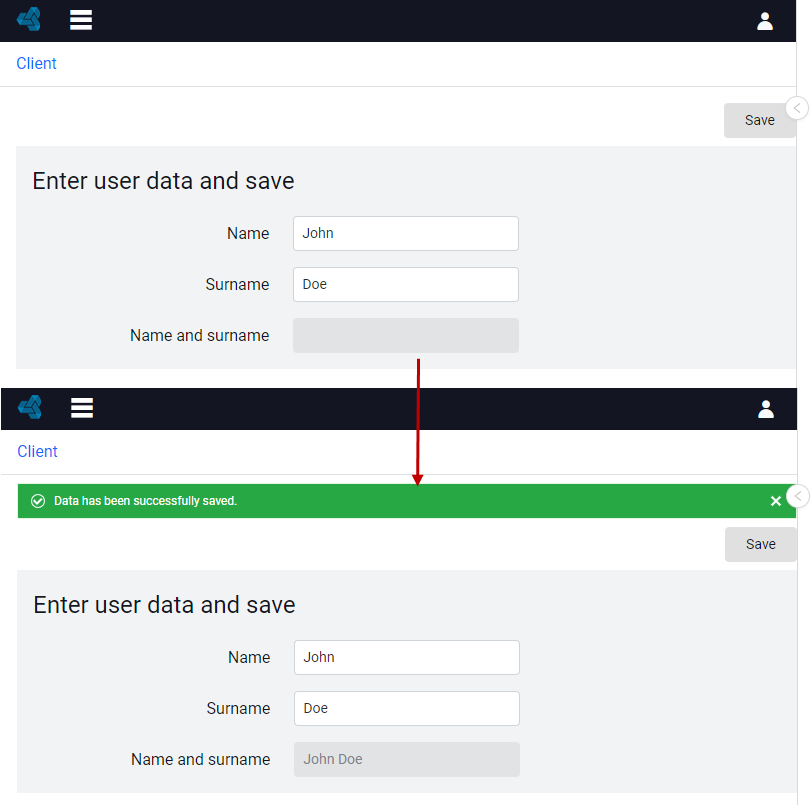
- Go to the web preview of the form and enter the data in the Name and Surname fields. After saving the data in the Name and Surname field, the value will automatically be fille, as we specified through the expression. The field is read-only.