Data validation on the form
Required fields
You can define which fields on the form will be required (it will be obligatory to enter a value).
- The Required field property is available in the Properties panel of selected form elements.
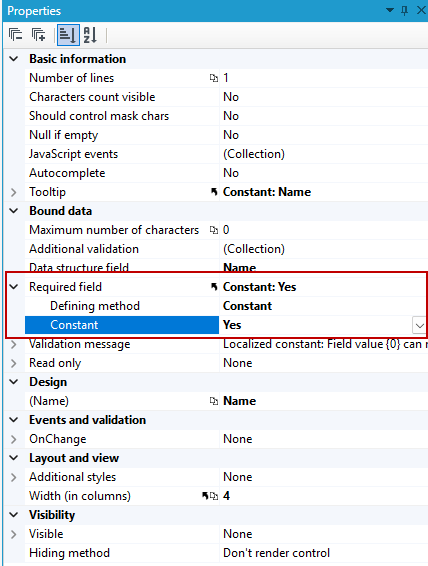
Data requirements can also be defined at the level of data structure fields (the Is field a required field? property). This setting overrides the form element properties.
| Data structure - Is the field a required field? | |||
|---|---|---|---|
| Yes | No | ||
| Form element - required field | Yes | Required field | Required field |
| No | Required field | Field not required | |
Validation of the form and its elements
With this property it is possible to define the way of checking the correctness of the data entered by the user.
To do so:
- select the Additional validation property.
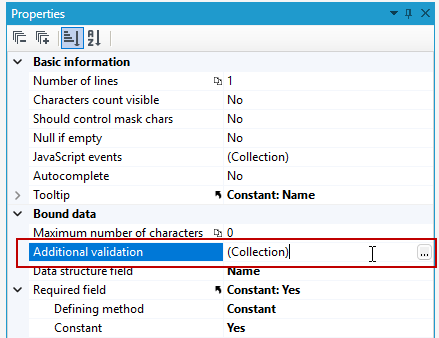
- Enter the Collection editor.
- The collection editor allows you to define validations - conditions that the form data must satisfy in order to be saved.
- In case of a form and its elements, after opening the Collection editor you can add and remove validations.
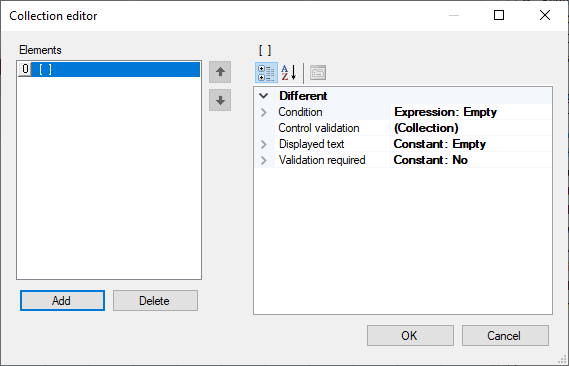
- For each validation, you can specify (property Validation required) the actions to be performed when the validation condition is not met. The displayed message can be configured via the Displayed text (form element) property. Each validation condition corresponds to a formula entered in the Formula property.
- The validation conditions are checked when the user performs an action, e.g. Save. By default, for each action all validations defined both in the form and its elements are checked.
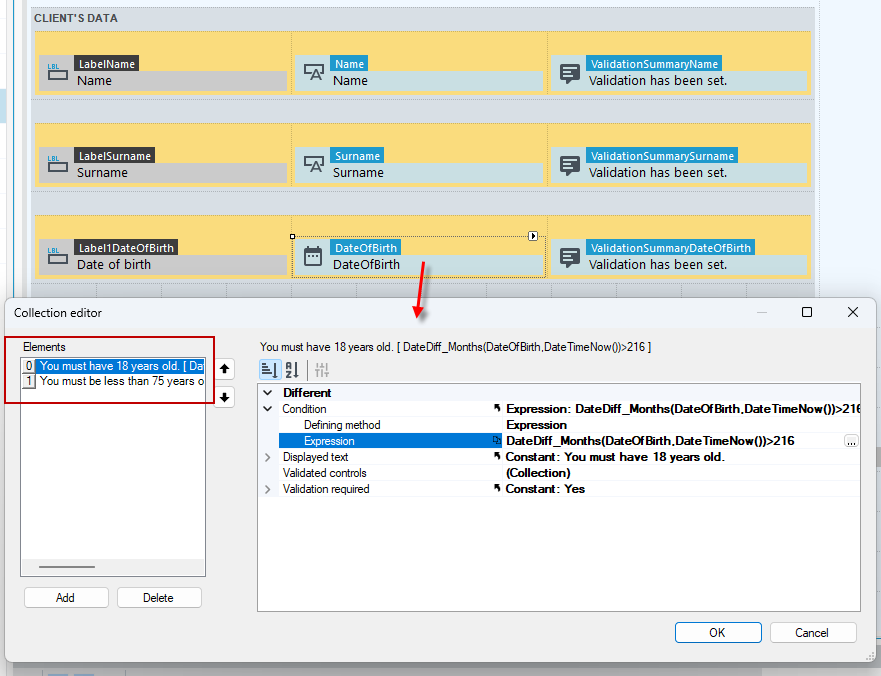
- The scope of validations that should be performed when the action is launched can be configured in the action's properties: Validations to be performed. In the example below - 2 additional validations check whether the age of the client is between 18 and 75 based on the date of birth entered on the form.
Data format accepted by the field
The data format is controlled by data handling components, blocking e.g. in date field entering letters. Additionally, it is possible to create custom masks for fields.
- The component properties can be used to define the range of data that can be entered into the field (Maximum number of characters, Number of decimal places, Maximum value, Minimum value).
- For numeric fields (integer, fixed point, percentage), through the Mask property, you can add a function to group the digits that make up the number.
Fields with mask
The format of the data is controlled by the rules defined in the properties of the control. In addition to the built-in custom formats you can use, you can also enter your own formats. For more information, see Masked text box
Validations during action execution
The Validation property determines which validations should be performed when the action is executed.
- Go to the Actions tab and select the action.
- On the Properties panel, select an option in the Validations to perform field:
- All - required, masks and additional validations form main form with subforms;
- None - no validations;
- Only required and masks - required and masks form main form with subforms;
- Only masks - masks form main form with subforms;
- Main form - required, masks and additional validations form main form;
- Current form - required, masks and additional validations form current form;
- Current form with subforms - required, masks and additional validations form current form with subforms;
- Selected - all required and masks with selected additional validations form current form;
- Except selected - all required and masks with additional validations except selected form current form;
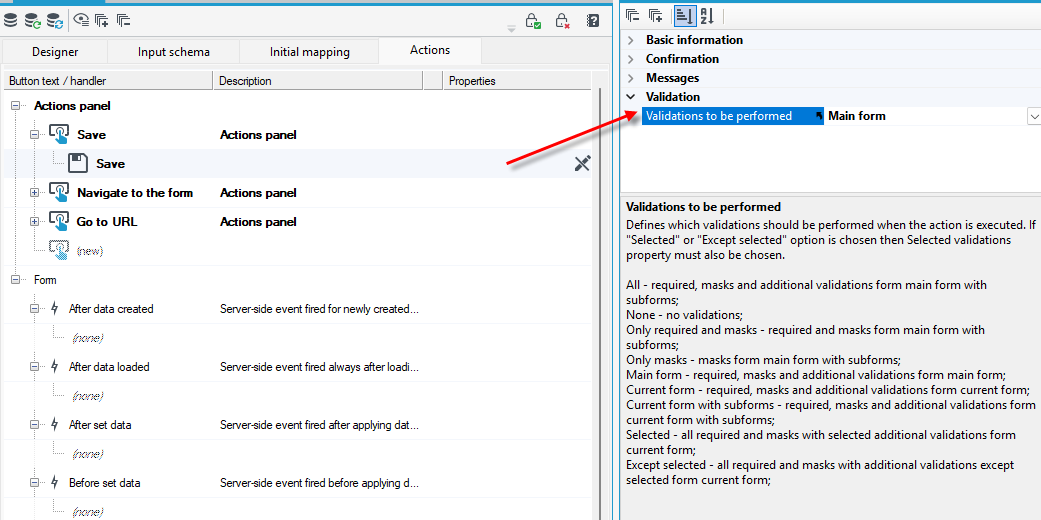
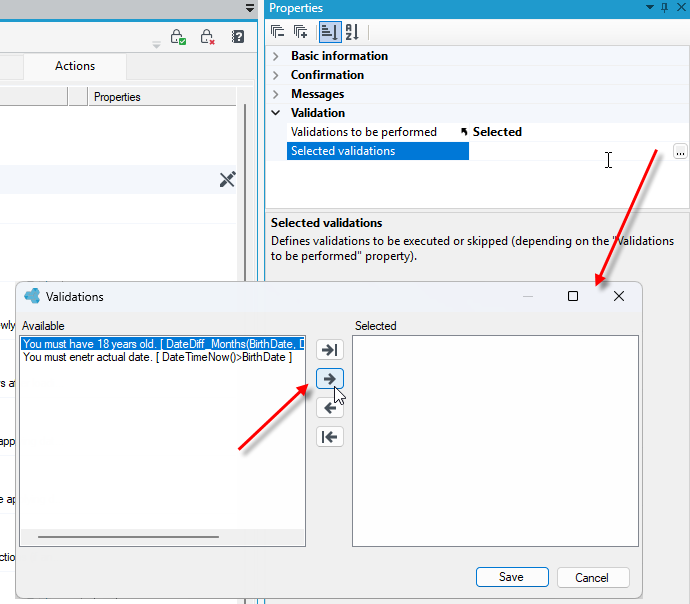
- If you select Except selected or Selected, indicate in the Selected validations field the validations to be performed or not. In the case below, 2 additional validations have been defined on the form for individual controls. If you do not add validations to the selected ones as excluded from executing on the form, then when you execute an action on the form, the validations will execute and take effect.
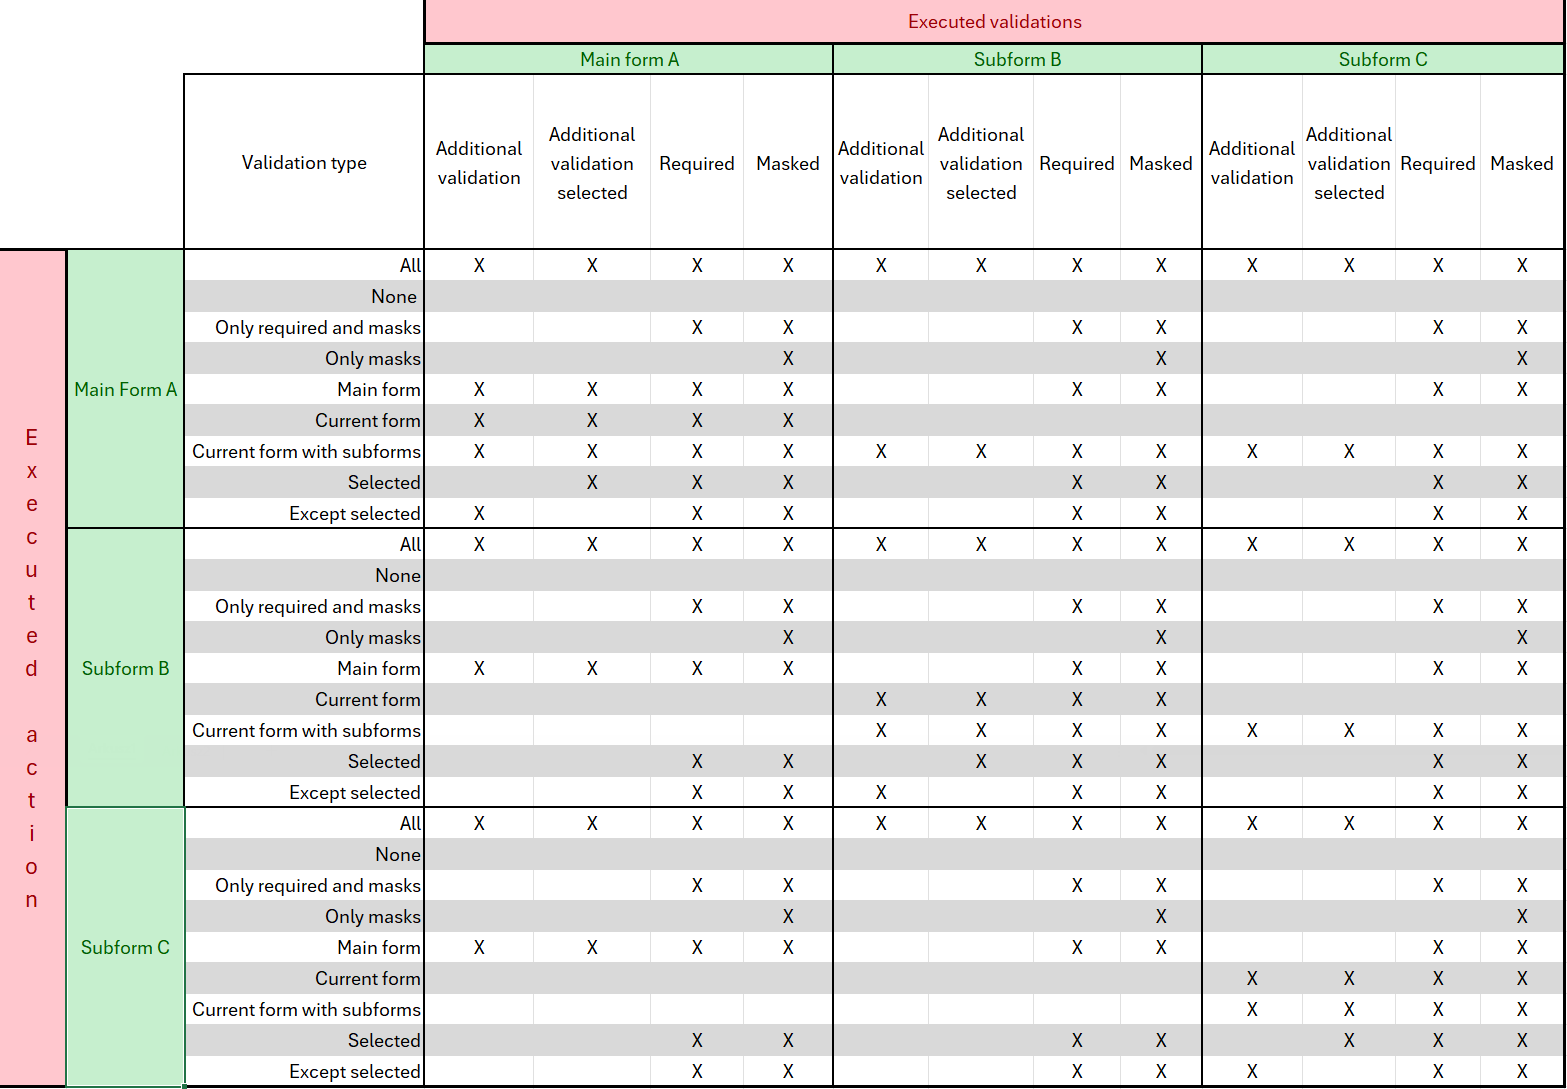
In the following case, the main form A has an embedded Subform B, which has Subform C.
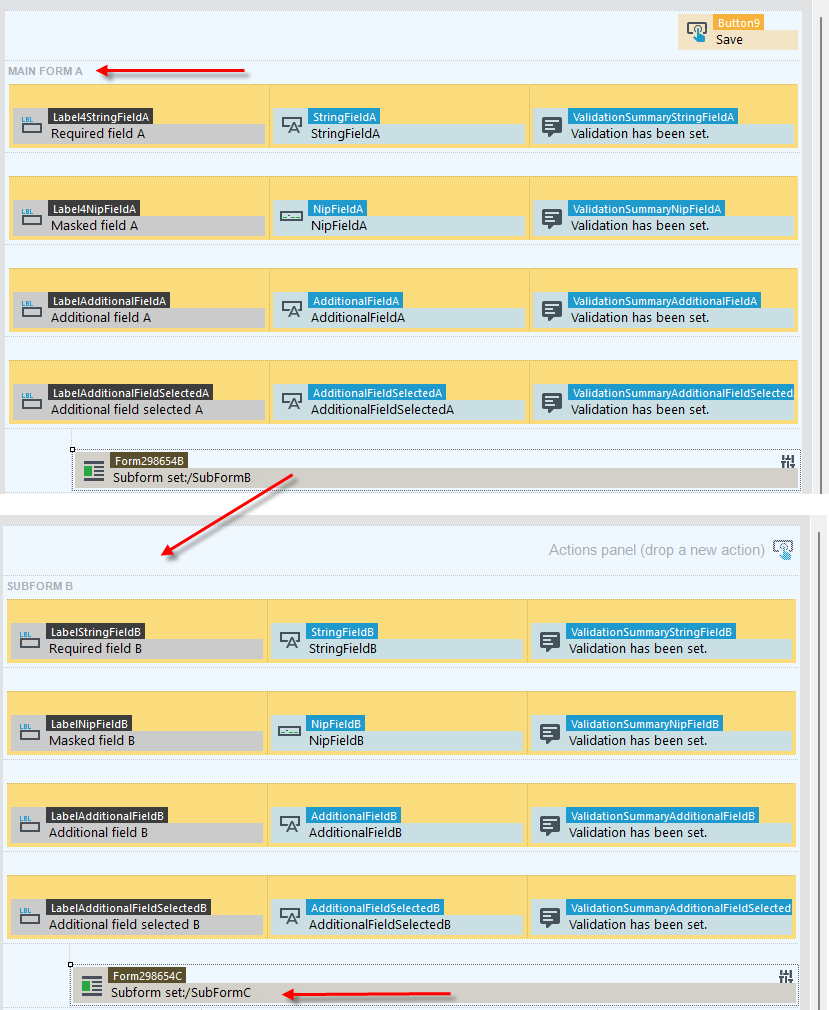
The table shows how the validations are executed on the main form and on the sub-forms, depending on where the action was invoked (on the form or on the sub-forms) and which validations will be executed for each option.