Menu parameters
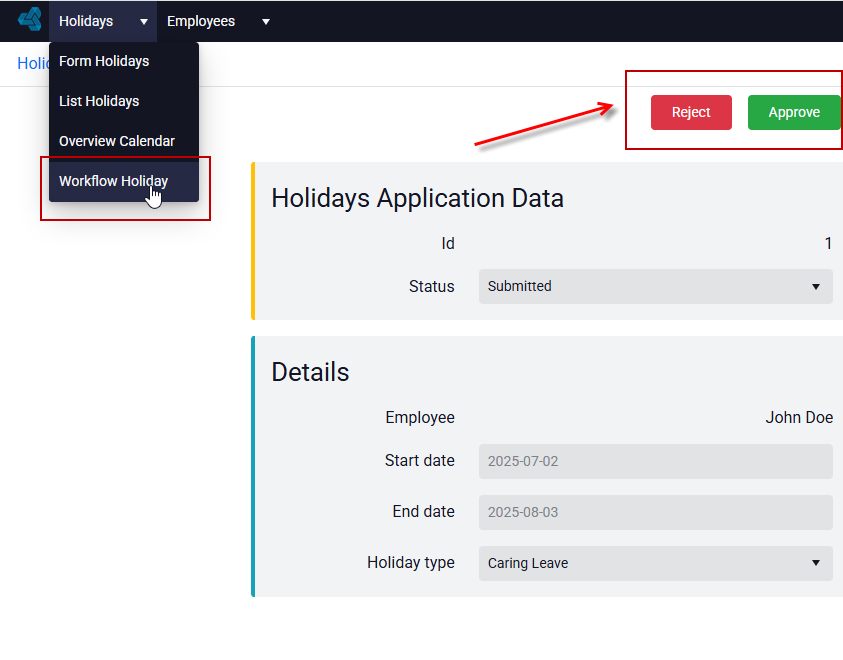
In archITekt, it is also possible to directly pass parameters from the menu level, which allows for dynamic control of the content of opened objects. These parameters are defined in the configuration of a given menu object (e.g. form, list or workflow).
- Go to the menu, then select the menu item and go to the Properties panel.
- Click the Parameters section.
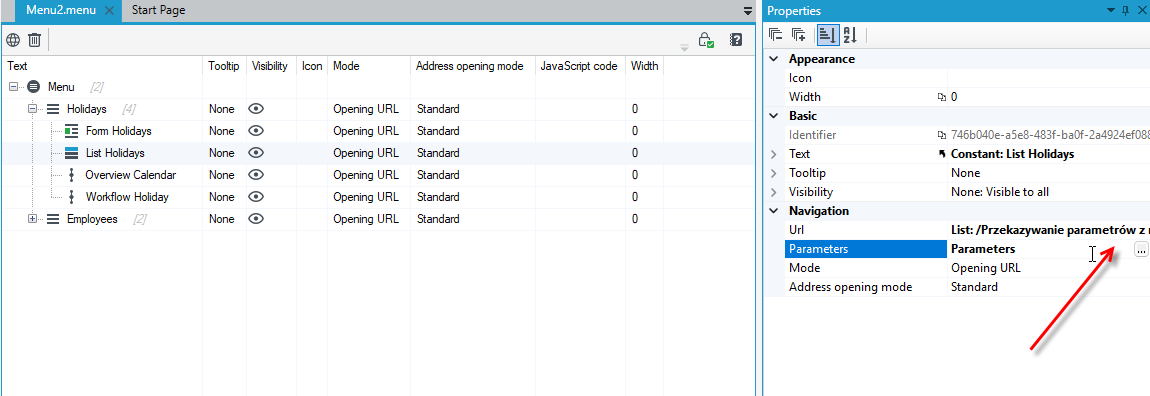
- Select the Add button, and then the type of parameter you want to add.
- Then specify the value and name of the parameter.
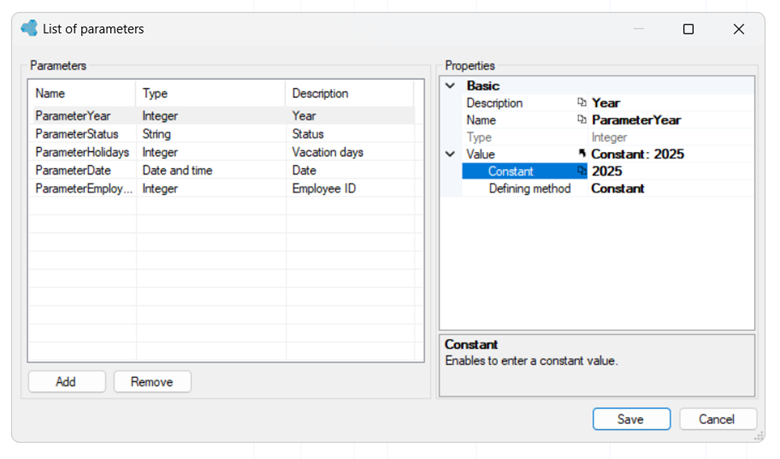
- The parameter name is later used as a key in the functions of the formula editor, as well as in expressions and the SQL editor.
- The parameter value is calculated when opening the object on the menu and then passed to the form/list/process, where it can be retrieved from the formula editor or using an expression via a previously defined parameter name.
Defining a parameter is always done in the same way. In turn, the configuration of retrieving parameter values depends on where you want to use it. Below are examples of how to configure an entry in an expression, formula, as a constant, in the SQL editor and in the Properties panel.
Lists
Defining and using parameters in a list from the menu
- Create a simple list in archITekt Studio. Remember, you must first create a data structure.
- In the example below, a data structure corresponding to employee data has been created along with a list of holidays they can report.
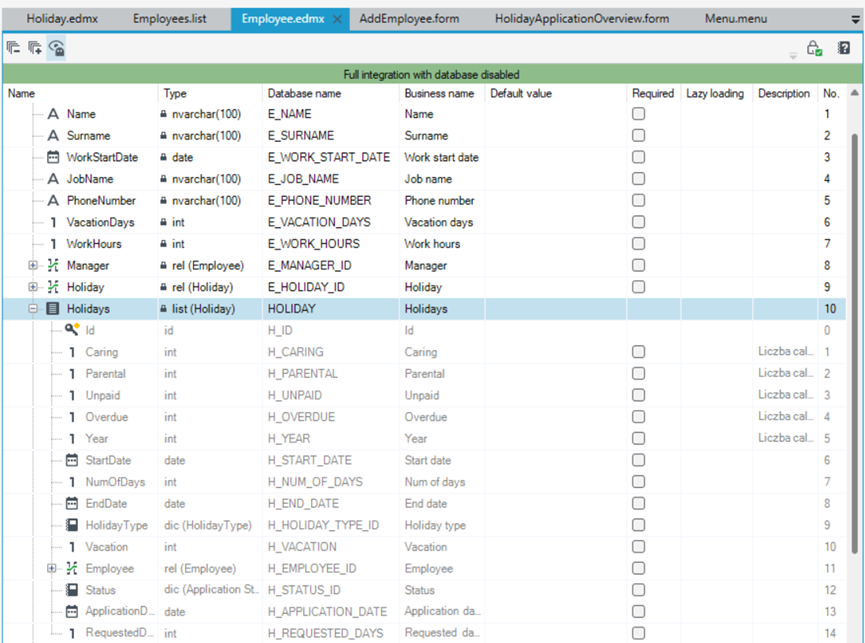
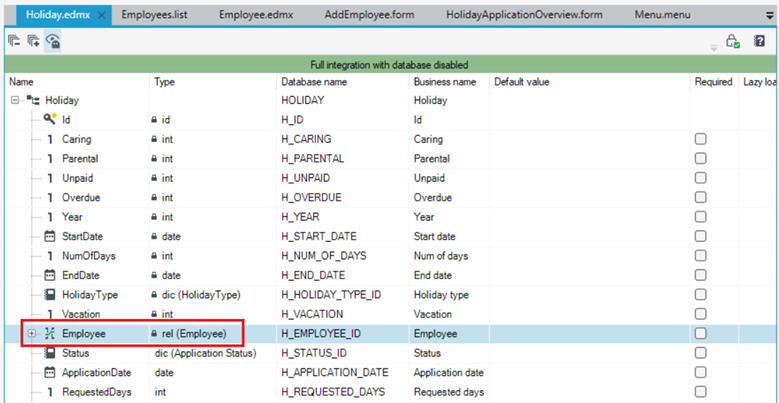
- A relation to the list of employees has been created from the Holiday data structure.
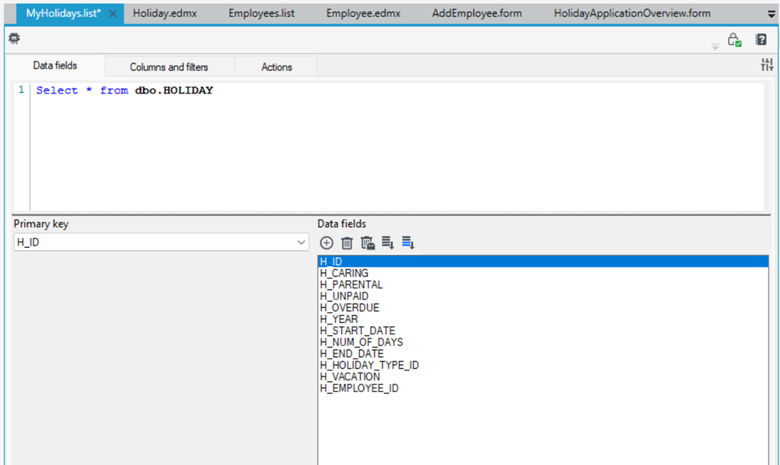
- A list of all holidays reported by employees has been created in archITekt Studio.
Defining parameters for the list
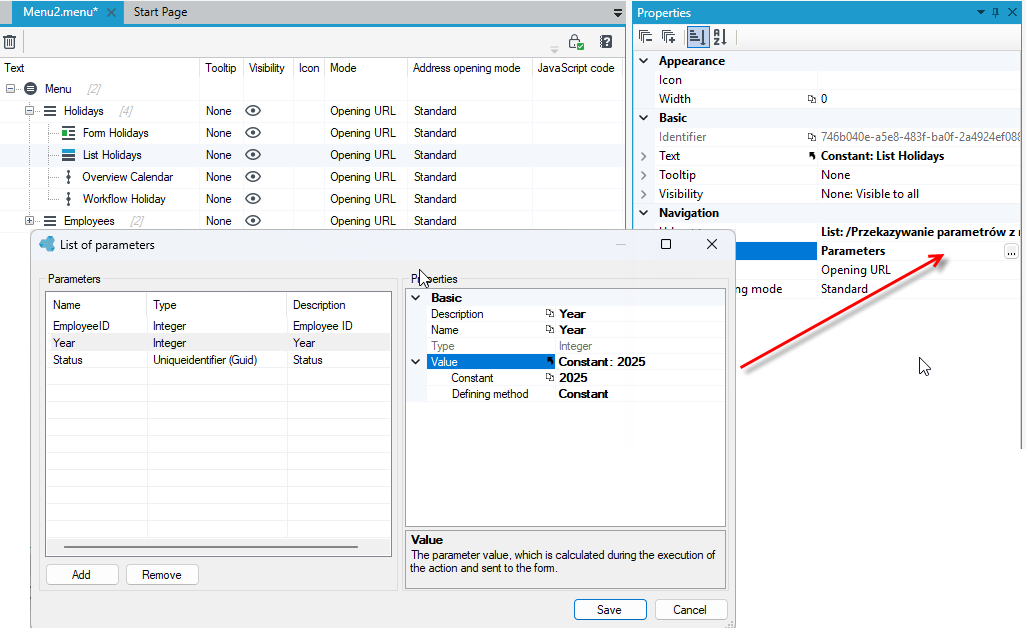
- From the menu level in the Properties panel, go to the Parameters section. In this example, the parameters will be the Status, Year and EmployeeID value, which will be passed to the list to display the accepted holiday applications of a given employee from a given year.
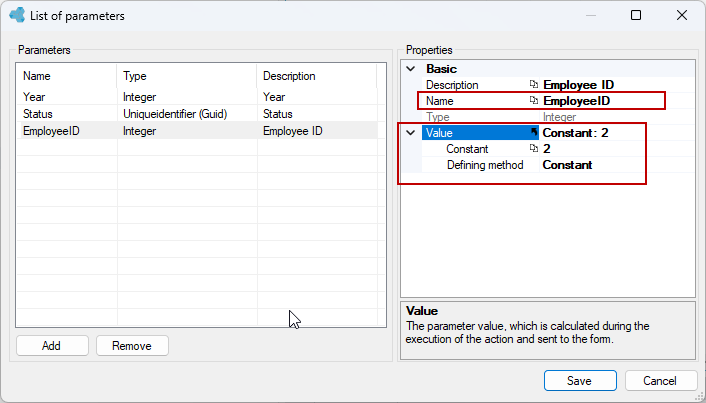
- Add a parameter of type Int with a constant value of 2025 and the name Year.
- Select constant as the Defining method. The parameter defined in this way conveys the information that we want to display the list of employee's holidays only from 2025.
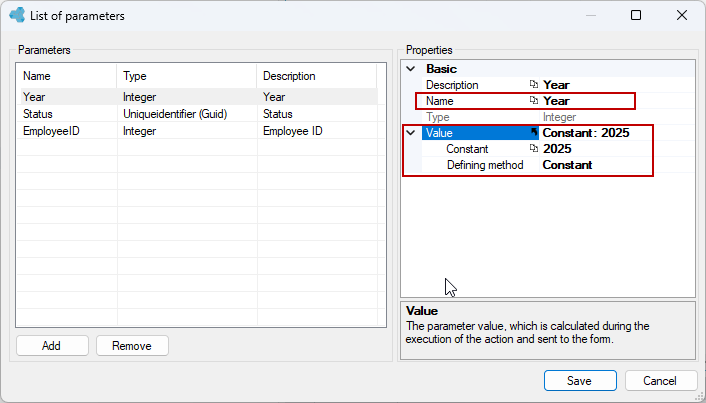
- Add a second parameter EmployeeID (int), which will convey a constant value corresponding to the employee's ID. Select const as the method of specifying and set the value 2.
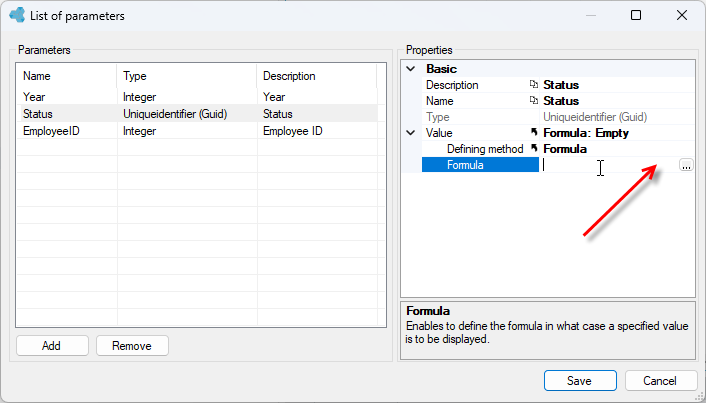
- Add a third parameter Status of the Uniqueidentifier (Guid) type with the method of specifying as Formula. This parameter will convey the value of the application status (application accepted), in the context of which the list of holidays will be displayed.
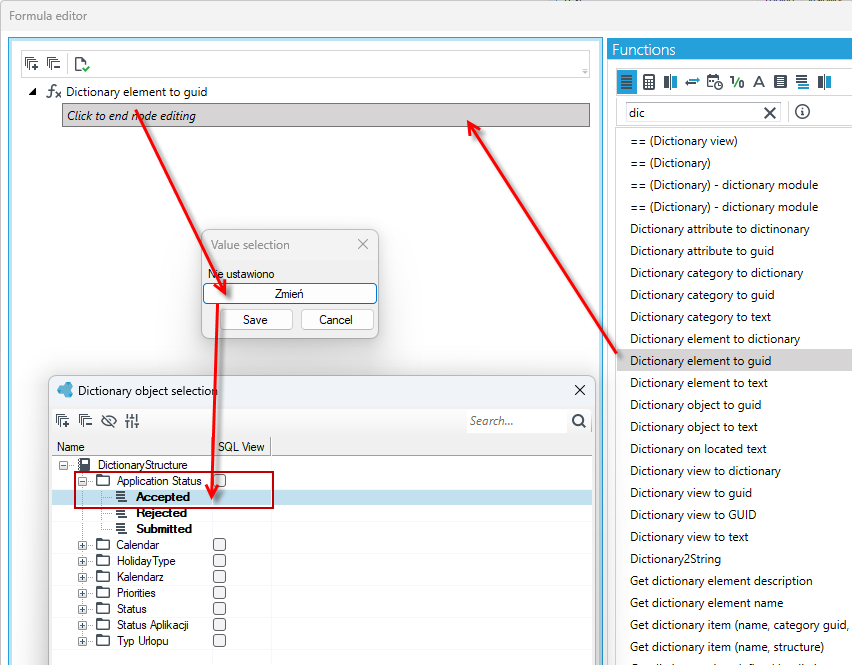
- Go to formula editor and drag Dictionary element to guid formula.
- Click on the form field to select a dictionary element.
- In the next window, select a dictionary structure from the version server and then a dictionary element from the corresponding category.
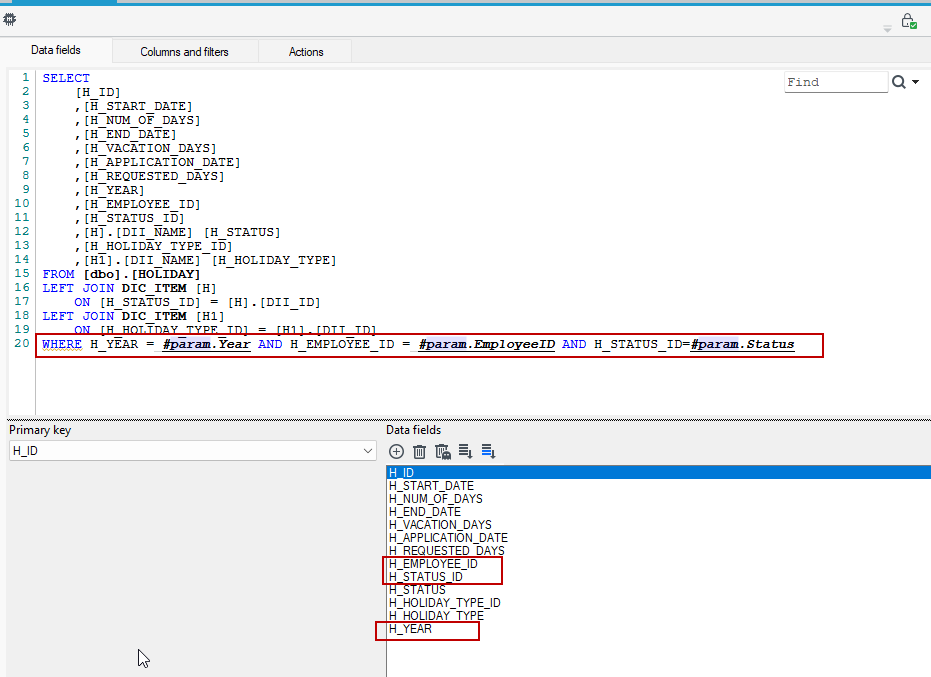
- Create a list of employee holidays. To use the defined parameter in the SQL query, use the
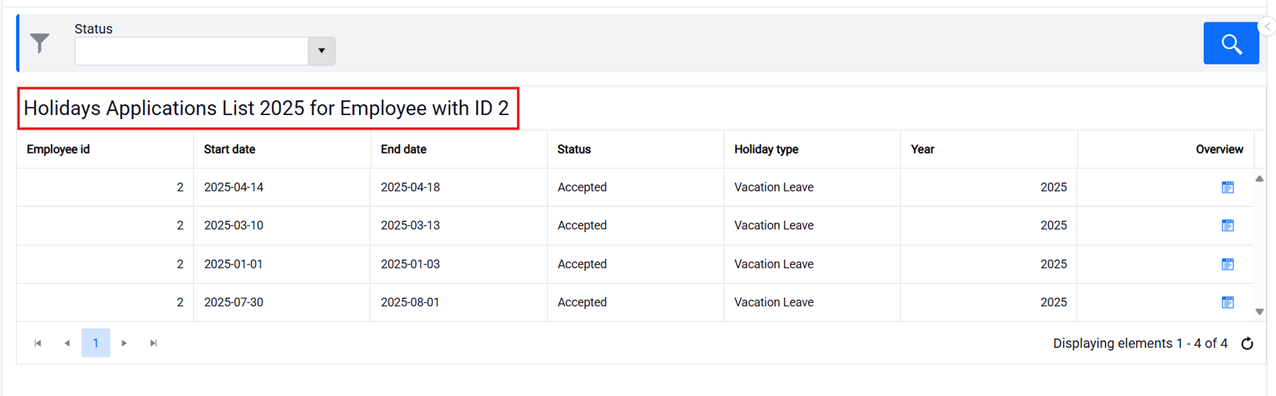
H_YEAR,H_STATUS_IDandH_EMPLOYEE_IDdatabase fields and assign them parameters using the syntax#param.Year,#param.Statusand#param.EmployeeID, respectively. The list will display only the leaves from 2025 for the employee with ID 2 which was accepted.
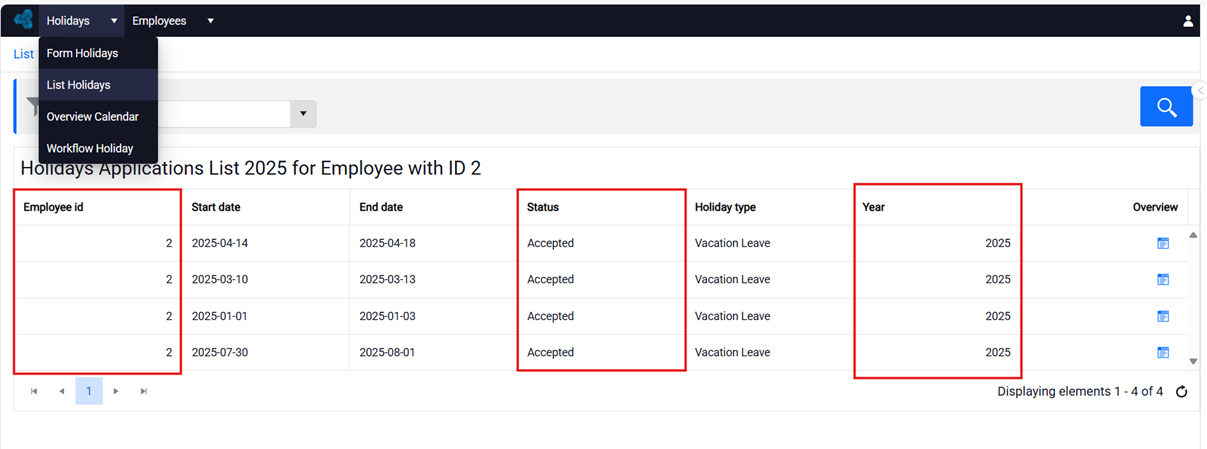
Defining the list header using parameters passed from the menu to the list
- Go to the Properties panel to the Header section and select the method of defining with a formula.
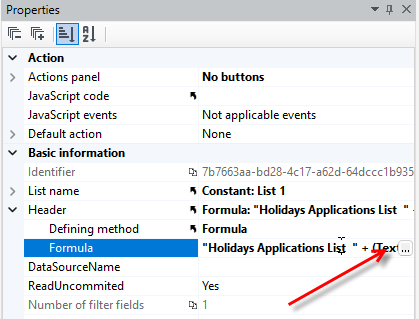
- Go to the formula editor. Use Concatenation and Get parameter formulas.
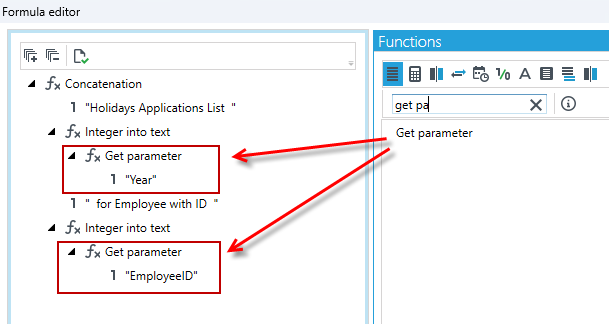
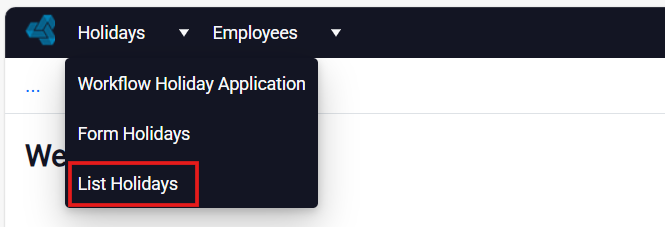
With parameters defined in this way, after selecting the list from the menu, the parameters that were used to define the list title and to limit the display of data in the list to only from a given year for a given employee will be passed.
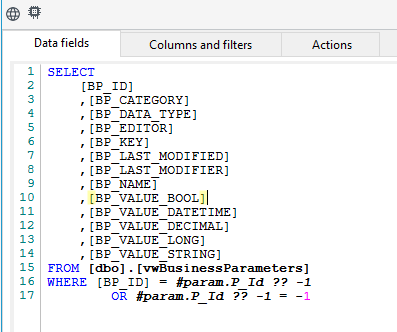
If the parameter is not passed to the list, the application will report an error. In such a case, when creating an SQL query, you can use the ?? operator (combining NULL values) if we assume that there may be no parameter and we allow the use of the list without passing the parameter. The SQL query should look like the following.
Form
Similarly to the lists in the menu, you can also define the parameters passed on to the Form.
- Using the previously created data structures, create a form that contains the data of the vacation application.
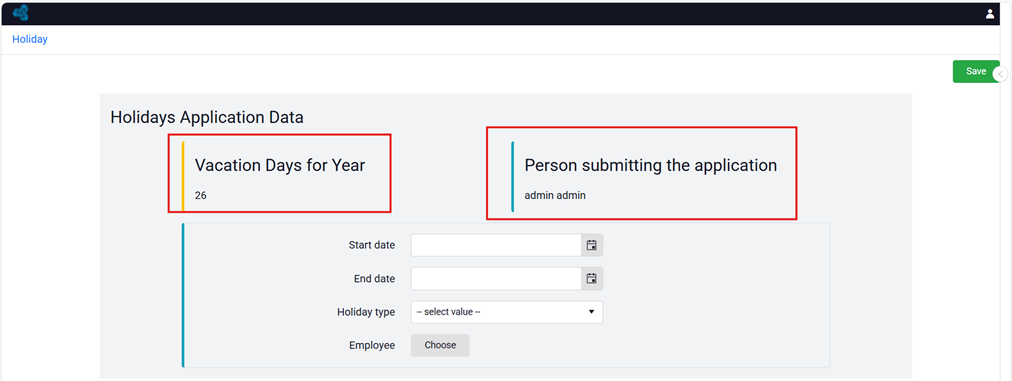
- From the menu level in the Properties panel, click the Parameters section and add an Int type parameter named Holidays and the value 26. This type of parameter will be passed on to the form and it corresponds to the vacation days.
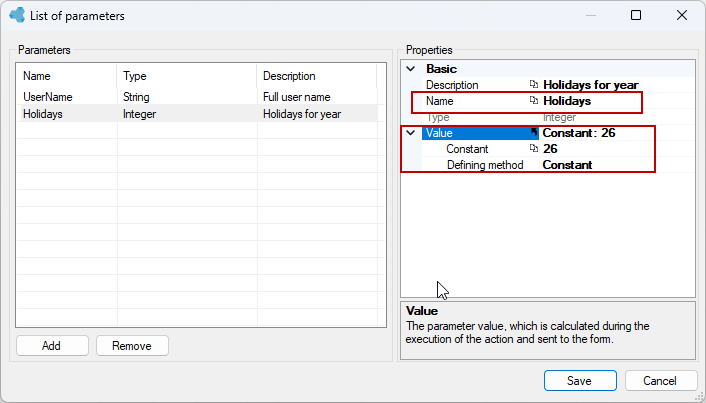
- Then define the parameter. Add the name UserName (string type). Select the formula as the Defining method and go to the formula editor.
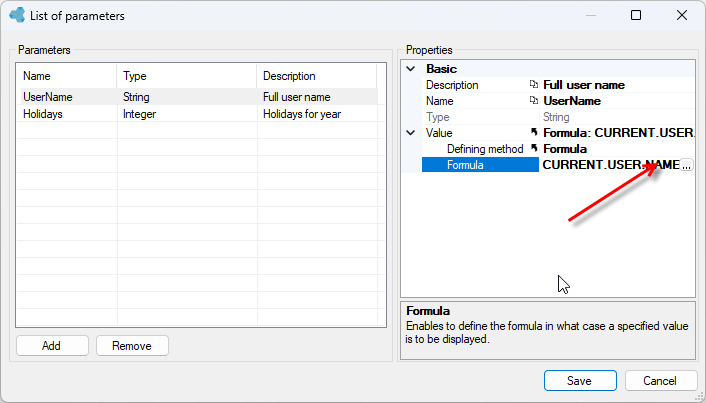
- Search for the Full name of current user function, drag it to the editor window.
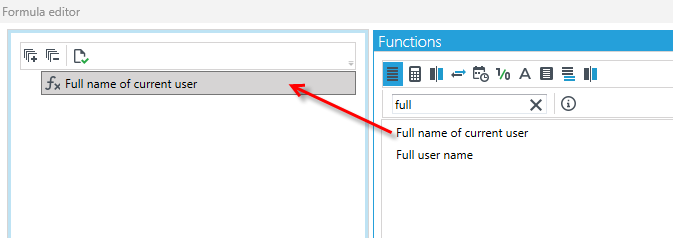
- This parameter returns the first and last name of the person submitting the vacation application.
- Save the data and remember the names of the parameters. It will be used on the form on which we want to retrieve the parameter value.
- Go to the form, add a text field to display theHolidaysparameter, then go to the Properties tab and define the text as Expression.
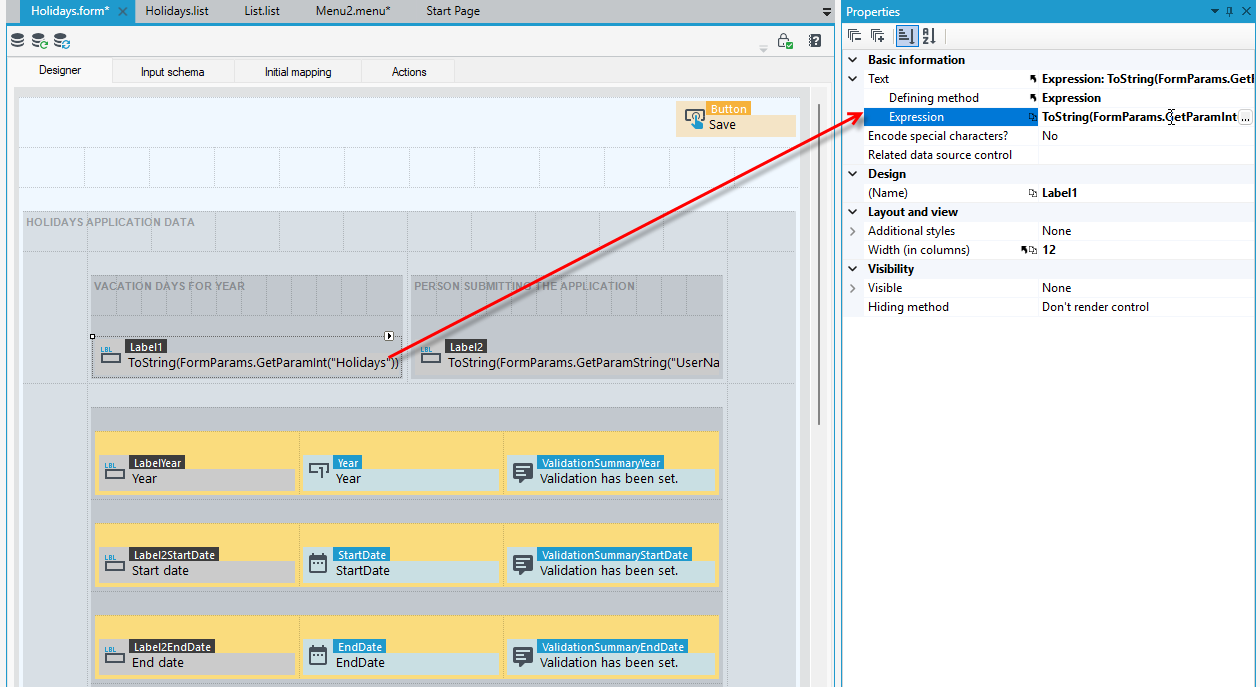
- Go to the expression editor or in the details panel start typing the expression text. First, refer to the form parameters and type
FormParamsWhile typing, you can press Ctrl+Space and use the syntax hints. - Start typing another component of the get... expression and press Ctrl+Space. Select
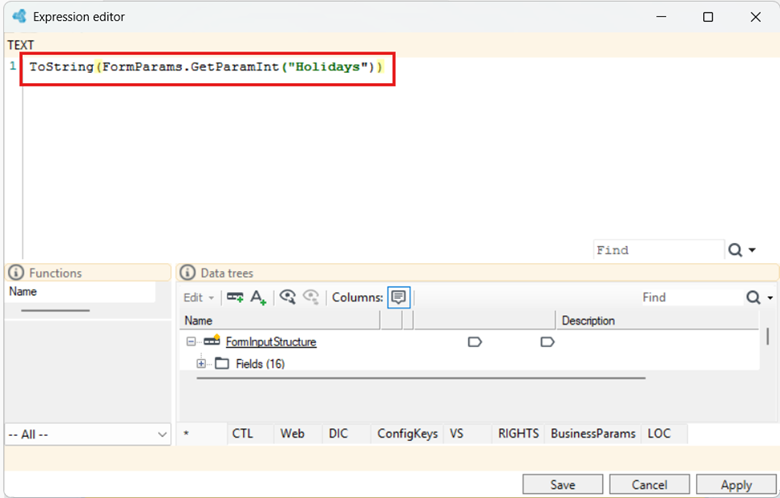
GetParamInt - Then, in parentheses, type the name of the parameter you are referring to. In this case, the parameter name is Holidays, which was defined in the list. The entire expression looks like this:
- Proceed similarly for the UserName (string) parameter.
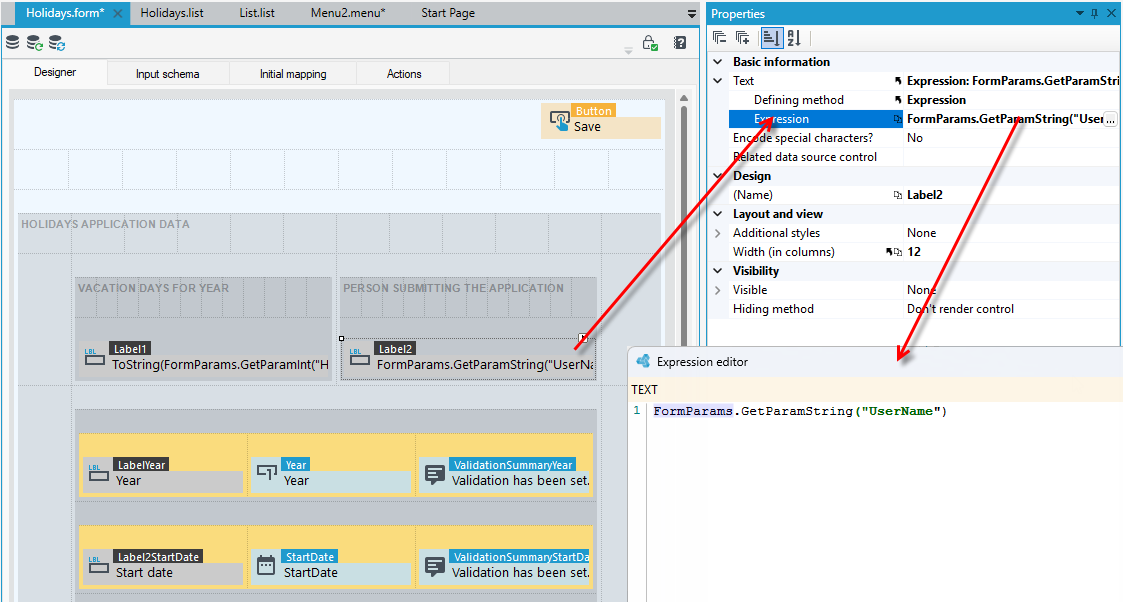
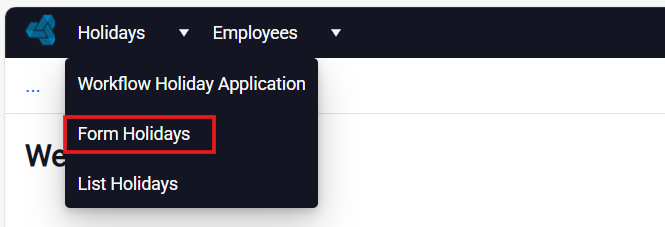
Now, after selecting the form from the menu, it will be displayed with the vacation request data to be filled in along with the vacation days for the year and full user name – person submitting the application, where this value was passed by the defined parameter from the menu.
Workflow
In archITekt, it is also possible to directly pass parameters from the menu level for workflow.
- From the menu level in the Properties panel, click on the Parameters section and add parameters.
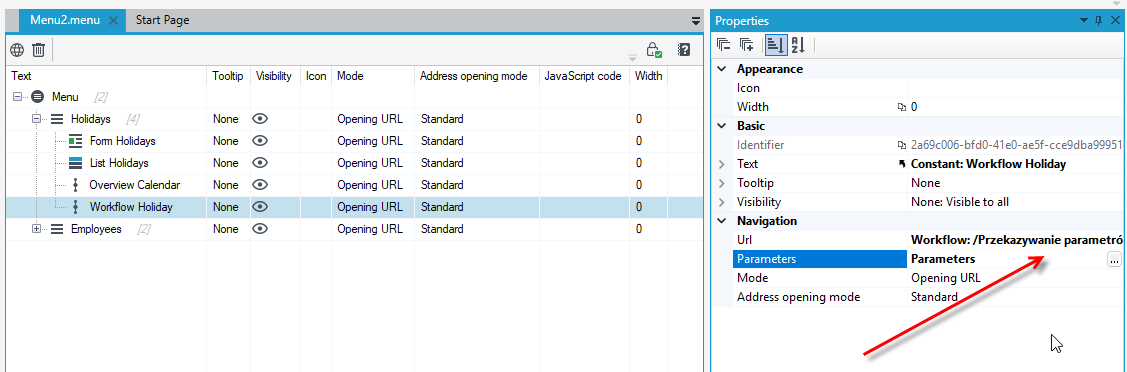
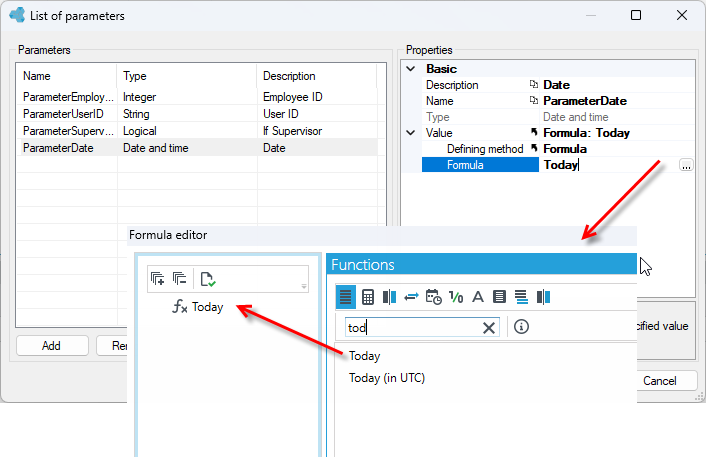
- Three parameters have been defined:
- ParameterUserID (string) – corresponding to the ID of the person who processes the leave application, which is defined by the function Current user ID in the formula editor.
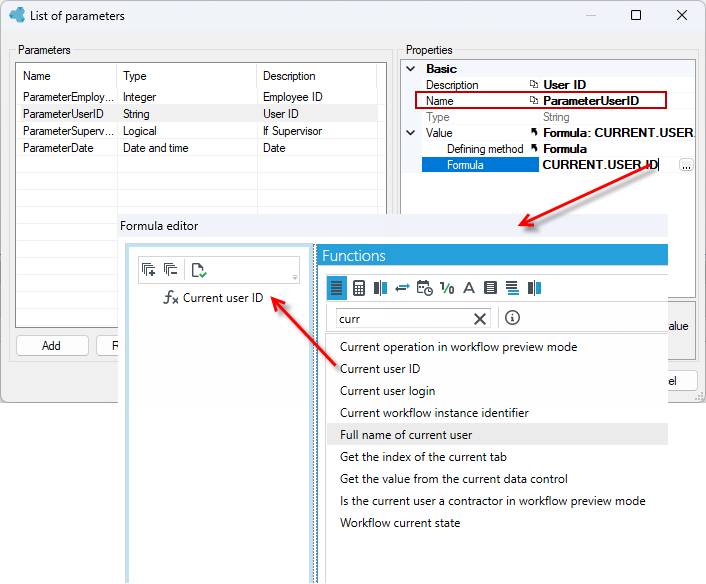
- ParameterDate (Date) – date of submitting the leave application, which is defined by the function Today in the formula editor.
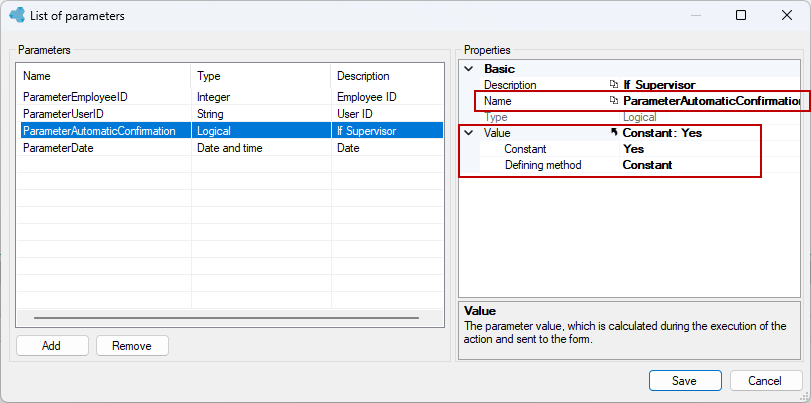
- ParameterAutomaticConfirmation (Bool) – a value that informs whether the processing of the leave application should be automatic or approved by the supervisor.
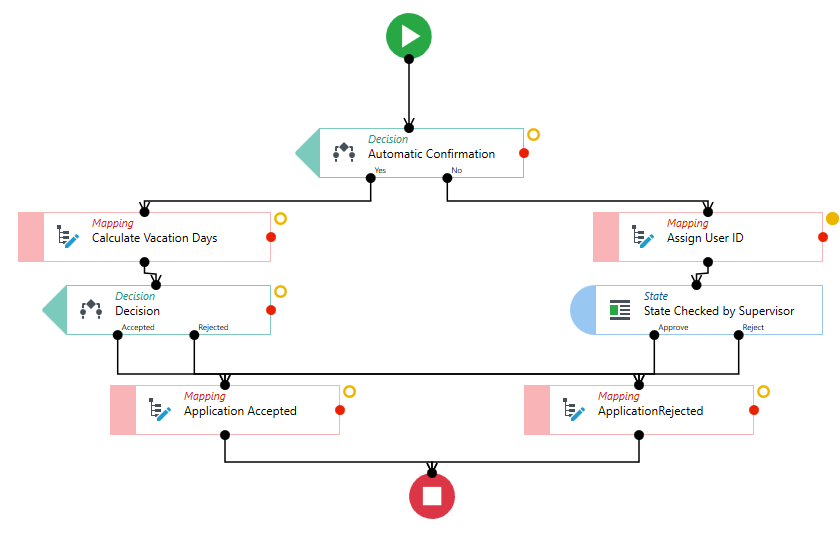
- Create a workflow in archITekt Studio. In this case, the workflow will concern the processing of the leave application.
- Next, in Variables, we define variables to parameters.

The parameters (variable names in the process) must have the same names as those defined in the menu.
Now we can use variables in the workflow, in the decision activity we define whether the workflow will be automatic or manual.
- Go to Output ports in Decision acitivity.
- Add conditional output (Yes) and define condition in formula editor.
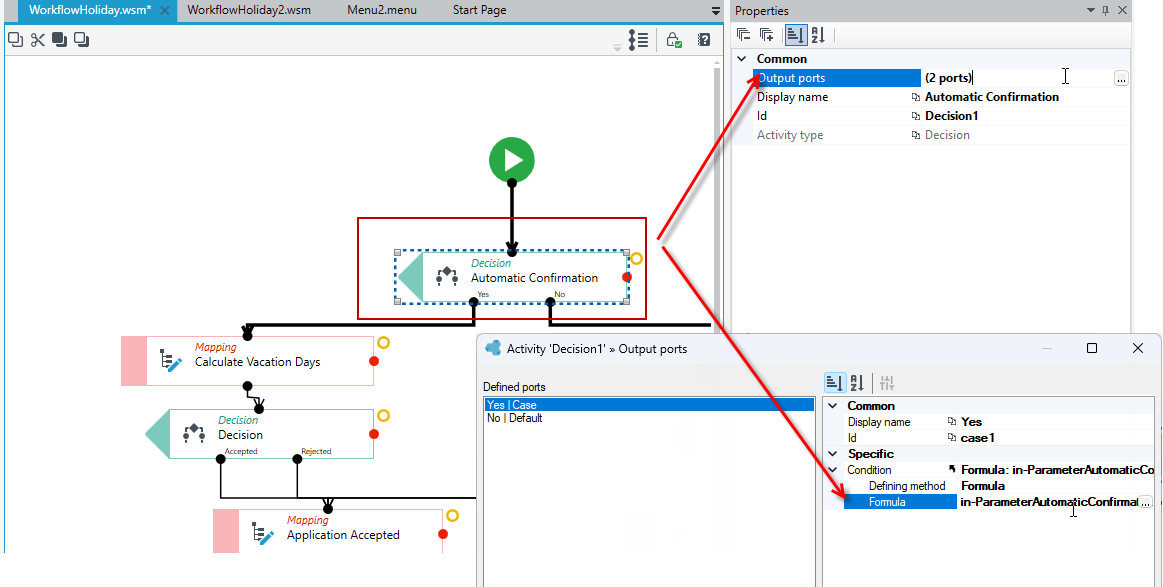
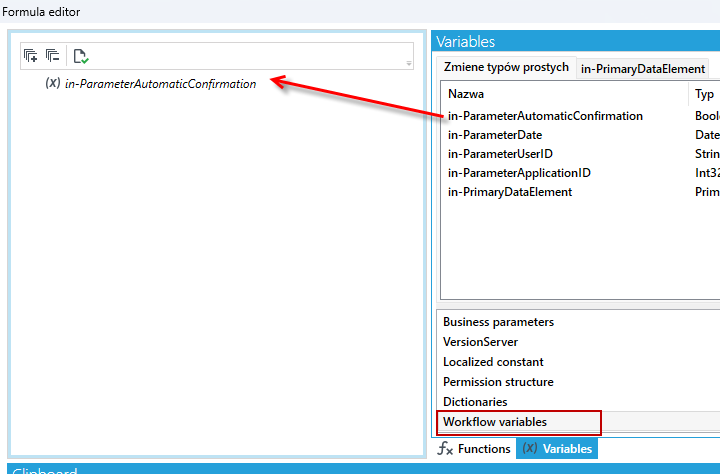
- Go to Formula editor and Workflow variables.
- Drag the in-ParameterAutomaticConfirmation onto formula node.
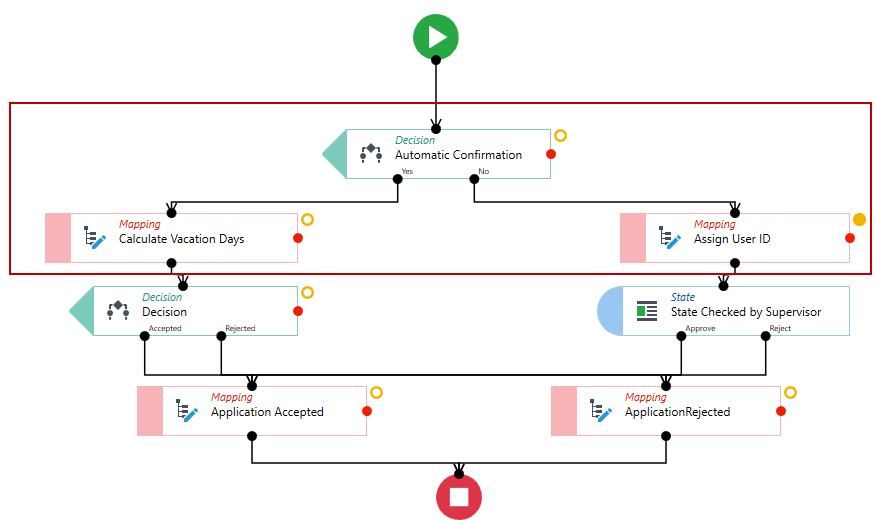
- If the passed parameter Automatic Confirmation = True, the workflow will go to the path with automatic application processing.
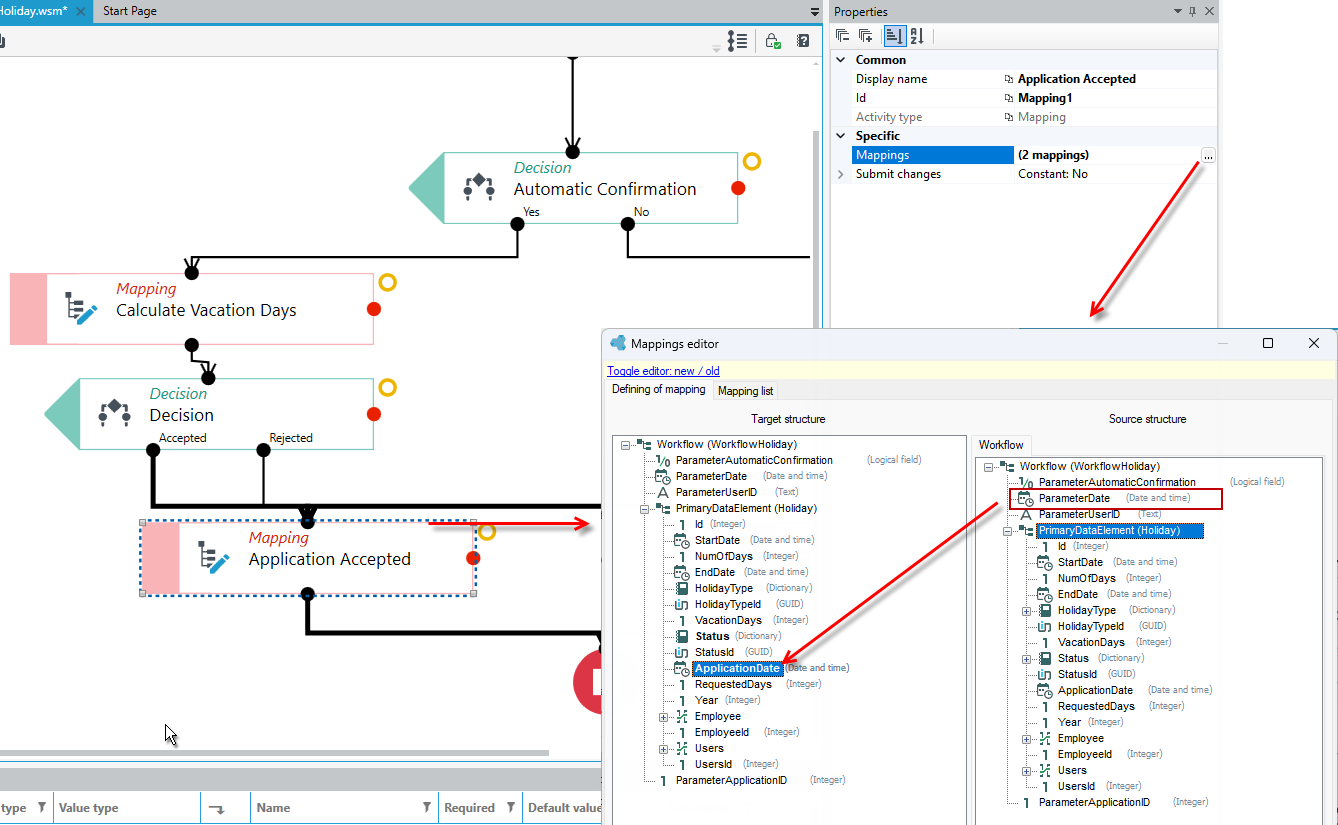
- Then, ParameterDate was assigned to the ApplicationDate variable of the Holiday structure. This variable defines the date the application was created.
- Go to Mappings section and drag the parameter to the field from the data structure.
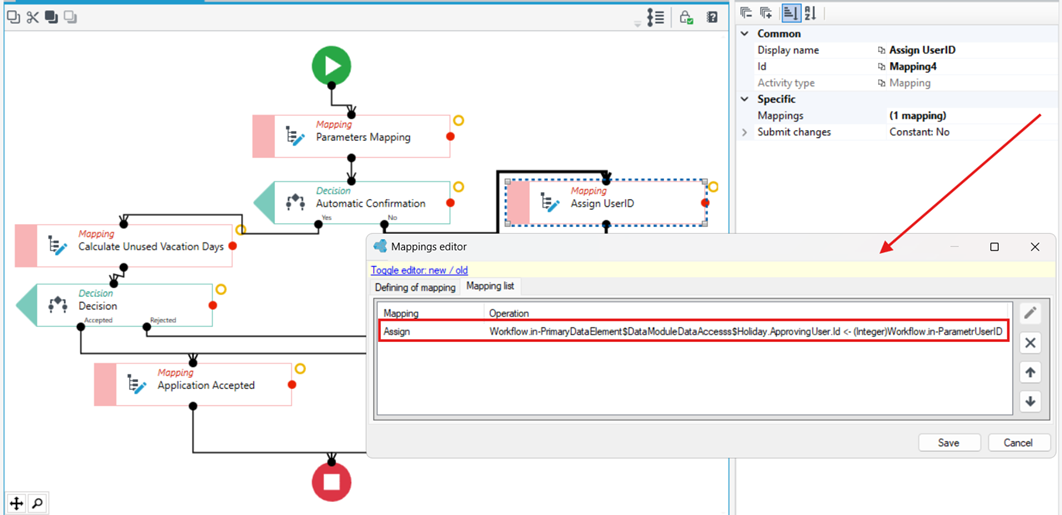
- The ParameterUserID parameter was assigned to the ApprovingUserId variable of the Holiday data structure.
If a parameter with the value Yes for automatic confirmation has been passed, then the application is immediately accepted and the execution of the workflow is completed.
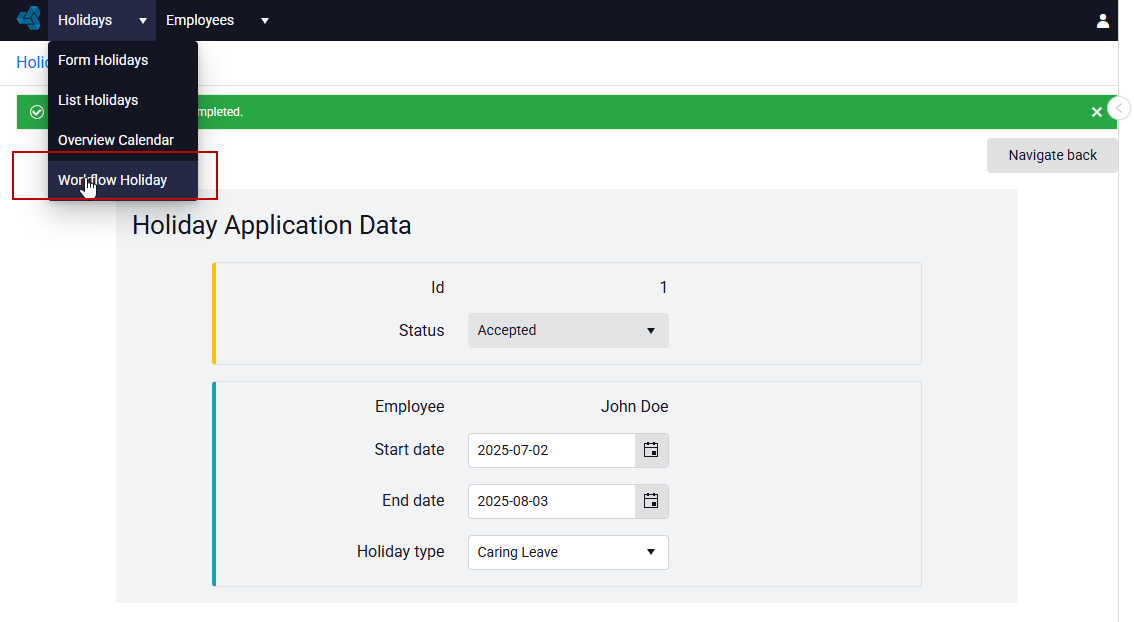
Otherwise, the application goes to the supervisor, who can approve or reject the leave.