Working with the table
The Documents generation supports working with tables and enables the use of tags inside a table, as well as displaying multiple data tables and data lists. Depending on the type of data, tables may contain different numbers of columns or rows. For working with tables, mainly the tags Iteration, Breaker and Table are used. Inside the tables, you can apply other tags and insert field values from the structure. The Condition tag can also be applied to tables.
Iterating rows
The Iteration tag is used to iterate table rows (see: Iteration), which is placed on the entire row. All Value tags that are placed on the row on which the iteration was established must come from the same table / relation that is indicated as the data element for the Iteration tag.
In the example below, the row is iterated based on the Vehicle table. All Values in the row where the Iteration is assumed also come from the Vehicle table.
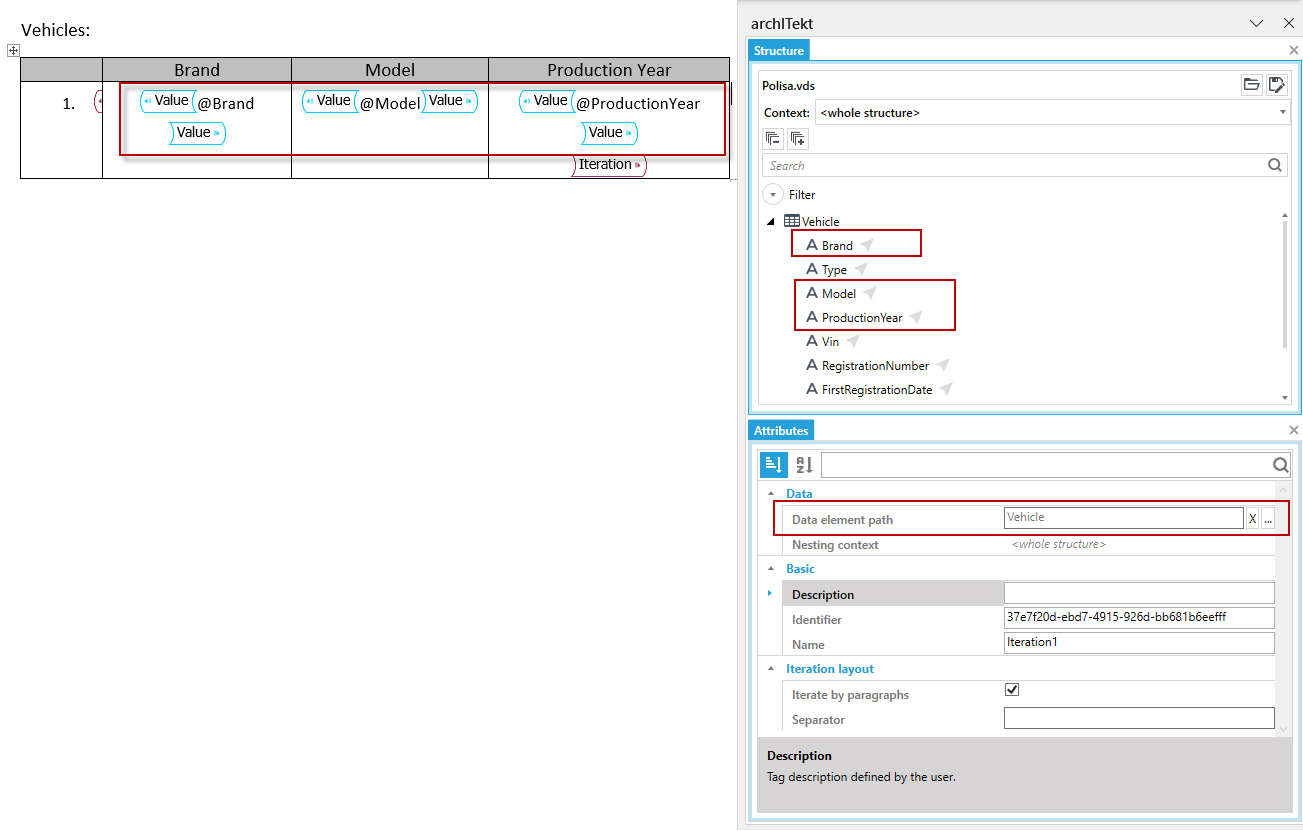
In the generated document, the table row is repeated for each Brand, Model, and Production year data set passed in the Vehicle table.

Iterating columns
The Iteration tag is used to iterate table columns (see: Iteration), which is placed in each row of a given column that is to be repeated. All Value tags that are placed inside the Iteration tag must come from the same table / relation that is indicated as the data element for the Iteration tag.
In the example below, in each row of the table in the second column, an Iteration tag has been inserted, inside which the fields to be displayed in a given row of a given column are placed. Both Iteration tags are based on the same Vehicle table, so Brand and Model are from the Vehicle table.
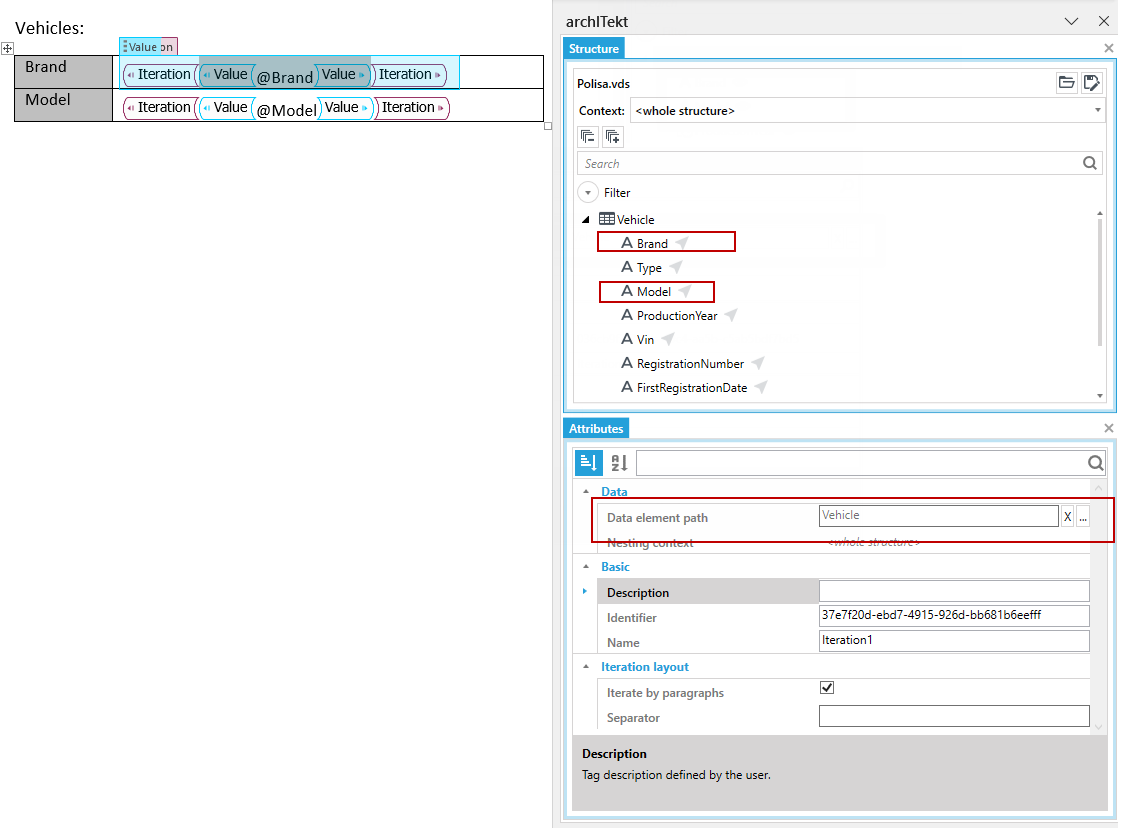
In the generated document, the car model and price column is repeated for each Brand and Model data set passed in the Vehicle table.

The Breaker Tag
If there is a concern that the number of data sets transferred to the document will be large, you can define how many columns should be displayed for a given row. To do this, use the Breaker tag. This tag is placed on the table row.
- In the tag attributes, define the number of header columns and the number of header rows, i.e. those that are column and row headings and should not be duplicated.
- In the Maximum number of columns field, define the number of columns after which the table should be split. The remaining columns for the remaining datasets will be displayed in the subsequent rows of the table.
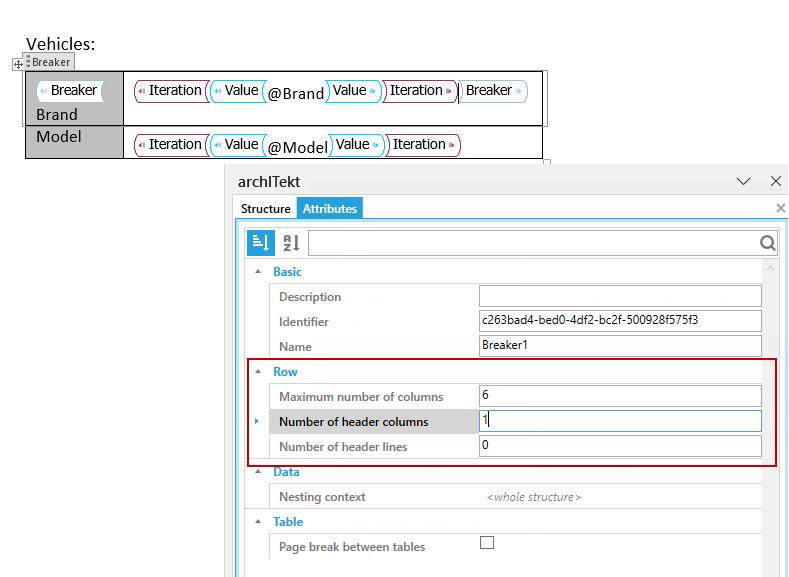
In the example below, the Break tag has been created on the first row of the table. The first column of the table is the header, so in the Number of header columns field, the value 1 was inserted. The table does not have a row that would be a header, so the value 0 was entered in the Number of header rows field. The value 6 has been inserted in the Maximum number of columns field, which means that for the data of the Brand and Model rows, a maximum of 6 columns with the Brand and Model data sets passed into the document can be displayed. The remaining data sets must appear on the following Brand and Model lines.
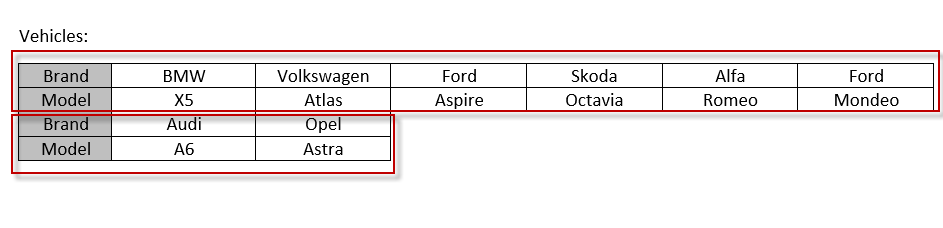
In the sample document, 8 Model and Brand data sets were transferred. In the generated table, columns are repeated in given rows for 6 data sets. The remaining data sets are displayed in the following lines.
The Table tag
In the event that you need to repeat a range of columns in a more complex table, you can use the Table tag, where you can define in detail the table range to be duplicated. The Table tag is placed on the entire table and a table or a relation from the data structure is indicated as a data element for this tag. All tags used inside a table must come from the same table / relation in the data structure that is indicated as a data element in the Table tag attributes.
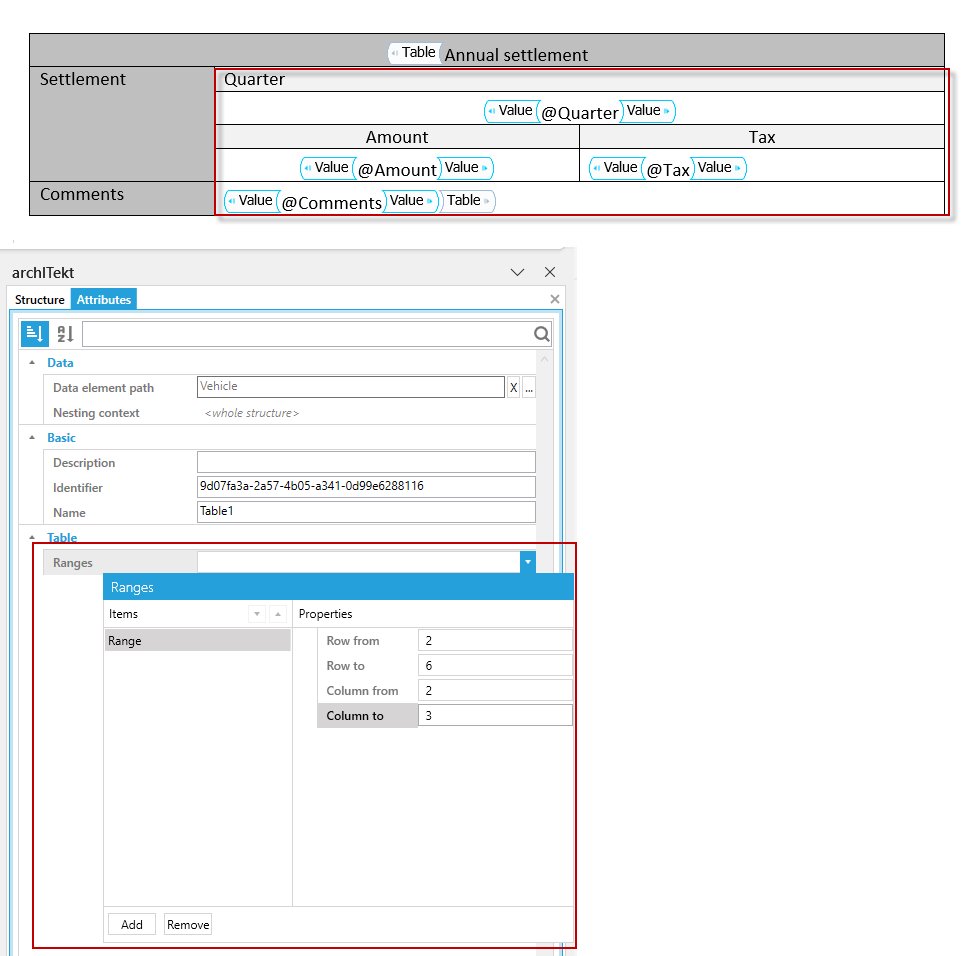
In the example below, the Table tag is placed on the entire table and based on the Settlement from data structure table. All values inside the table also come from the Settlement table. In the Table Tag Attributes window, in the Ranges section, you define the table range that you want to duplicate. Rows 2-6 and columns 2-3 are to be repeated.
Note! Both rows and columns are numbered from 1.
The range defined in the Table tag will be repeated in the generated document.
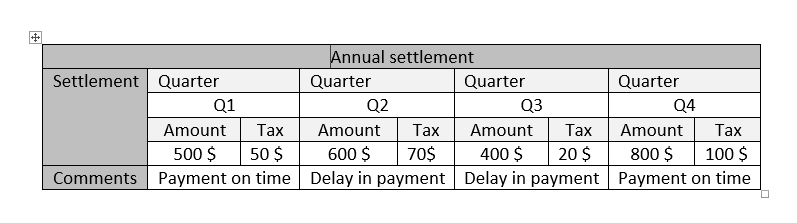
In order for the table in the generated document to have columns of equal width, it should be formatted in the same way as a typical table in MS Word using the options available from the ribbon Tools>Layout.
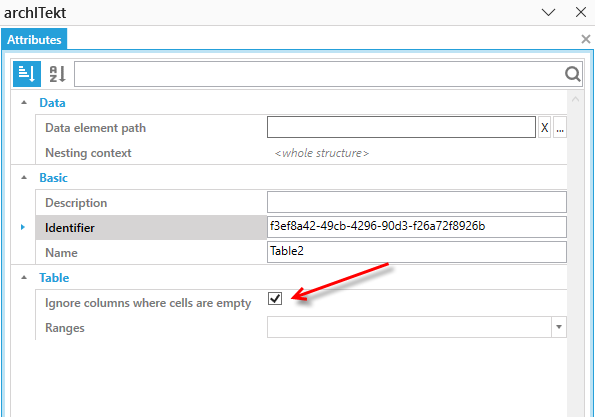
The Table tag also allows you to hide empty columns. This option lets you better tailor the data presentation to the user’s needs and the document’s context—for example, when you know that empty columns may be generated in the table.
- Go to the tag attributes and select the Ignore columns containing empty cells option.
See also
Style validation – The sub-template tag