History
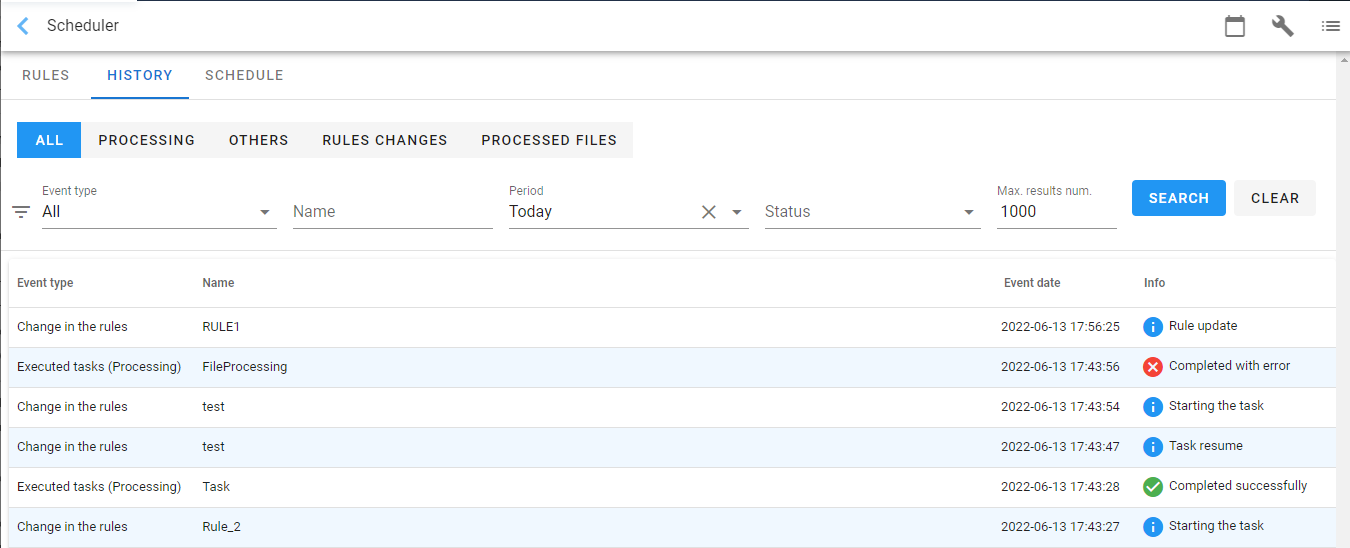
The History tab is divided into several sections, which aggregate the history of running tasks, changes in rules, changes in processed files, changes in task statuses in the Task Hierarchy, changes of the calendar, i.e. importing calendars, deleting processed files. The individual historical data is divided into sections.
History of the task hierarchy
The Task Scheduling allows you to run a hierarchy of tasks, both in response to the appearance of files (scenarios of downloading data from external systems) and at a specific time (scheduling, scenarios of uploading data to external systems). For more information on the task launch mechanism, see: Task hierarchy.
- After selecting the Processing tab, a list with tasks representing single runs of individual paths of the task hierarchy is displayed.
- Tasks are grouped according to the cycle number. Additionally, a task hierarchy file that contains a hierarchy definition is used for grouping.
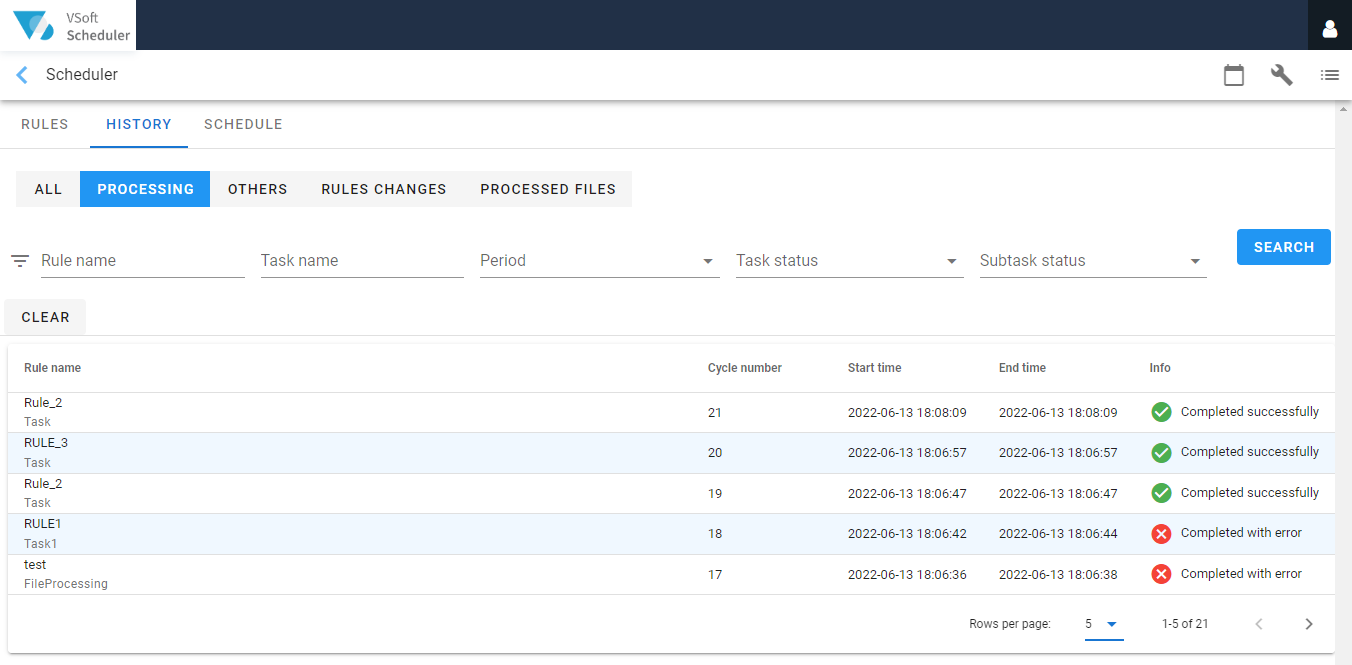
The tasks presented on the list above are the first tasks on the path and a single launch of such a task. To go to the list with tasks from the task hierarchy path see: Hierarchy Details.
Hierarchy details
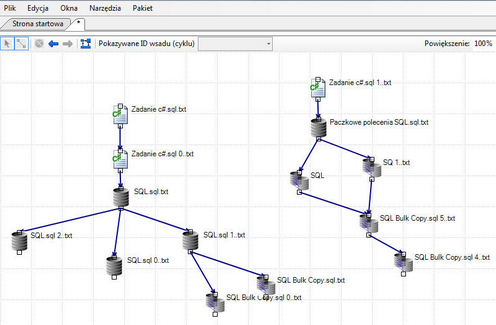
- After selecting a task, a list with the tasks in the path of the task hierarchy that the selected task starts with is displayed.
- The list shows all the tasks, including the task from the upper list. After clicking on a task, a panel with a list of starting parameter values will be displayed.
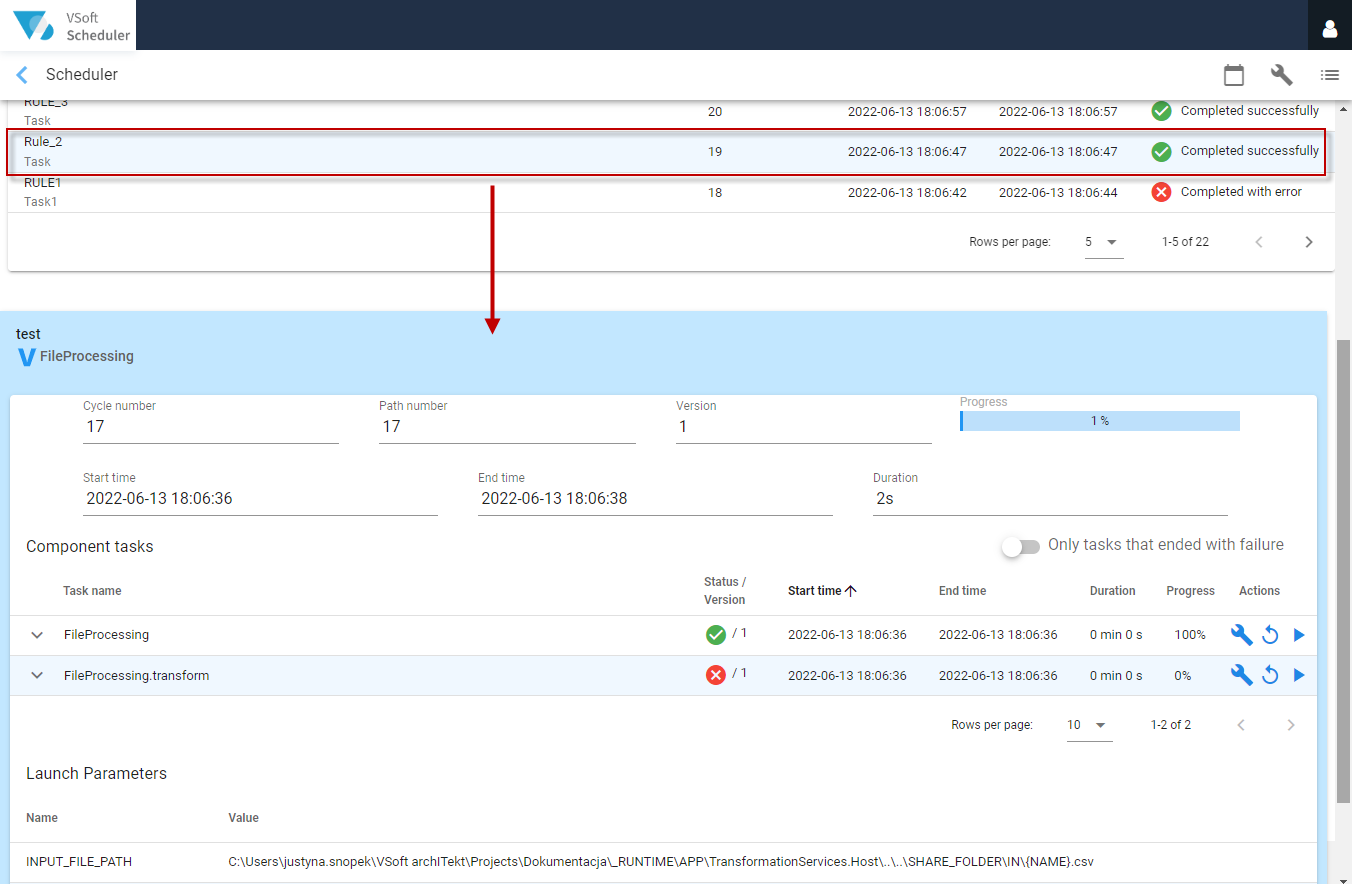
In addition to the task master data, there is a Component tasks section below that shows the details of the task hierarchy.
The table contains basic information about the task hierarchy, including:
- the name of the task,
- the time of starting and ending of the processing of the task,
- duration of the processing,
- the executor (the name of the machine on which the task was run) - this option is used if the Data processing package is running in the cluster mode,
- status,
- percentage of the processing progress.
Additionally, after expanding a given task, a message regarding this task will be displayed (it may be useful in case of an error in the selected task). Then you can copy the error text to the clipboard. Select the button 
The user has the option to perform an action Run or Resume for the selected task and to change the task status to any other status.
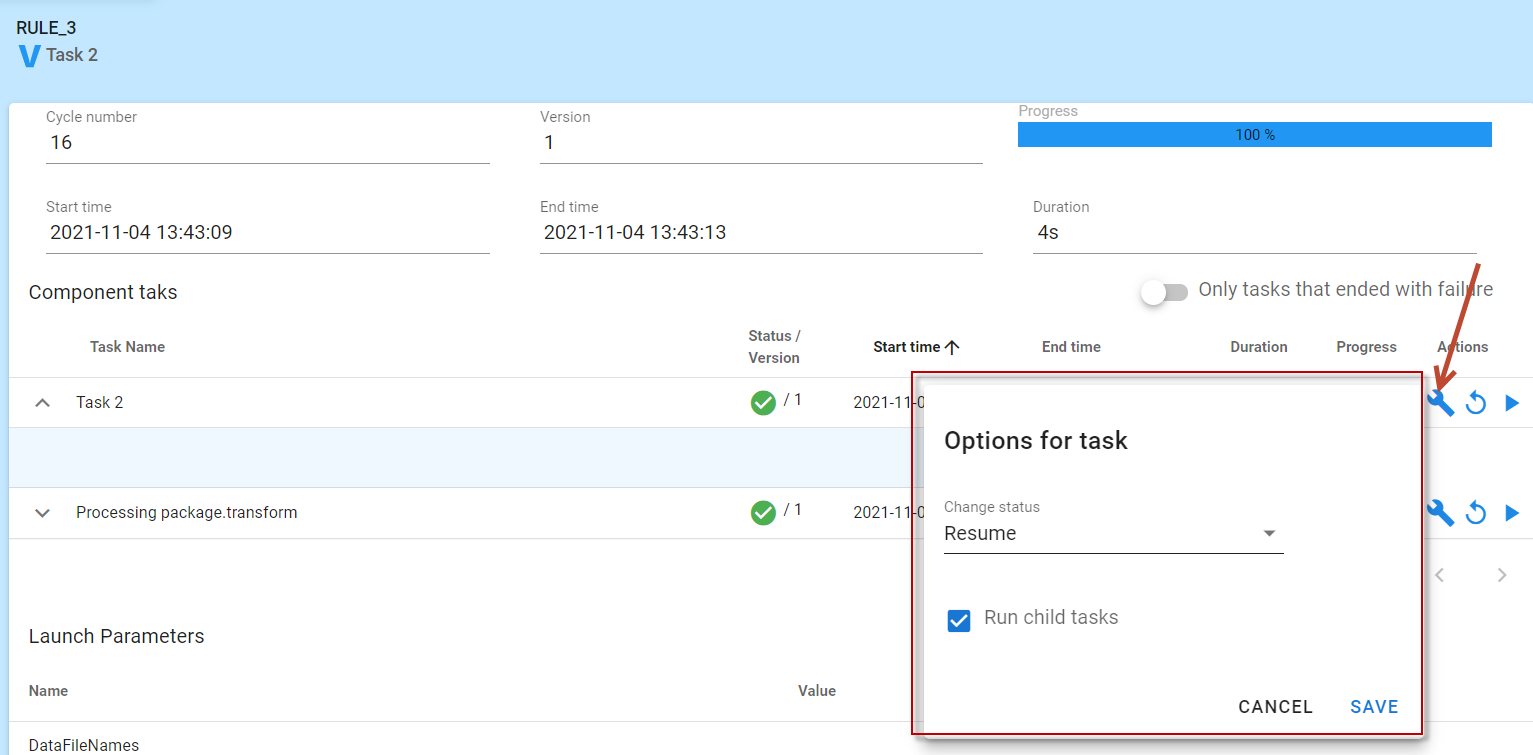
When changing the status, the Run child tasks option is available, which defines whether only the selected task is to be performed or the entire hierarchy path related to the task.
After selecting a given status and confirming the action, a window appears with a warning about the action being performed and the details of the status and the task.
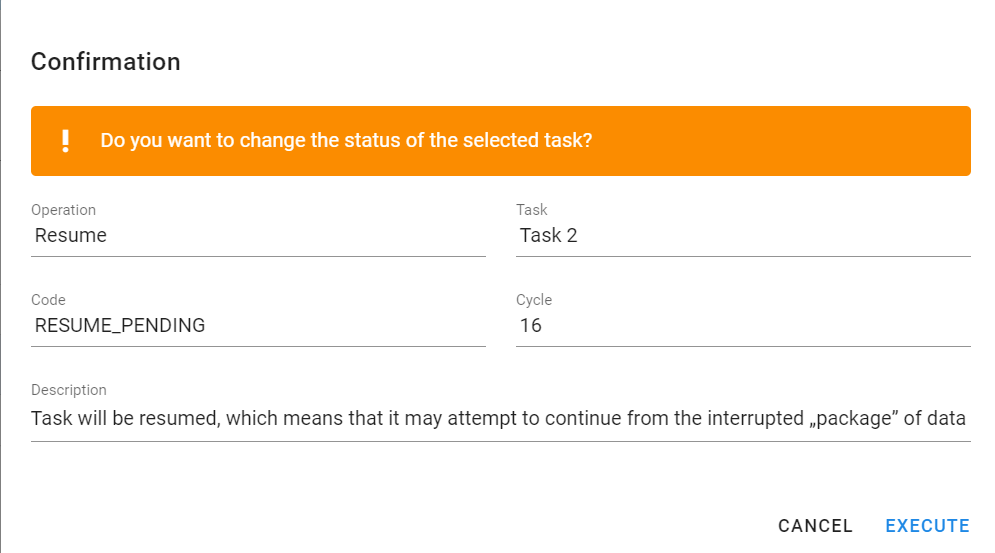
Task statuses
The statuses in which the task can be found are presented in the figure below. The primary processing path is marked in yellow. Circles represent task statuses, including final statuses (thick line).
Diamonds indicate functions performed by tasks:
- Check () - checking the starting conditions of the task - can be performed safely without making changes to the environment (therefore marked in gray),
- Run () - proper performance of the task - usually a long-term activity causing the progress update (Increment progress),
- Resume () - resuming operation after an interruption is detected, often leading to the same action as Run (),
- Stop () - ending the task's operation - after transitioning from the SKIP state without running the task, it is obviously not performed.
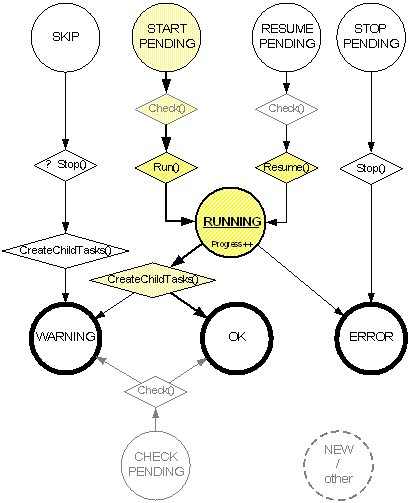
You can change the final status of the task ERROR to a different one, for example, to create child tasks and continue processing. You can set any status: OK, WARNING, ERROR. Similarly, in the case of WARNING, the user also has the option of changing it to another, e.g. to suspend processing.
History of performed tasks
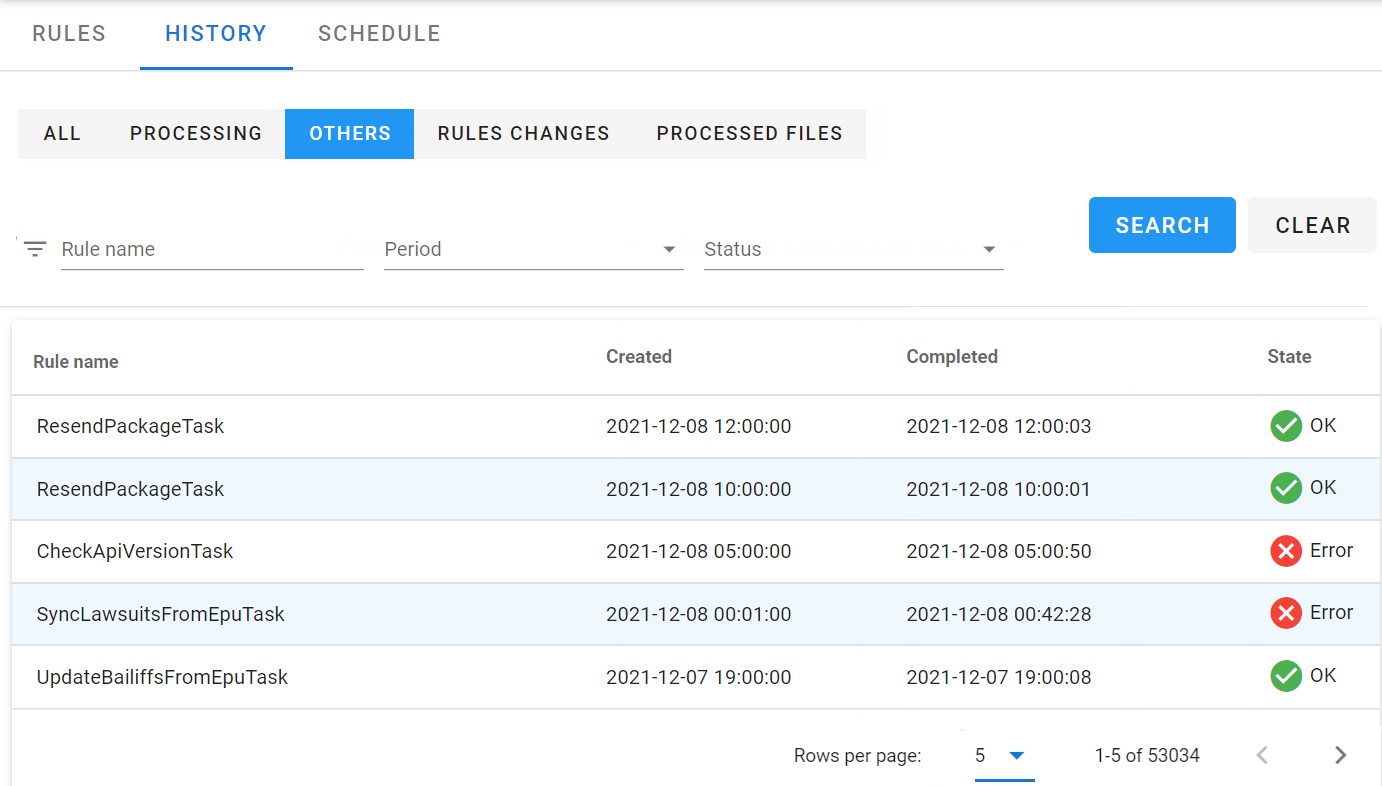
After selecting the Others tab, the window presenting the list of all tasks run synchronously (Code tasks, processing tasks) will be displayed.
- You can view the history of the task status changes and the task details. The task details include errors, if any, or information returned by the task authors from code (CodeTasks).
- After clicking on a task, the details panel will appear on the right, with information about its status, creation date and completion date. When an error occurs, information about the error with a description will be displayed.