Create a new workflow
Building a workflow
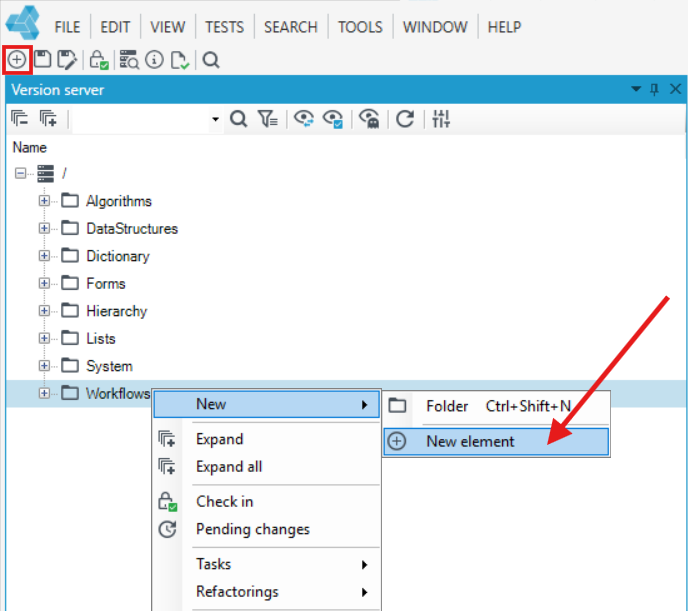
- In the main window select New, or File>New, or the New Item icon.
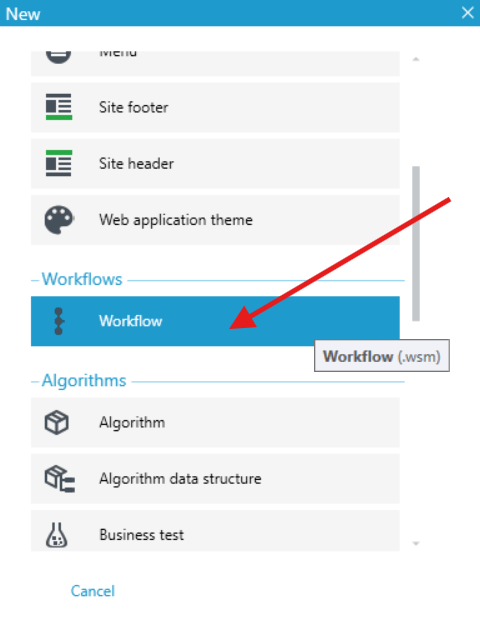
- Select Workflow.
- In the next window indicate whether the workflow should be persistent or not, i.e. microworkflow.
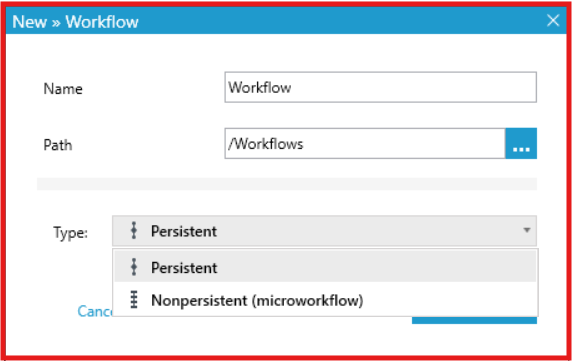
By default, a persistent workflow is created, i.e. one that is designed to build long-lasting workflows containing, for example, interaction with the user for whom information about its execution is saved in the database.
If you want to create a workflow that will only exist in the memory for runtime, select Nonpersistent (microworkflow). In the case of a non-persistent workflow, no information about its status and execution path will be saved in the database.
After the workflow is created, the workflow designer is displayed. The Toolbox tab lists everything that you can use to create workflows.
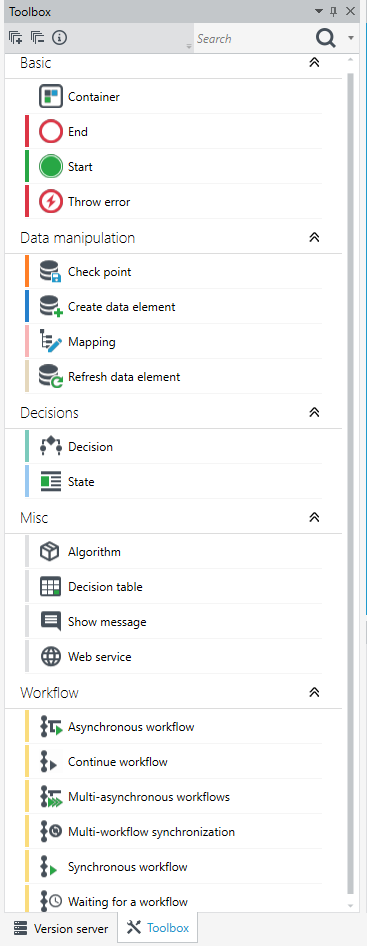
In order to correctly define the workflow, its elements should be defined, and then links between them should be created.
When designing, you can use the following elements (workflow activities):
- Create a data element
- Check point
- Mapping
- State
- Decision
- Asynchronous and synchronous workflow
- Waiting for a workflow
- Multi-asynchronous workflows
- Multi-workflow synchronization
- Continue workflow
- Refresh data element
- Algorithm/Table
- Web service
- Show message
- Throw error
Adding links between workflow elements
Elements placed on the workspace must be linked with each other. A link can be created between two elements. Each of the elements (except the Start and End elements) should have at least two connections with other elements of the workflow. These links indicate the workflow flow direction.
- Select the item you want to link to another workflow item.
- Place the cursor over the element at the black connection point.
- Press the left mouse button and drag the pointer over the black point on the element with which you want to connect the selected element.
- Release the mouse button.
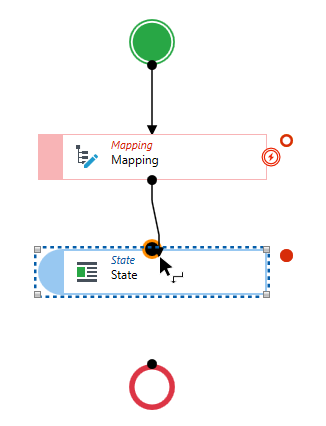
You don't always have to create connections manually. If you drag a new activity from the Toolbox panel and drop it onto the preceding activity, it is connected to it automatically. Dropping an activity onto an existing connection inserts it into the flow between two elements. See: Inserting and removing activities in the flow.
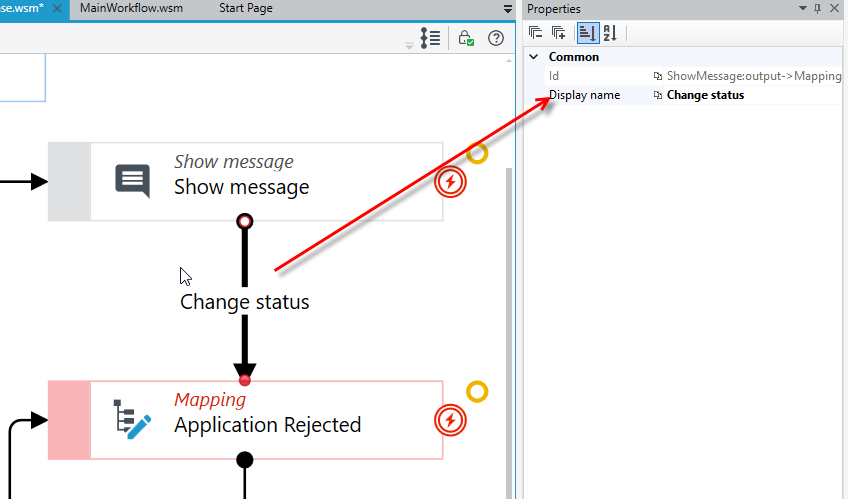
- Connections can be given names. To add a name to a connection, select the line, then go to the Properties panel and enter the name in the Display name field.
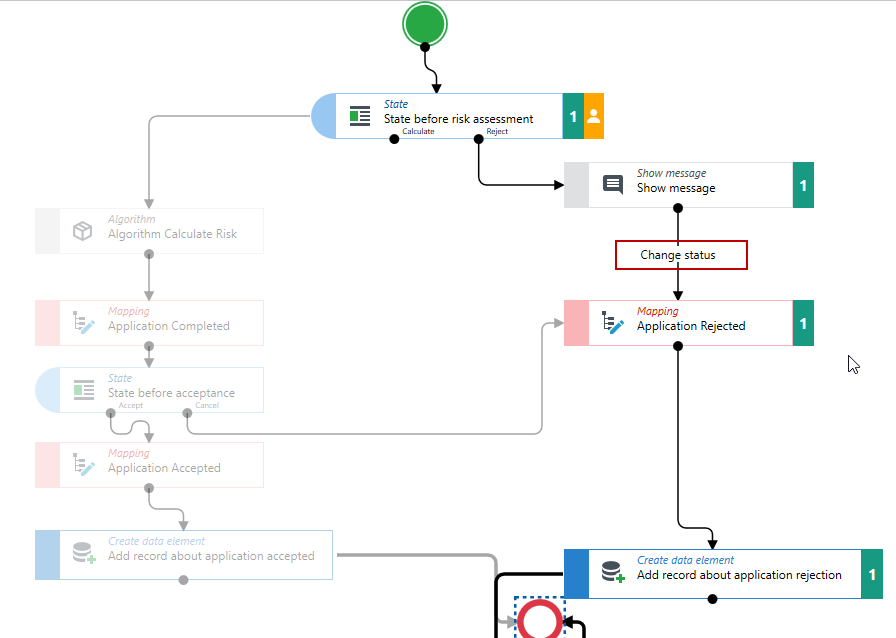
- The names of connections are also visible in the workflow preview mode after its execution.
Defining output ports
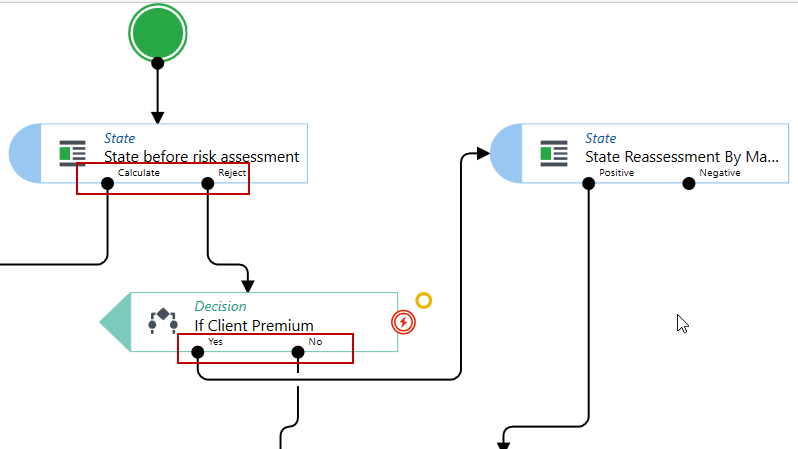
Output ports are outputs from a given element that indicate further steps in the workflow according to fixed paths.
The Decision and State activities can be configured in such a way that they have several outputs: in the case of decisions, they are outputs related to the fulfillment of one of the conditions defined in the activity, in the case of the State activity further steps in the workflow depend on the action selected by the user on the form.
Apart from the outputs used in the regular workflow flow, activities can also have:
- timeout outputs – marked with a clock icon, they let the workflow continue after a specified time, e.g. when the user does not perform an action on the form or an asynchronous workflow does not finish in time. For more information, see: State element - timeout output, Using the timeout output for integration with other systems and Waiting for a workflow - Synchronization.
- error handling outputs – marked with the BPMN error symbol, they let the workflow follow an alternative path when an activity fails. For more information, see: Output port for error handling and Throw error.
Output ports are defined by selecting the element and navigating to the Properties panel. For more information on defining output ports, see: State element and Decision element