List mappings
For mappings of list elements, you need to perform several operations and specify the mappings in the formula editor, as well as the conditions for performing the mapping.
You can perform the following operations on a list:
- add elements to the list,
- complete / fill the list with data,
- remove elements from the list.
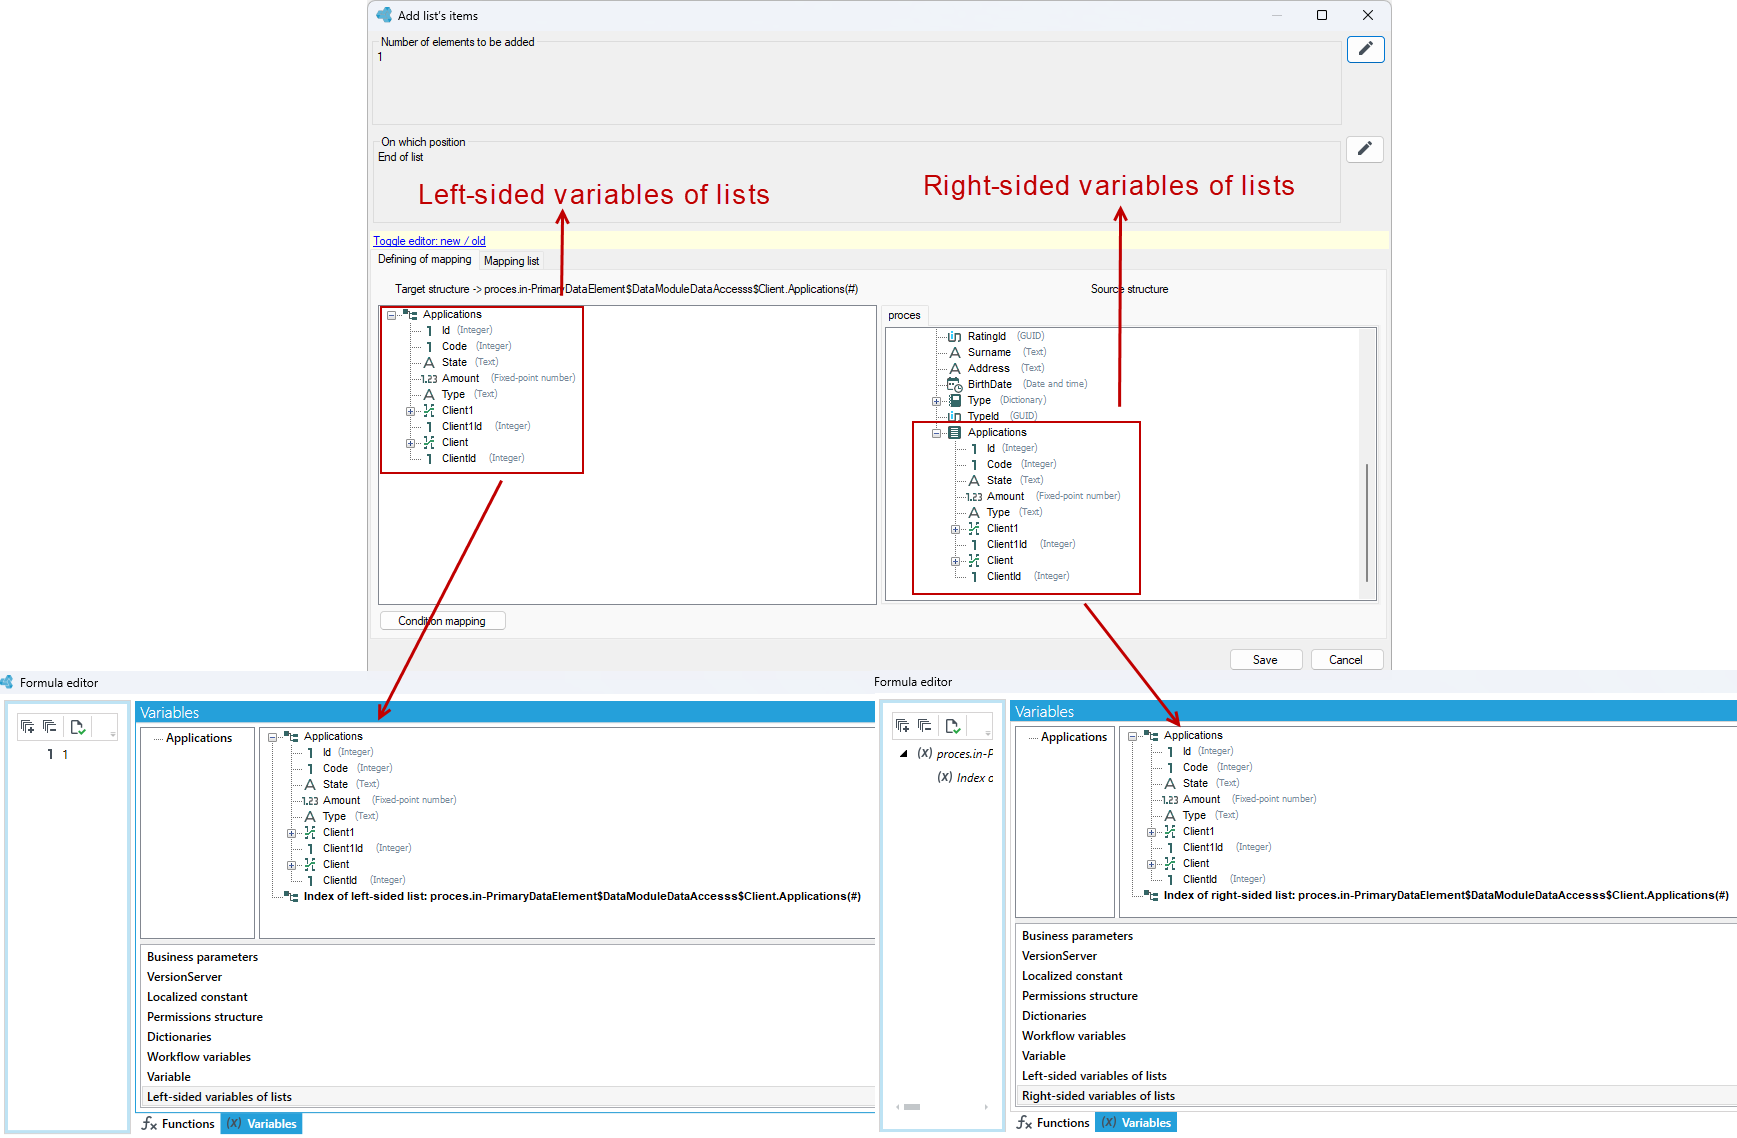
In the mapping editor, when you go to define the formula, additional variables like Left-sided variables of lists and Right-sided variables of lists will be displayed. This has to do with the mapping of list items, and depending on the context of which action or mapping the formula editor window is open, there will be Left-sided variables of lists or Right-sided variables of lists or both groups of variables.
Left-sided variables of lists are the list that is on the target structure in the workflow, and Right-sided variables of list are the list on the source data structure of the workflow. If you want to refer to the list to which you are mapping, use the left-sided list variables. If you want to refer to the list from which the mapping is performed, use the right-sided list variables.
List indexes - each list has its index so that we can determine exactly which element of the list is edited, filled with data, etc.
Adding element to list
In the following case of adding elements to the list, we will add a new element to the list of applications of a given client.
- Go to the mappings window in the workflow.
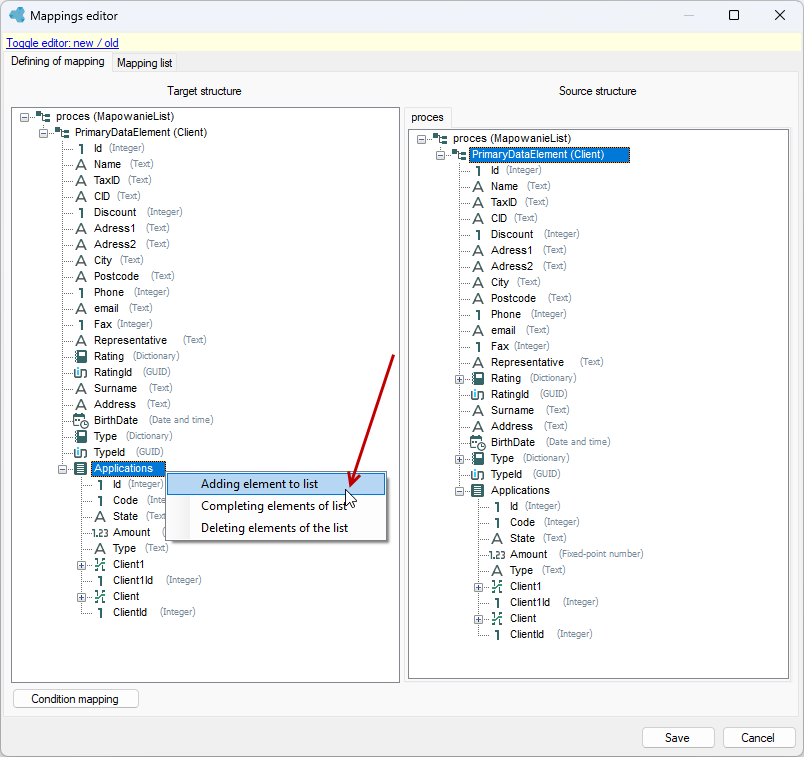
- On the left side, right-click on the list and select Adding element to list from the context menu.
- In the next window, specify through a formula the Number of elements to be added and On which position the elements are to be added. This window opens with the default formulas for Number of elements to be added: 1 and On which position as End of list (-1).
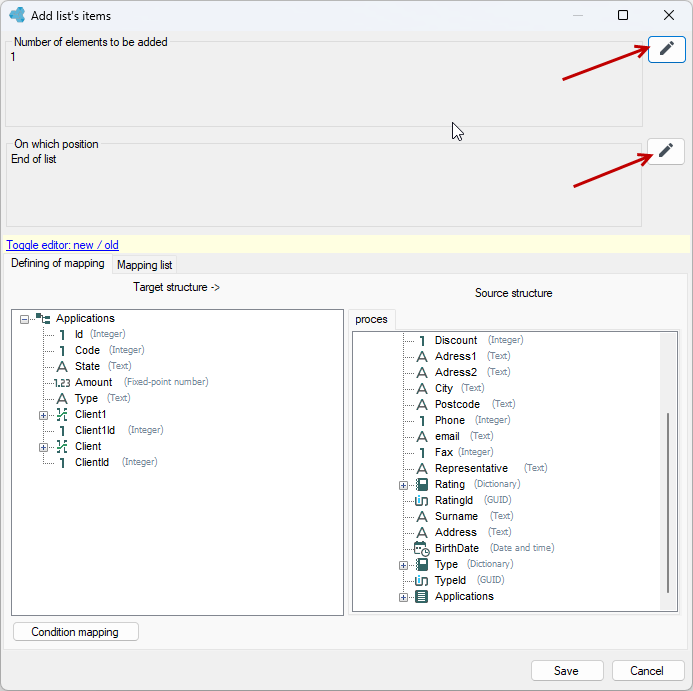
Usually we want to add one element to the list. This is the most common use when adding elements and we add it to the end of the list. If you expect this behavior, then leave the above settings unchanged.
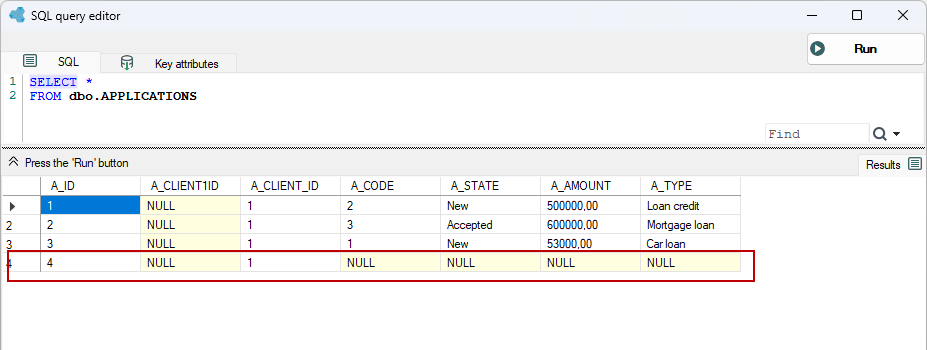
In this case, 1 element was added to the client's application list to the end of the list, where after running the workflow and querying the database in archITekt Studio, you can see that the element was added to the table and placed at the end of the list
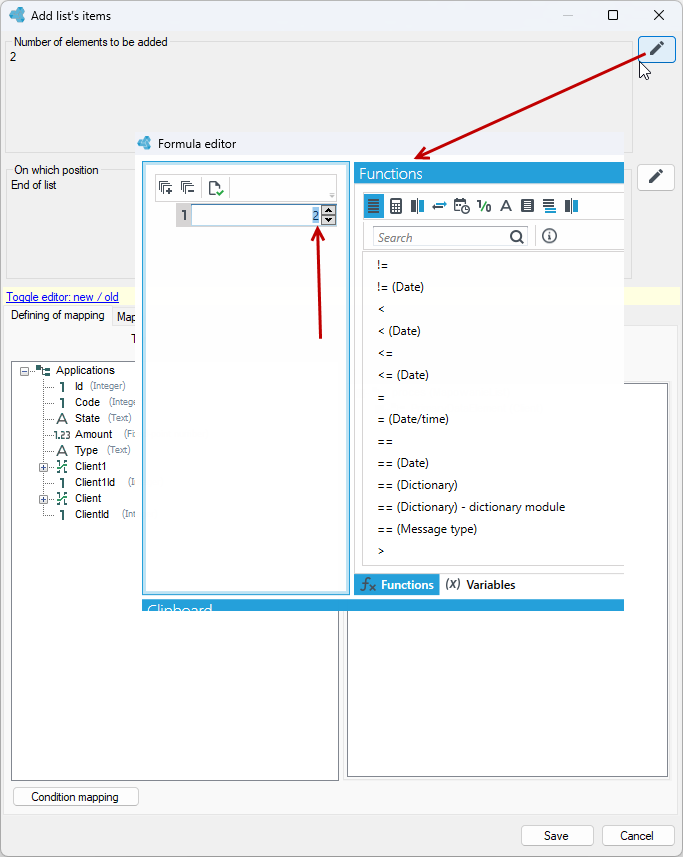
If you want to change the defaults and add several elements to the list, go to the formula definition in the relevant sections.
- Go to the formula in the Number of elements to be added section and on the formula node enter the data.
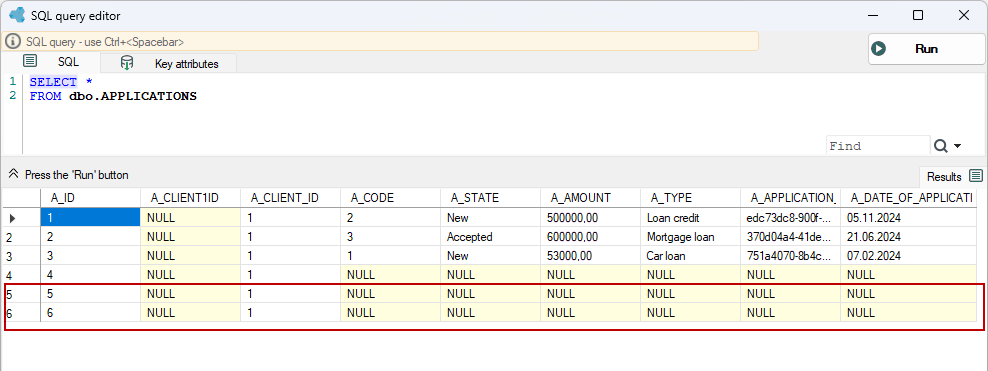
After running the workflow and querying the database, 2 items were added to the list:
Otherwise, you can also use the option to add all items, that is, to add as many items as there are in the list on the right side.
- In the following example, in the workflow we will connect to an external service to which we want to pass the list of all attachments of a given client.
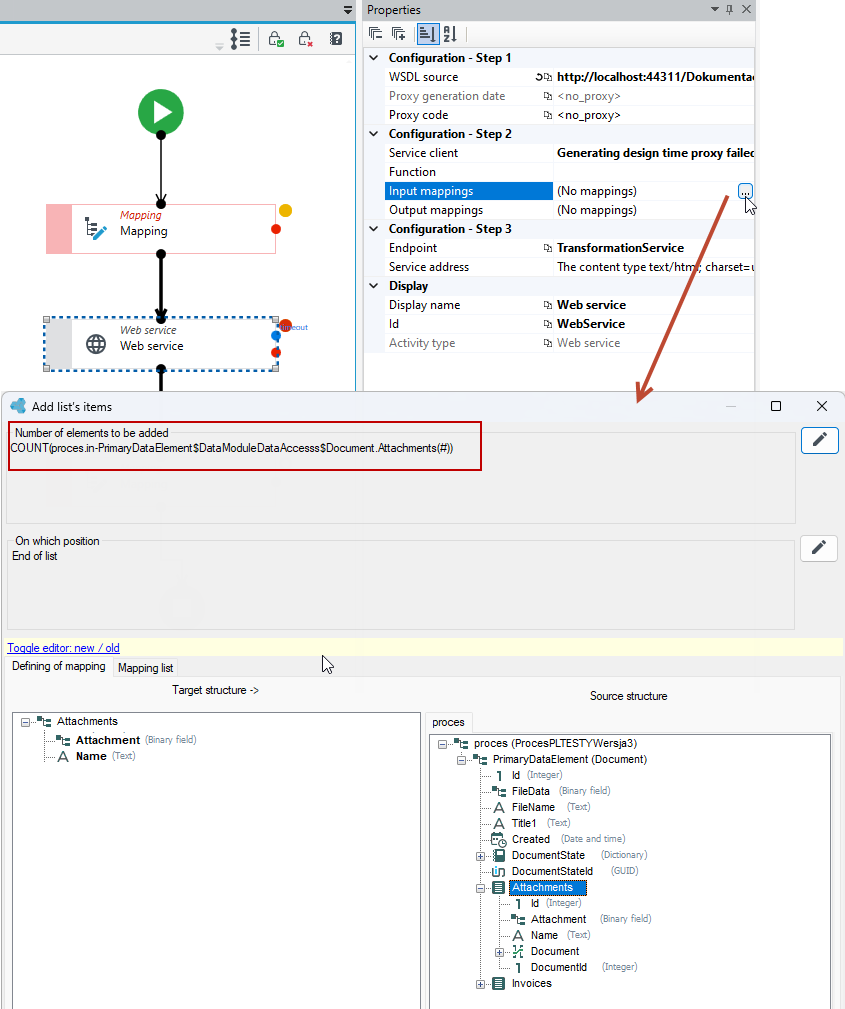
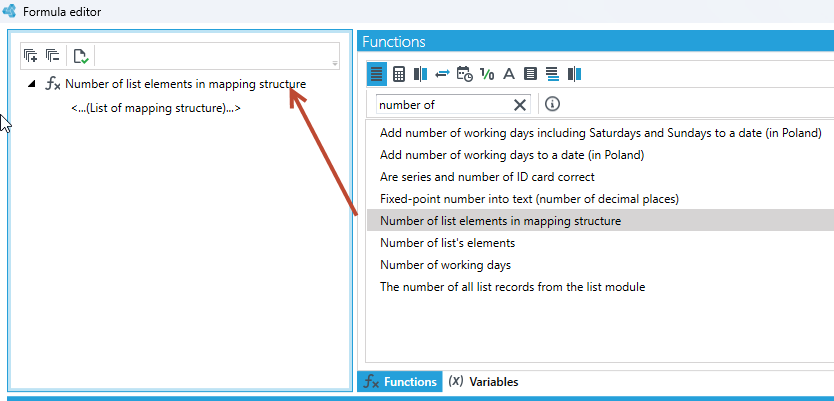
- Go to the details of the formula editor in the Number of elements to be added section. Search for the Number of list elements in mapping structure function and drag it to the formula node.
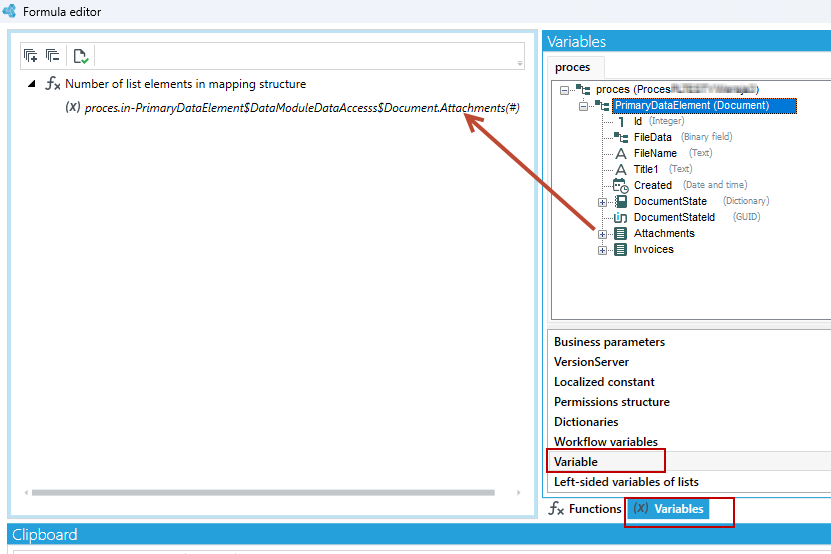
- Go to the Variables tab and drag the list to the function argument.
Completing elements of list
We can use the completing elements of list operation when we want to complete an empty list or modify/edit the data in the list.
For example, let's assume that there are already some elements in the list on the right and left, and based on the list on the right (Source structure), we want to complete/modify the data in the list on the left (Target structure).
- Go to the mapping window in the workflow.
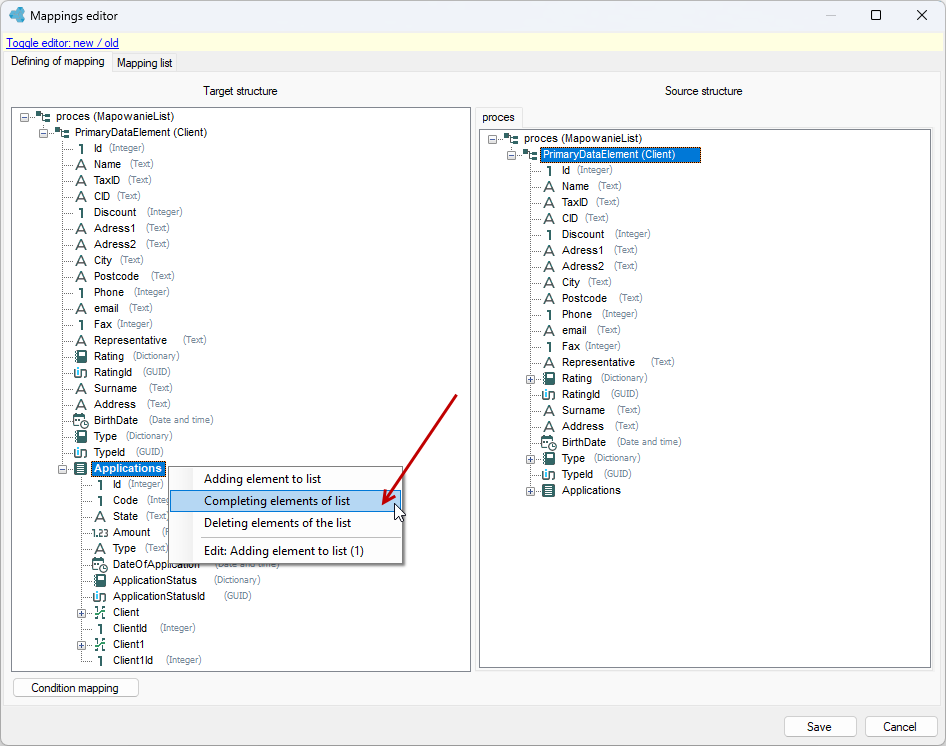
- On the left side, right-click on the list and select Completing elements of list from the context menu.
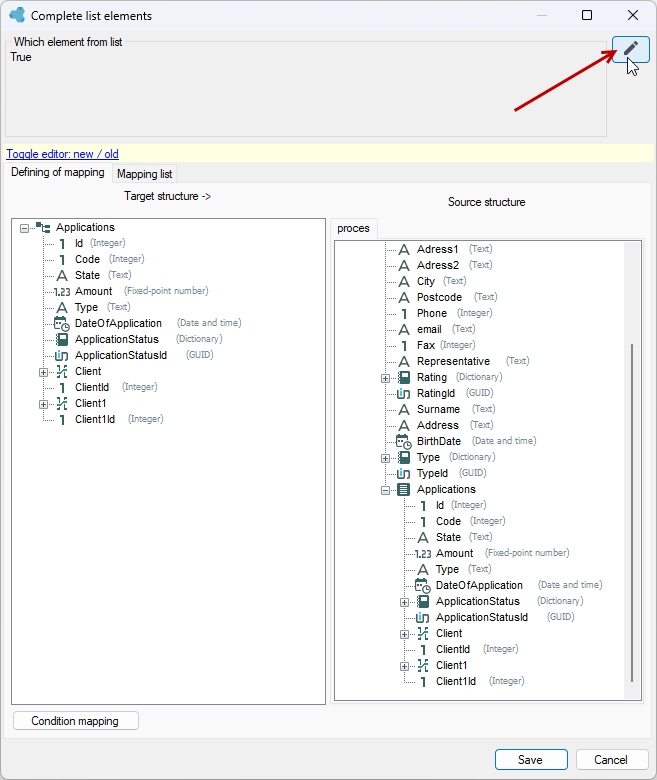
- In the next window, first specify in the Which element from list section the condition whether the element meets the criteria to be mapped.
By default, the formula in the Which element from list section is set to True which means that the mappings you define will be performed for the elements in each list.
- If you want to specify the condition for which elements of the list the mapping is to be performed, then go to edit the formula in the Which element from list section.
- The system will iterate through the list to see for which elements the condition will be met and thus the mapping is to be performed. In this case, for each client application.
- Next, create the mappings by dragging fields from the right side (Source structure) to the left side (Target structure). While iterating through the list, the system will apply the element mapping you define here to each list. In this case, for each client application.
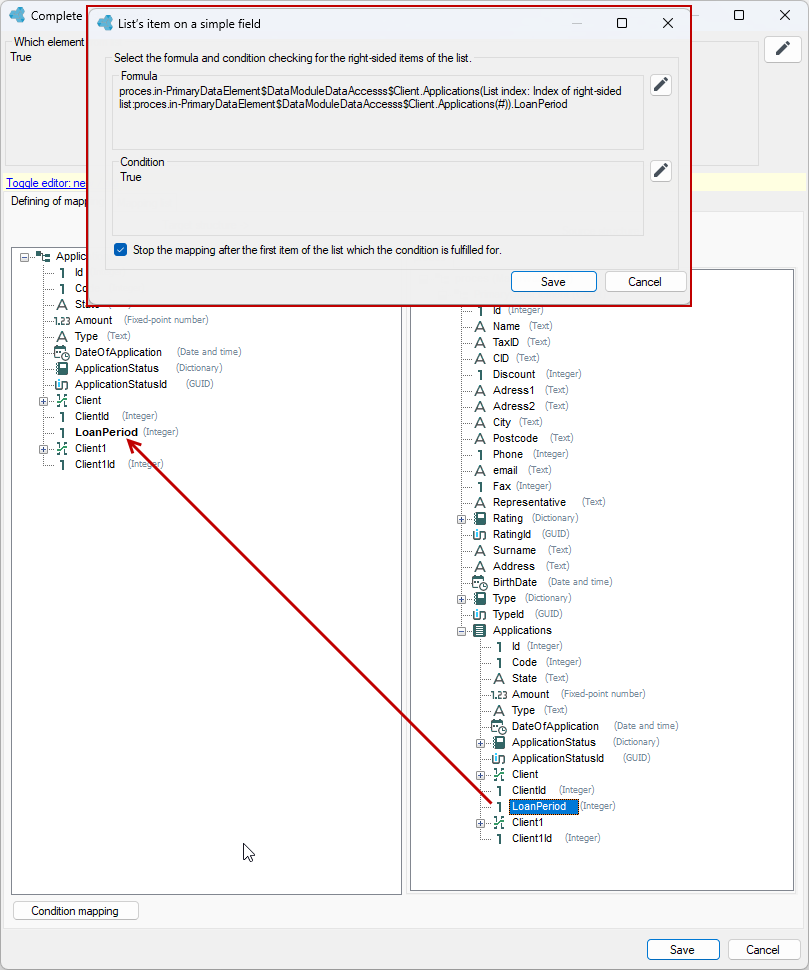
- After mapping the field, a window will be displayed in which:
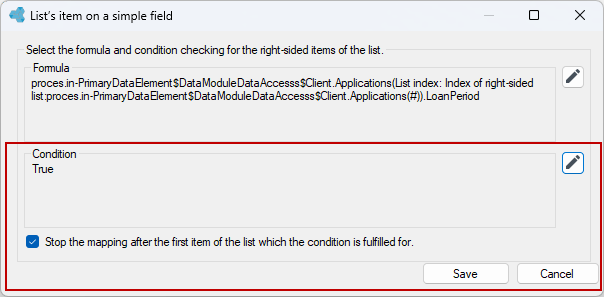
- In the Select the formula and condition checking for the right-sided items of the list section, the formula is automatically set based on the dragged field from the list, as well as the right-sided list index.
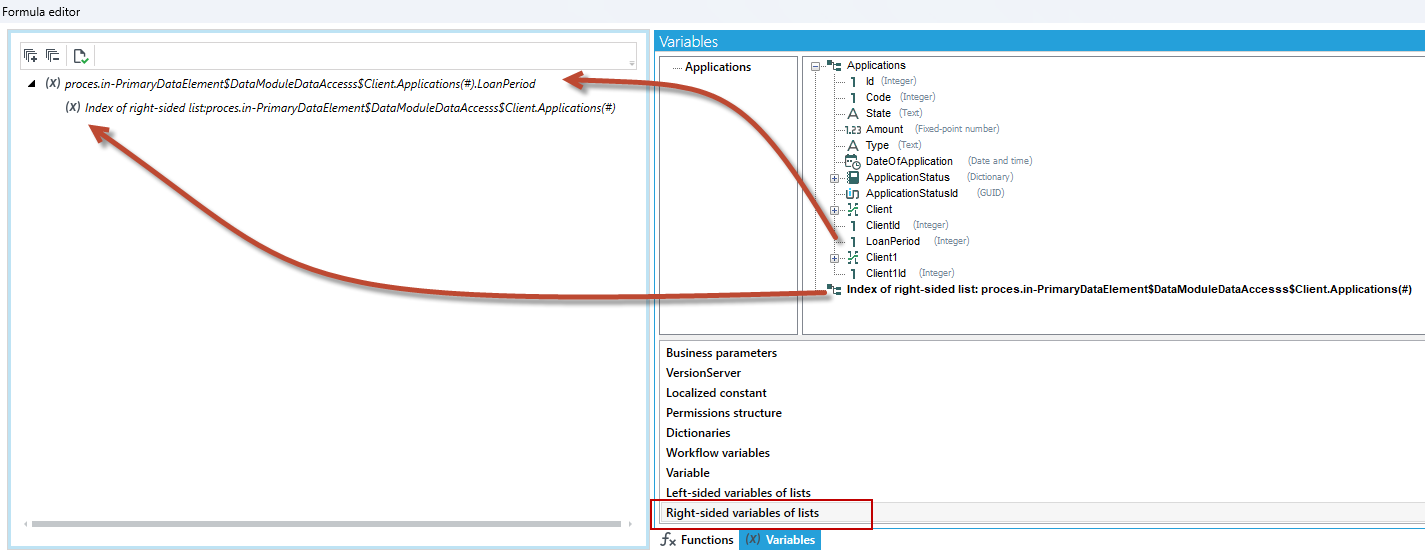
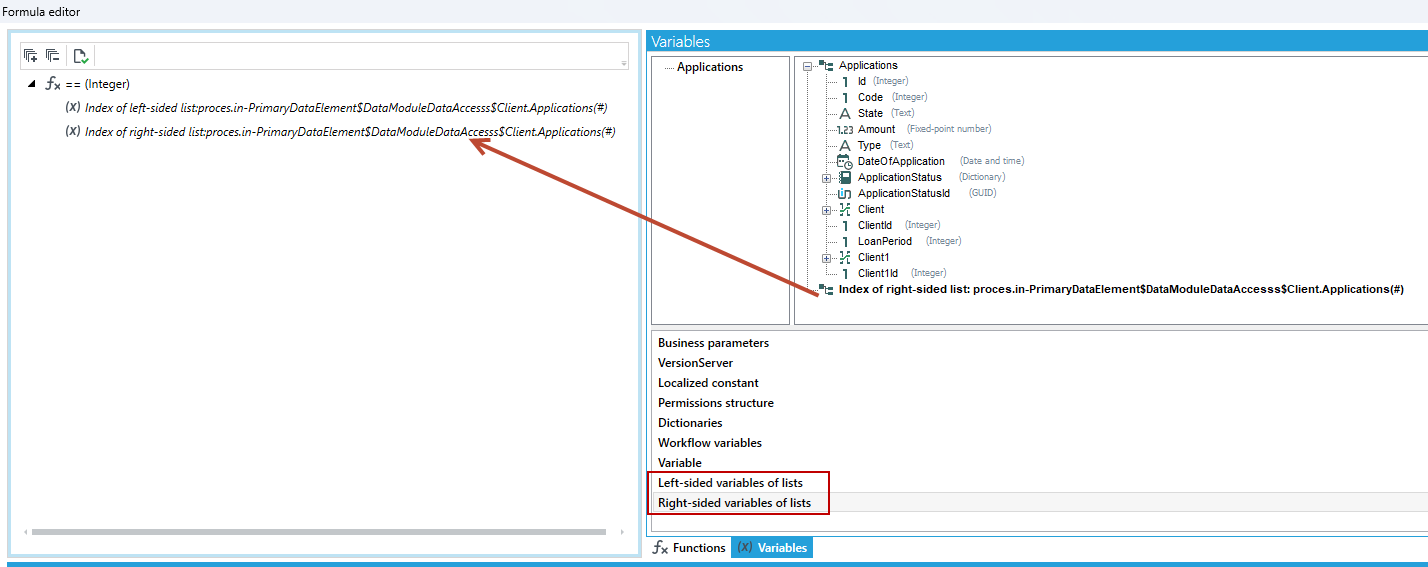
- After going to edit the formula, the Right-sided variables of lists, that is, the source list from which we drag data, are available in the formula editor. In the formula, in addition to indicating the field, it is also necessary to drag the index of the right-sided list. Because in this case we are pointing to the source list and the right-sided list will be iterated.
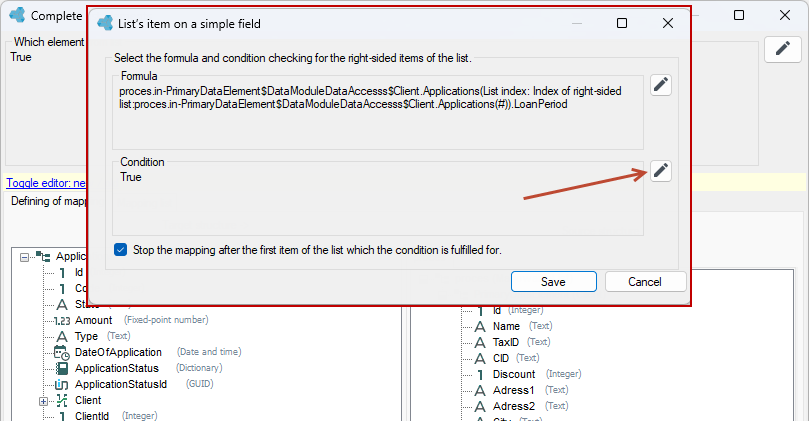
- In the Condition section, specify the data mapping condition. Go to edit the formula.
- With the option of completing the data in the list, if we want to map an element in each list, remember that we need to know exactly how many elements there are in the list, and indicate in the condition that the index of the list on the right (source) is to be equal to the index of the list on the left (target). So that the corresponding elements in the list on the right will be mapped exactly to the corresponding elements in the list on the left. The system will iterate over both the list on the right and the list on the left and perform the mappings for all the elements in the list.
- Drag a function onto a formula node.
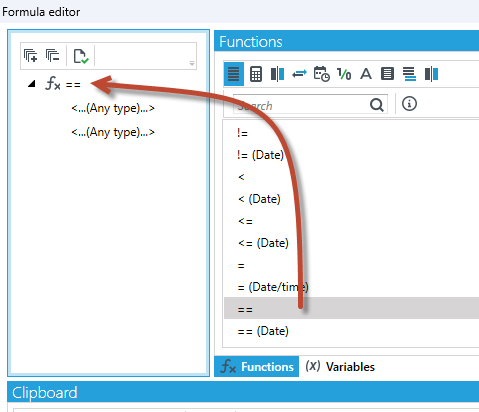
- Next, drag the index of the right-sided list from the Right-sided variables of lists and the index of the left-sided list from the Left-sided variables of lists onto the function arguments.
- If you do not specify any condition for executing the mapping for specific list elements, and you leave the condition unchanged with the default value True and the option Stop the mapping after the first item of the list which the condition is fulfilled for checked, the same value will be assigned to all elements in the list on the left. The system will assign the value from the first element on the right (the source structure) to all elements on the left.
- In the following example, for the client with Id 1 in the source list, we have different loan periods. As a result of executing the mapping defined as in the window above (without the condition that the left-sided and right-sided list indexes are to be equal) and with the option to stop the mapping after the first element checked, the loan period value from the first element of the source list is assigned to each element of the target list.

- On the other hand, if you unchecked the box Stop the mapping after the first item of the list which the condition is fulfilled for, then to all elements on the left side in the target list will be assigned the value from the last element on the right side, that is, from the source list. The system will iterate through the source list until the last element in the list.

For example
Suppose that for client applications, older than 30 days, we want to set their status as Rejected.
- Go to the mappings of the Completing elements of list operation.
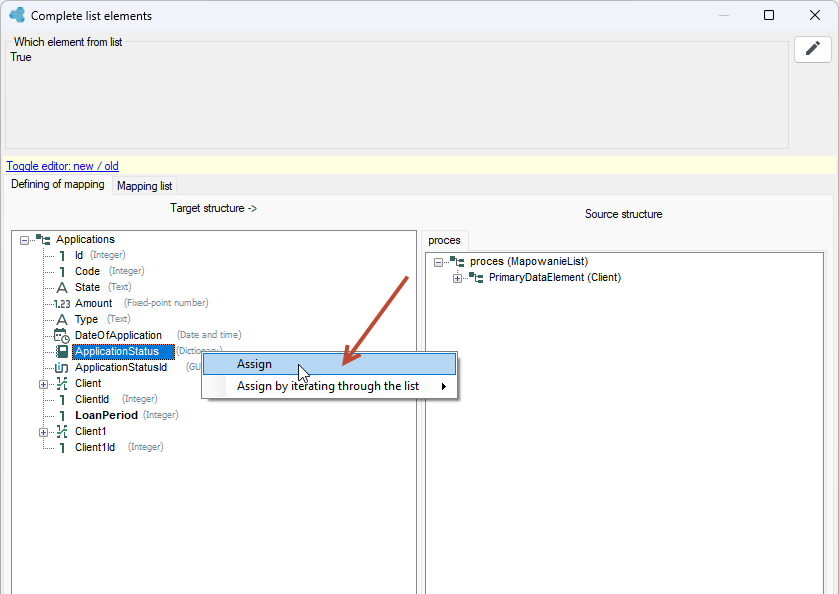
- For a given client PrimaryDataElement(Client), change the status of applications to Rejected. To map the dictionary, click on the ApplicationStatus field on the left and select Assign from the context menu.
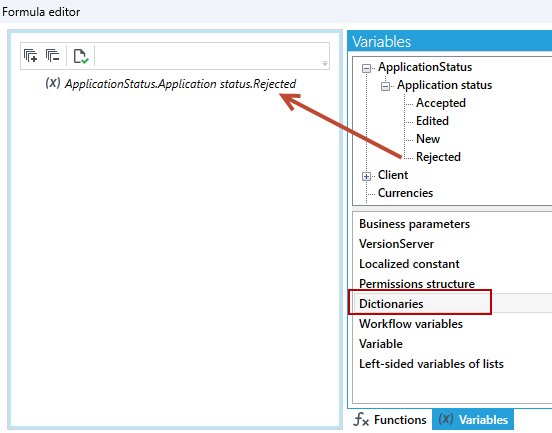
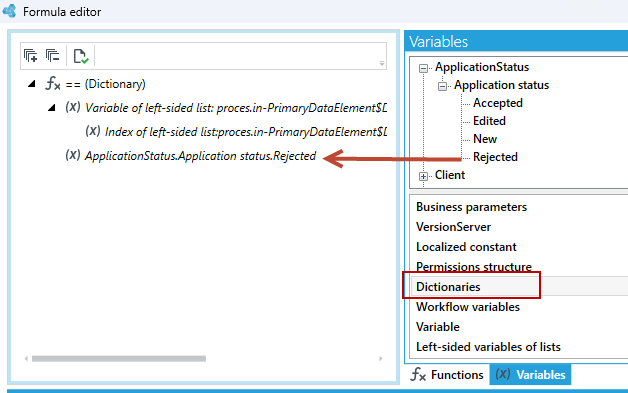
- In the formula window, select a value from the dictionary and drag it onto the formula node.
- If you want to enter a condition whether an item meets the criteria to be mapped and specify for which list items the mapping is to be performed, then go to edit the formula in the Which element from list section.
By default, the formula in the Which element from list section is set to True which means that the defined mappings will be performed for the elements in each list.
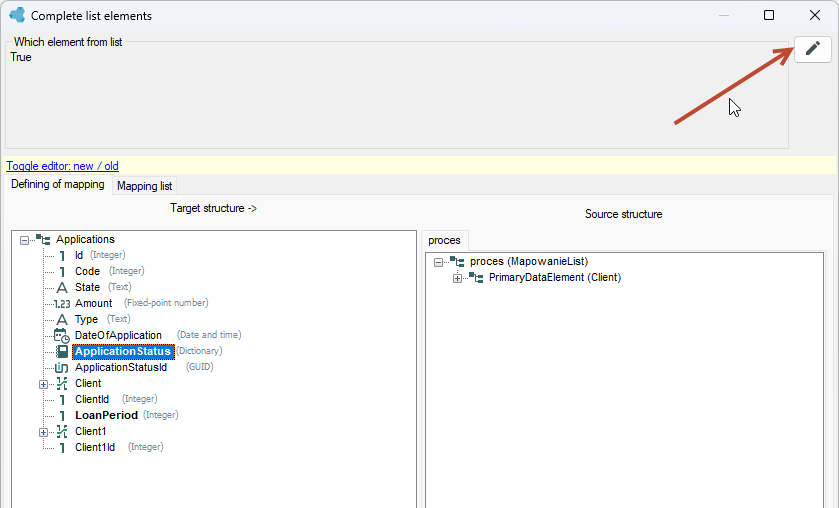
- Suppose we want the mapping defined a step earlier, i.e. changing the status of client applications to Rejected, to be performed only for applications older than 30 days.
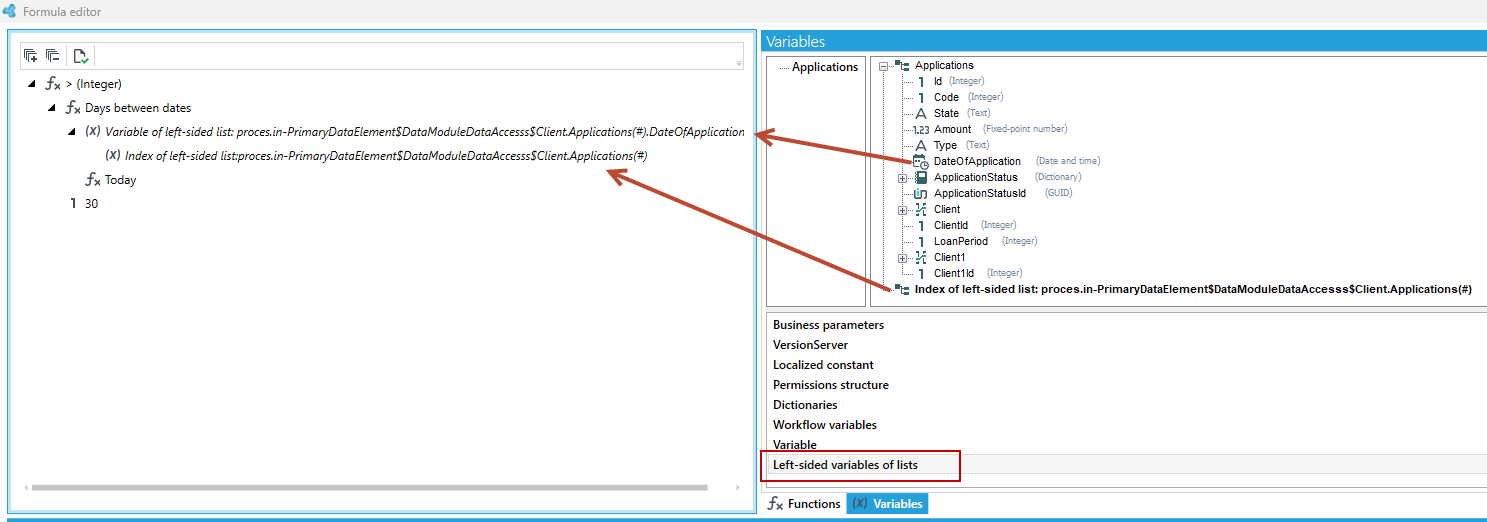
- We will use the function larger
>in the formula editor and then another function as one of the function arguments: Days between dates:
- To the arguments of the function, as the first date, drag the DateOfApplication from the list from the Left-sided variables. Also indicate the index of the left-sided list and drag it to the formula window.
- Select the Today function as the second argument of the function.
- Enter the constant 30 as a statement that the difference in days between the dates is to be greater than 30 days, in which case the whole condition is considered to be fulfilled and will return True.
Deleting elements of the list
- Go to the mappings window in the workflow.
- On the left side, right-click on the list and select Deleting elements of the list from the context menu.
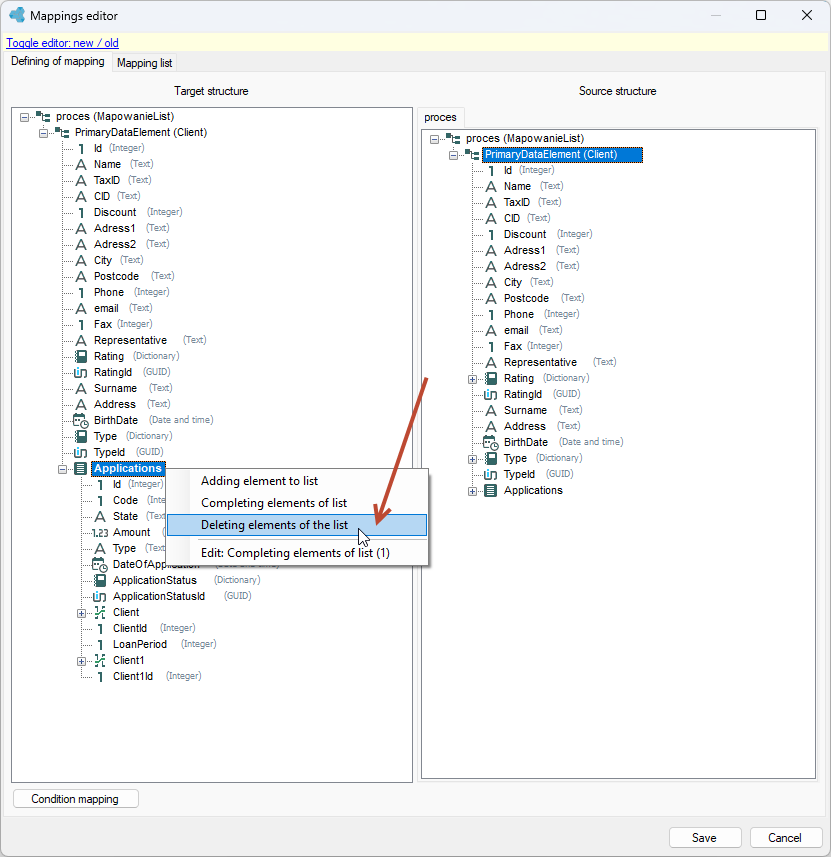
- After selecting an action in the next window you can indicate the condition for performing the action. If you leave True according to the default setting then all items will be deleted.
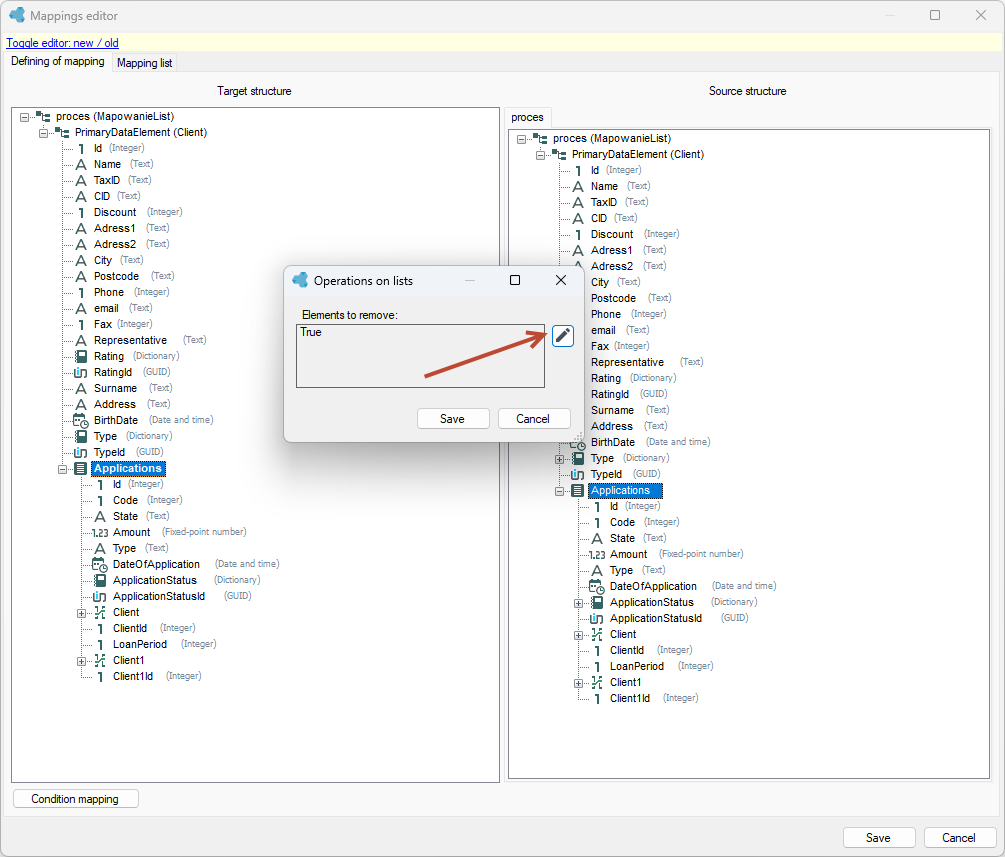
- You can indicate which element in the list should be deleted based on the index. Go on to define the condition in the formula.
- Drag the comparison function onto the formula node.
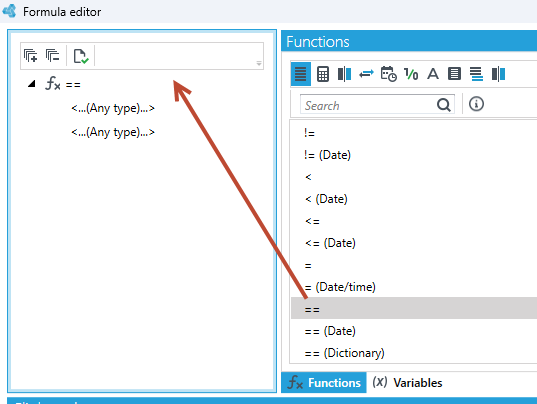
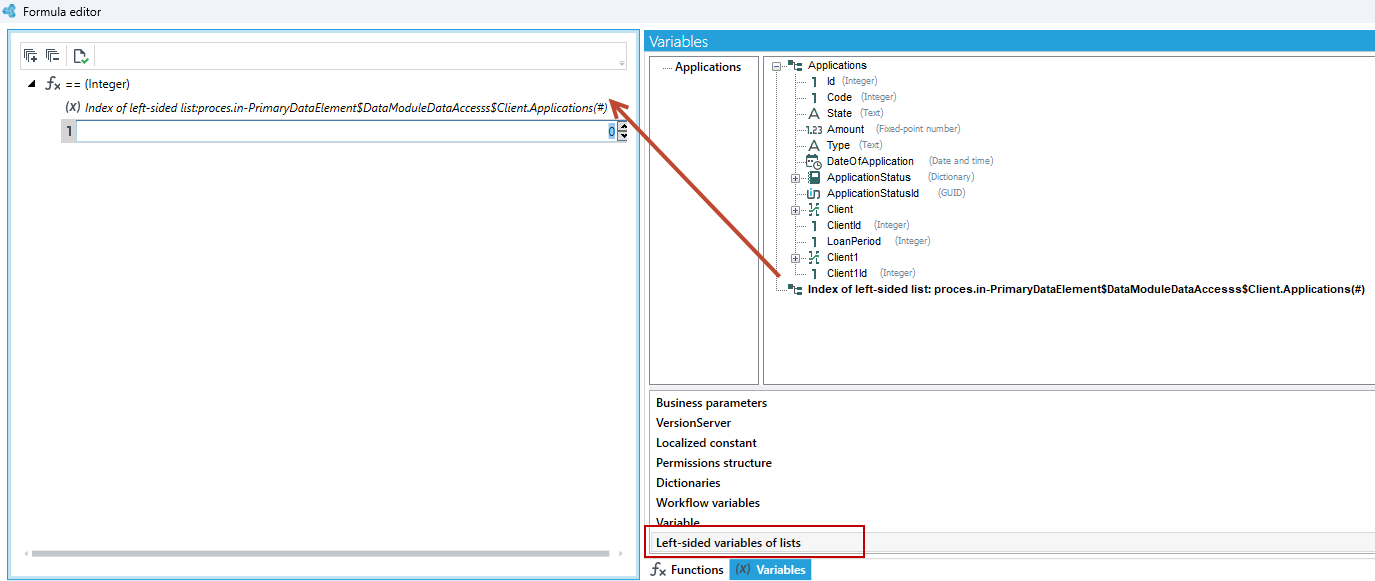
- Next, drag the index of the left-hand list from the Left-sided variables of lists onto the function argument.
- As the second argument, enter which element is to be removed from the list. In the example below if you enter a value of 0 then the first element in the list will be removed for a value of 1 the second element and so on.
For example
The example below describes the case of deleting all client applications that are in the status Rejected.
- Add an operation to remove the list elements.
- Go to the formula to define the condition for performing the operation in the Elements to remove section.
- Drag the comparison function onto the formula node.
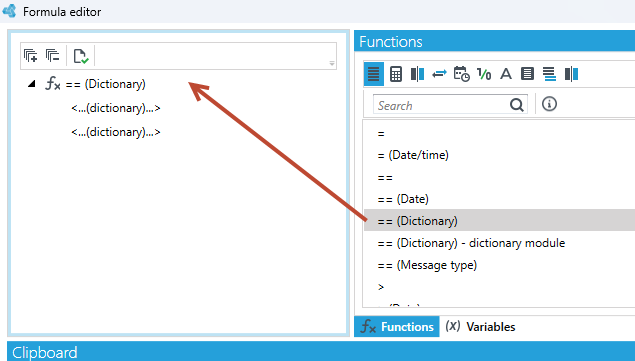
- Drag the ApplicationStatus field and the left list index from Left-sided variables of lists onto the function arguments.
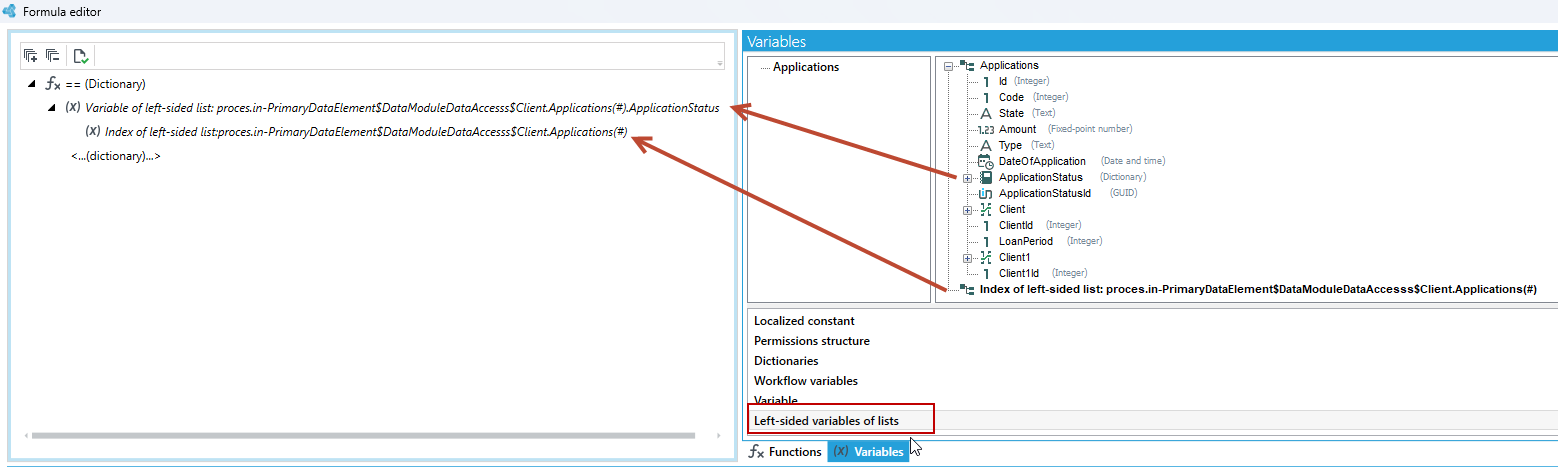
- On the second argument of the function, drag the element from the dictionary to which the application statuses from the list are to be compared.
Tips
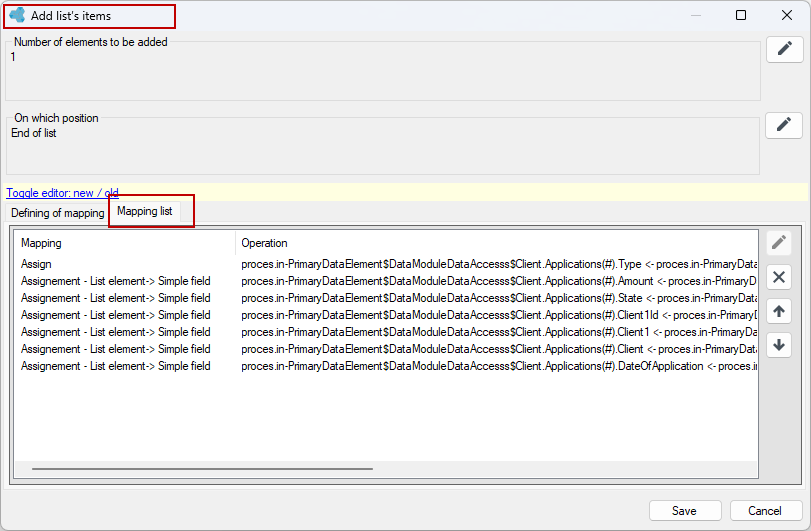
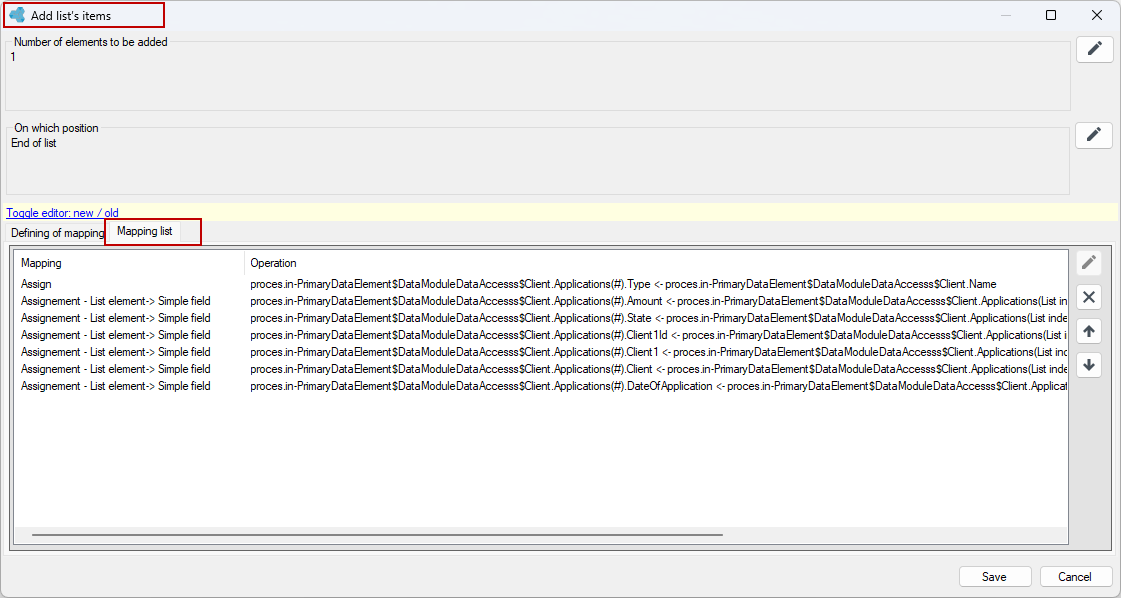
- When you add items to the list, you can immediately fill them with data already on the add action. Make mappings by dragging the data from the right side from the source structure to the left side. All mappings will be available in the details of the add action in the mapping list.
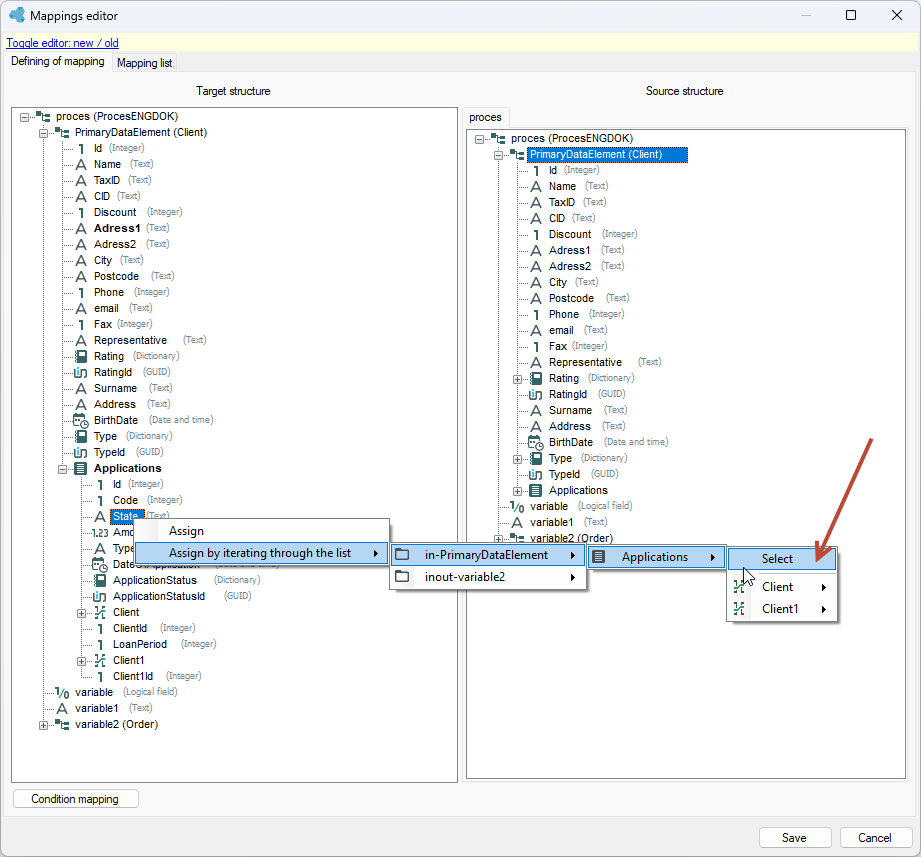
- You can also map data on lists at the level of the main mapping window, without going into the details of the add or complete operation.
- Right-click on a field in the target list on the left and select Assign by iterating through the list... from the menu.
Performing the action here places it on the main list of mappings.
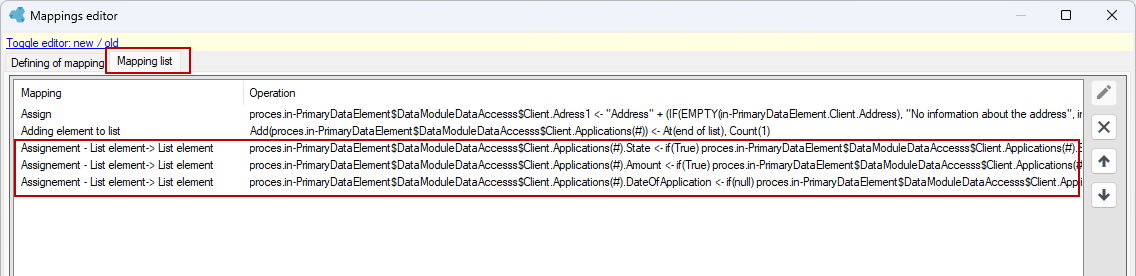
With a large numbers of mappings in the workflow, this may not be clear to the user, so we recommend performing mappings on lists inside the Add or Complete list element action.
Then only the mapping of the Adding element to list type will be visible on the main list of mappings. Only after you go to the mapping details will you be able to view the list of mappings for that operation.