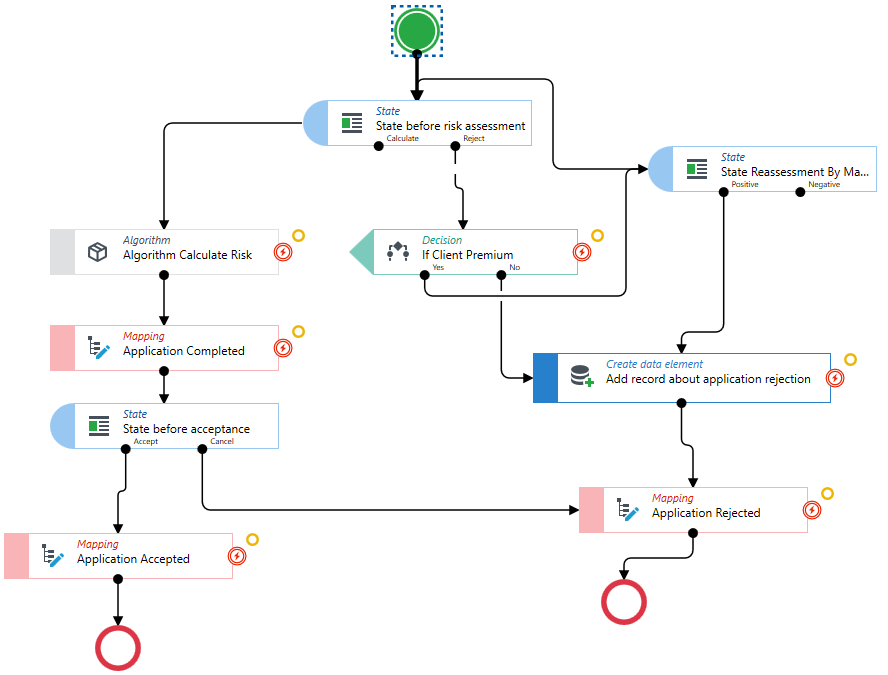
Working environment
The user creates a workflow by means of graphic elements representing activities by dragging them from the Toolbox panel to the workspace, and then connects them together at the input and output ports (represented in the diagram as large black dots - input ports are usually at the top, while output ports at the bottom). Connections between activities can be routed from the top and bottom edges as well as from the sides of elements, which makes for clearer diagrams and reduces the number of crossing lines in complex workflows.
Zoom in and out of the workspace
The workspace can be zoomed in and out with the mouse scroll. The functionality is useful if there are very large and complex workflows. After zooming in or out, you can select AutoFit to fit the workflow view in the center of the workspace.
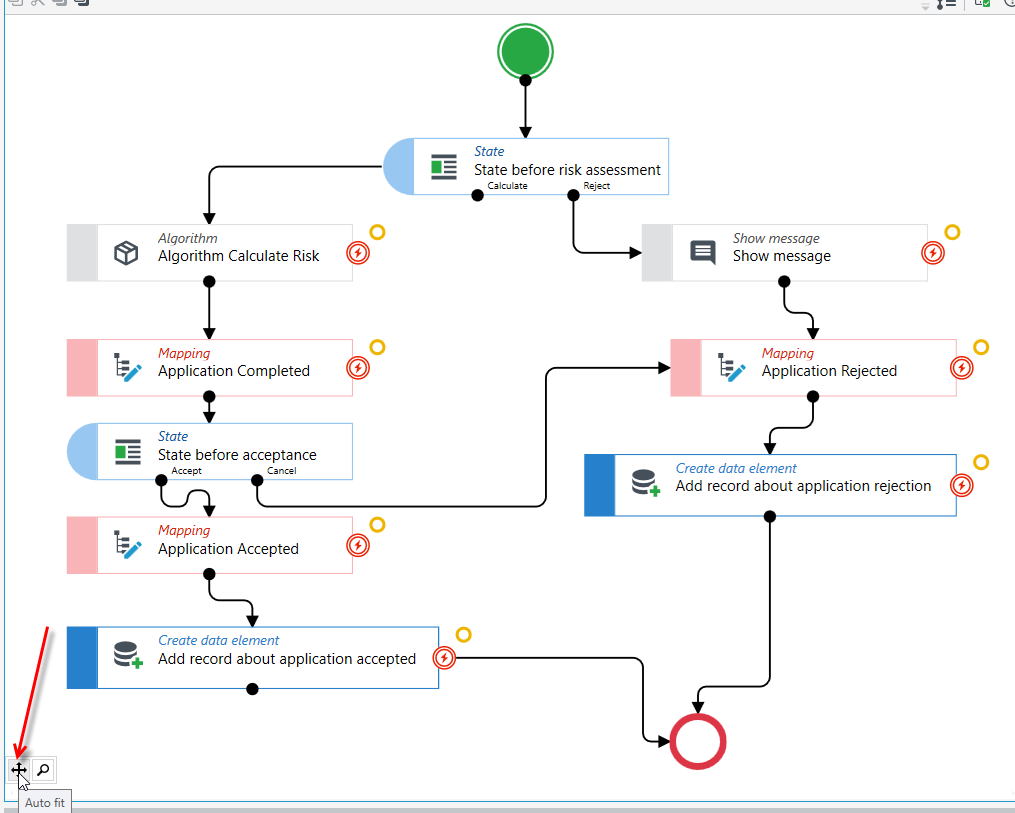
You can also select the magnifying glass icon in the lower left corner of the work screen, then you need to specify the magnification level and the area you want to enlarge.
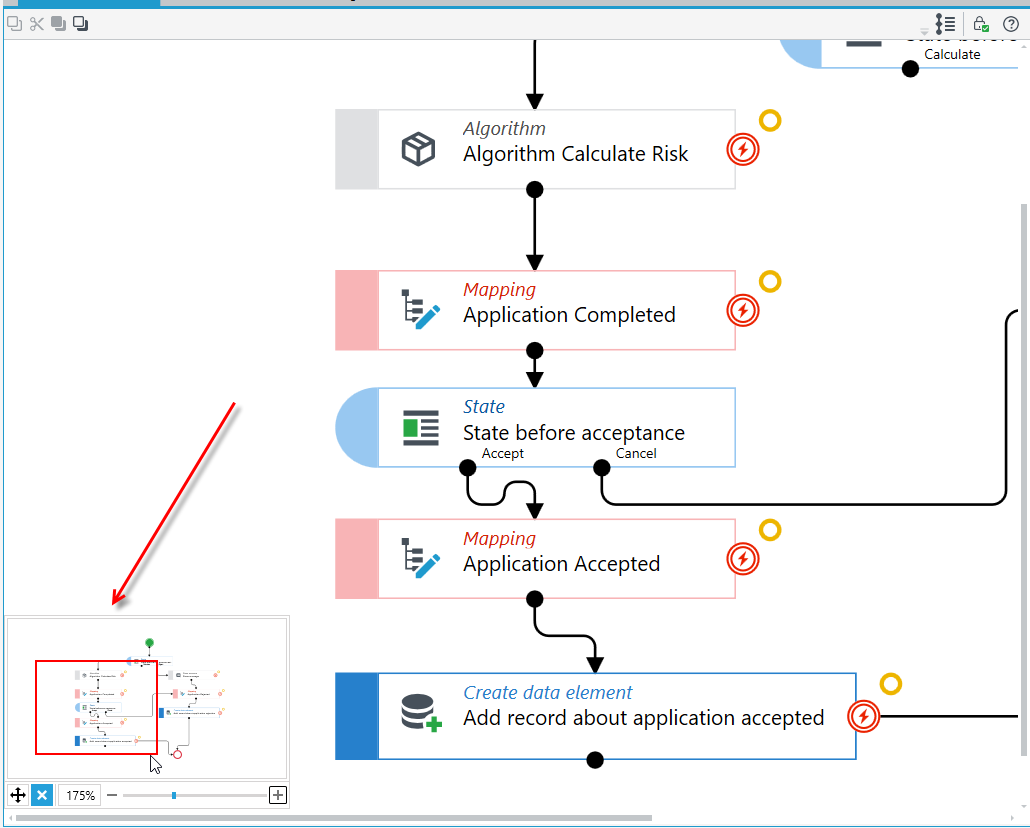
Graphical adjustment of elements
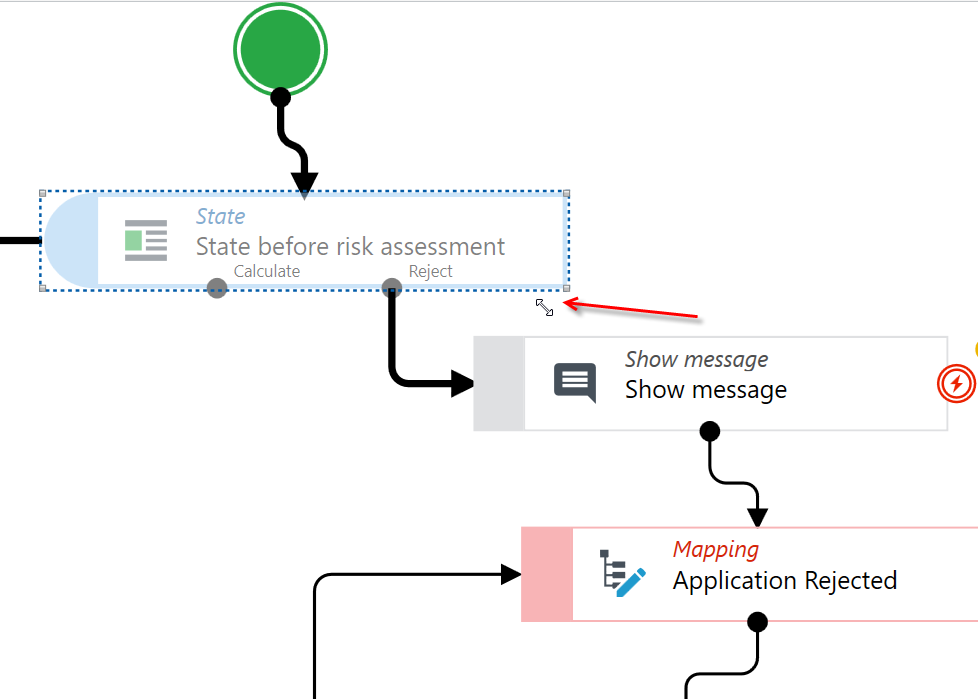
Elements can be arranged freely on the workspace, that is, with larger or smaller spaces between them, moved to the right or left, etc. Also, if the description of an element is too long, then this element can be enlarged.
- Select an activity and hover the mouse over any corner of the element.
- When the double-headed arrow appears, click on the corner and enlarge or reduce the element.
When an element is resized, the position of the connection points is adjusted automatically, so the lines are still routed correctly.
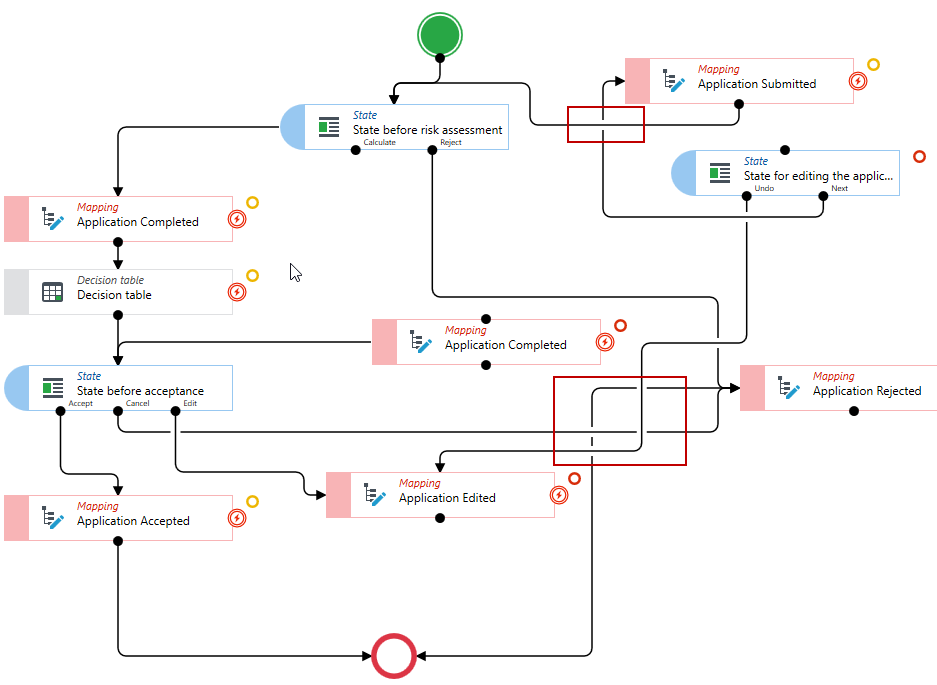
Lines connecting elements are routed at right angles, and for complex workflows bend points are added to make the graphical representation of the workflow clearer. Where lines cross, one of them is drawn with a gap. This makes it easy to tell a crossing from an actual connection and to follow each path.
Inserting and removing activities in the flow
The workflow designer automatically keeps the flow continuous while you modify it:
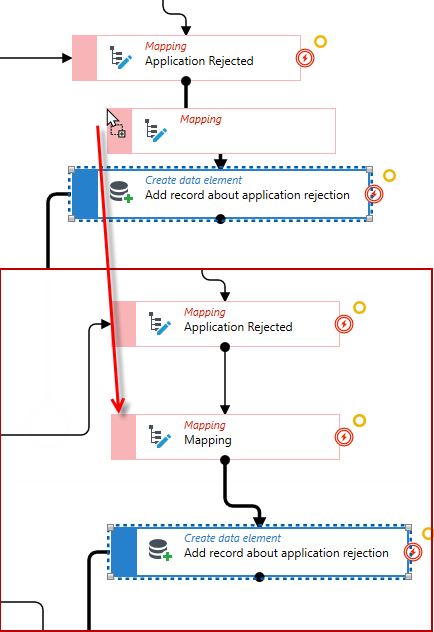
- Inserting an activity into an existing flow – dropping a new activity from the Toolbox panel onto an existing connection automatically inserts it into the workflow. There is no need to manually remove and recreate connections.
- Removing an activity – removing an activity does not break the flow. The designer automatically connects the neighboring elements, keeping the workflow consistent.
Activity output markers
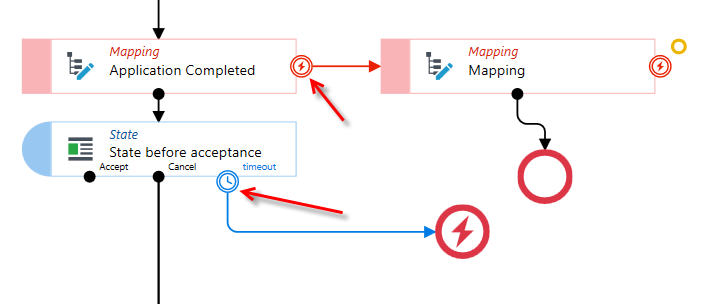
Activity outputs are marked graphically in line with BPMN notation:
- the error output is marked with the BPMN error symbol, which is highlighted on hover,
- the timeout output is marked with a clock icon,
- activities with multiple output types use consistent color coding to make execution paths easier to identify.
Context menu
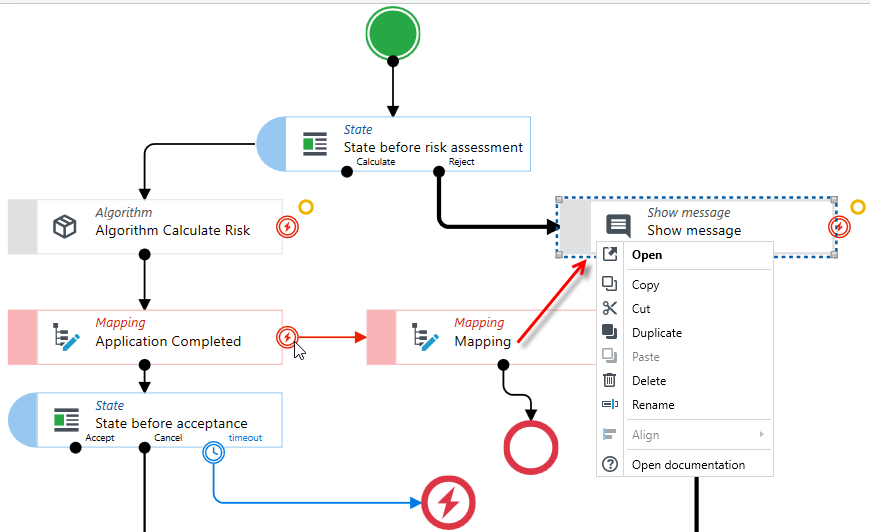
Right-clicking an activity displays a context menu with the commands available for that element. The commands are grouped and marked with icons:
- Open – opens the element attached to the activity or its configuration window (the same as double-clicking the activity, see Double-click on a workflow activity),
- Copy, Cut, Duplicate, Paste – clipboard operations on the selected activities,
- Delete – removes the activity from the diagram; the neighboring elements are connected automatically (see Inserting and removing activities in the flow),
- Rename – lets you edit the activity name,
- Align – a submenu with options for aligning elements on the diagram,
- Open documentation – opens the documentation of the activity.
Commands that are not available in the current context are grayed out.
Double-click on a workflow activity
In most cases, a double-click on a given workflow element moves you to another window that allows configuration or opens a tab in archITekt Studio with the workflow, table, algorithm attached to the activity.
Double-click on an item:
- Mapping - opens the Mapping Editor, where you can define mappings,
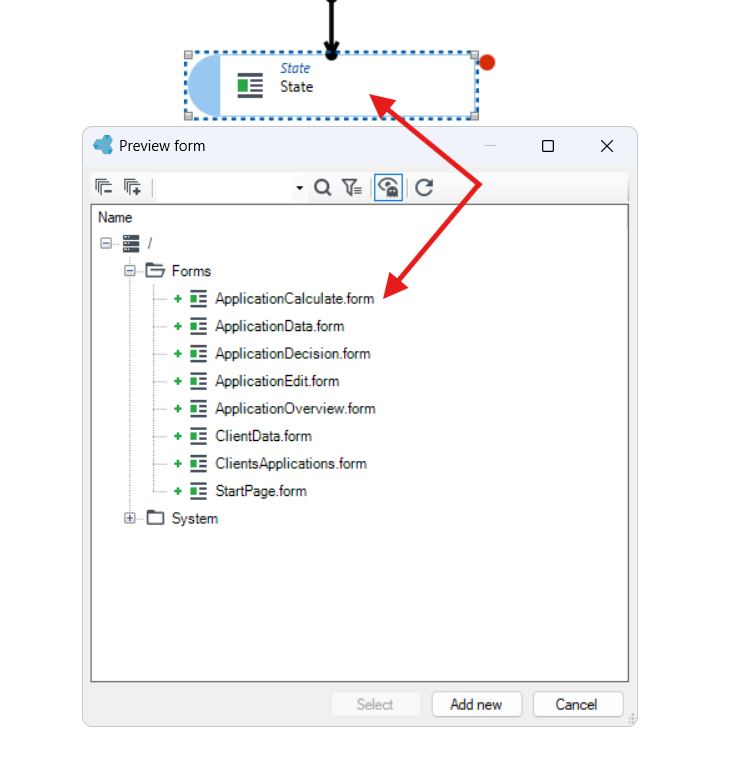
- State - opens a tab in archITekt Studio with the form attached to the activity,
- Decision - opens a port edition window where you can define multiple exits from an activity,
- Synchronous/Asynchronous workflow - opens a tab in archITekt Studio with the workflow attached to the activity,
- Algorithm/Table - opens a tab in archITekt Studio with the algorithm/table attached to the activity.
If no element has been attached to an Algorithm, Table, State or Workflow activity yet, then the Version server window will open after a double-click, with the option of selecting an element of an appropriate type.
Start and end of the workflow
Each workflow must contain exactly one Start element that specifies the starting point. However, the user may define several End elements. This allows for greater transparency of the diagram in the case of a fork of the workflow definition by means of, for example, Decision or State activities. The workflow is executed from the Start step to one of the End steps.